NOTES:
●Be careful not to cover the camera sensor;
●If 5 minutes elapse in the
●When a blank portion is left between recorded scenes on the tape, the time code is interrupted and errors may occur when editing the tape.
Continue recording from where you stop so there
are no gaps by following “Recording from the middle of a tape” (☞ pg. 20).
●
●During recording, sound is not heard from the speaker. If you want to hear the sound, connect optional headphones to the headphones jack. The sound volume at this point is the same as the level it was adjusted during playback.
●To make the indications disappear, press and hold the IND.ON/OFF button for more than approx. 1 second. However, it is impossible to remove the
tape running indicator “ 444” and warning indications and so on (☞ pg. 79).
●When the battery remaining power indicator
appears as ![]() , that means the battery power is close to nil. When the battery power is exhausted, power turns off automatically.
, that means the battery power is close to nil. When the battery power is exhausted, power turns off automatically.
![]()
![]()
![]()
![]()
![]()
![]()
![]()
![]()
![]()
![]()
![]()
![]()
![]()
![]() EN
EN![]() 19
19![]()
![]()
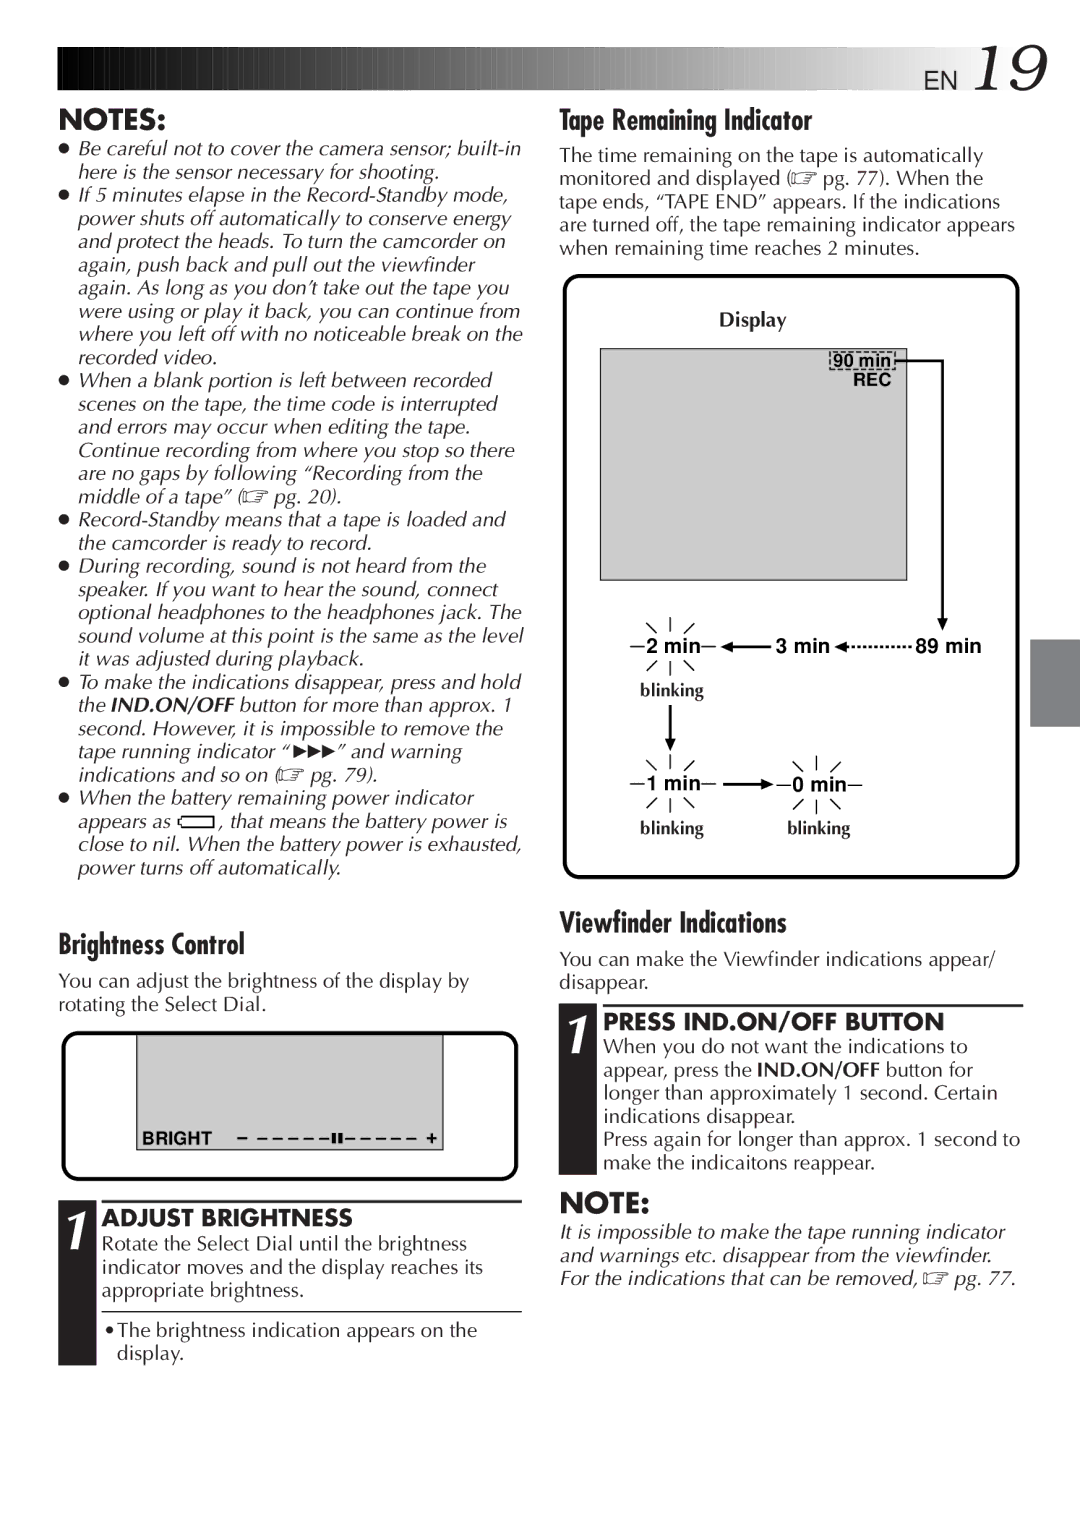
Tape Remaining Indicator
The time remaining on the tape is automatically monitored and displayed (☞ pg. 77). When the tape ends, “TAPE END” appears. If the indications are turned off, the tape remaining indicator appears when remaining time reaches 2 minutes.
Display
90 min ![]()
REC
2 min ![]() 3 min
3 min![]() 89 min
89 min
blinking
1 min |
| 0 min |
|
blinking blinking
Brightness Control
You can adjust the brightness of the display by rotating the Select Dial.
BRIGHT – – – –
1 ADJUST BRIGHTNESS
Rotate the Select Dial until the brightness indicator moves and the display reaches its appropriate brightness.
•The brightness indication appears on the display.
Viewfinder Indications
You can make the Viewfinder indications appear/ disappear.
1 PRESS IND.ON/OFF BUTTON When you do not want the indications to appear, press the IND.ON/OFF button for longer than approximately 1 second. Certain indications disappear.
Press again for longer than approx. 1 second to make the indicaitons reappear.
NOTE:
It is impossible to make the tape running indicator and warnings etc. disappear from the viewfinder. For the indications that can be removed, ☞ pg. 77.
