English

Using the Cassette Deck (Recording)


EDIT


COMPACT COMPONENT SYSTEM


PROGRAM


/ RANDOM


DISC

DISC


COMPACT


DIGITAL AUDIO


REPEAT


DISC


DISC


DISC

3

DISC

EDIT

DISC


TRIPLE

TRAY

PLAY & EXCHANGE SYSTEM


MULTI CONTROL

SETCANCEL

SET

SOUND MODE

MULTI CONTROL

TIMER/CLOCK

MX-D622T

AUTO POWER OFF

VO ME


LU


CD

STANDBY

FM/AM


DECK CONTROL

COMPUPOWER

TAPE

PLAY

CONTROL


PHONES

A B

REVERSE DOLBY B

DUBBING REC CD REC START

DECK A/B MODE NR


VCR

START/STOP

S.A. BASS


DEMO

DUBBING

CD REC START

REC START/STOP

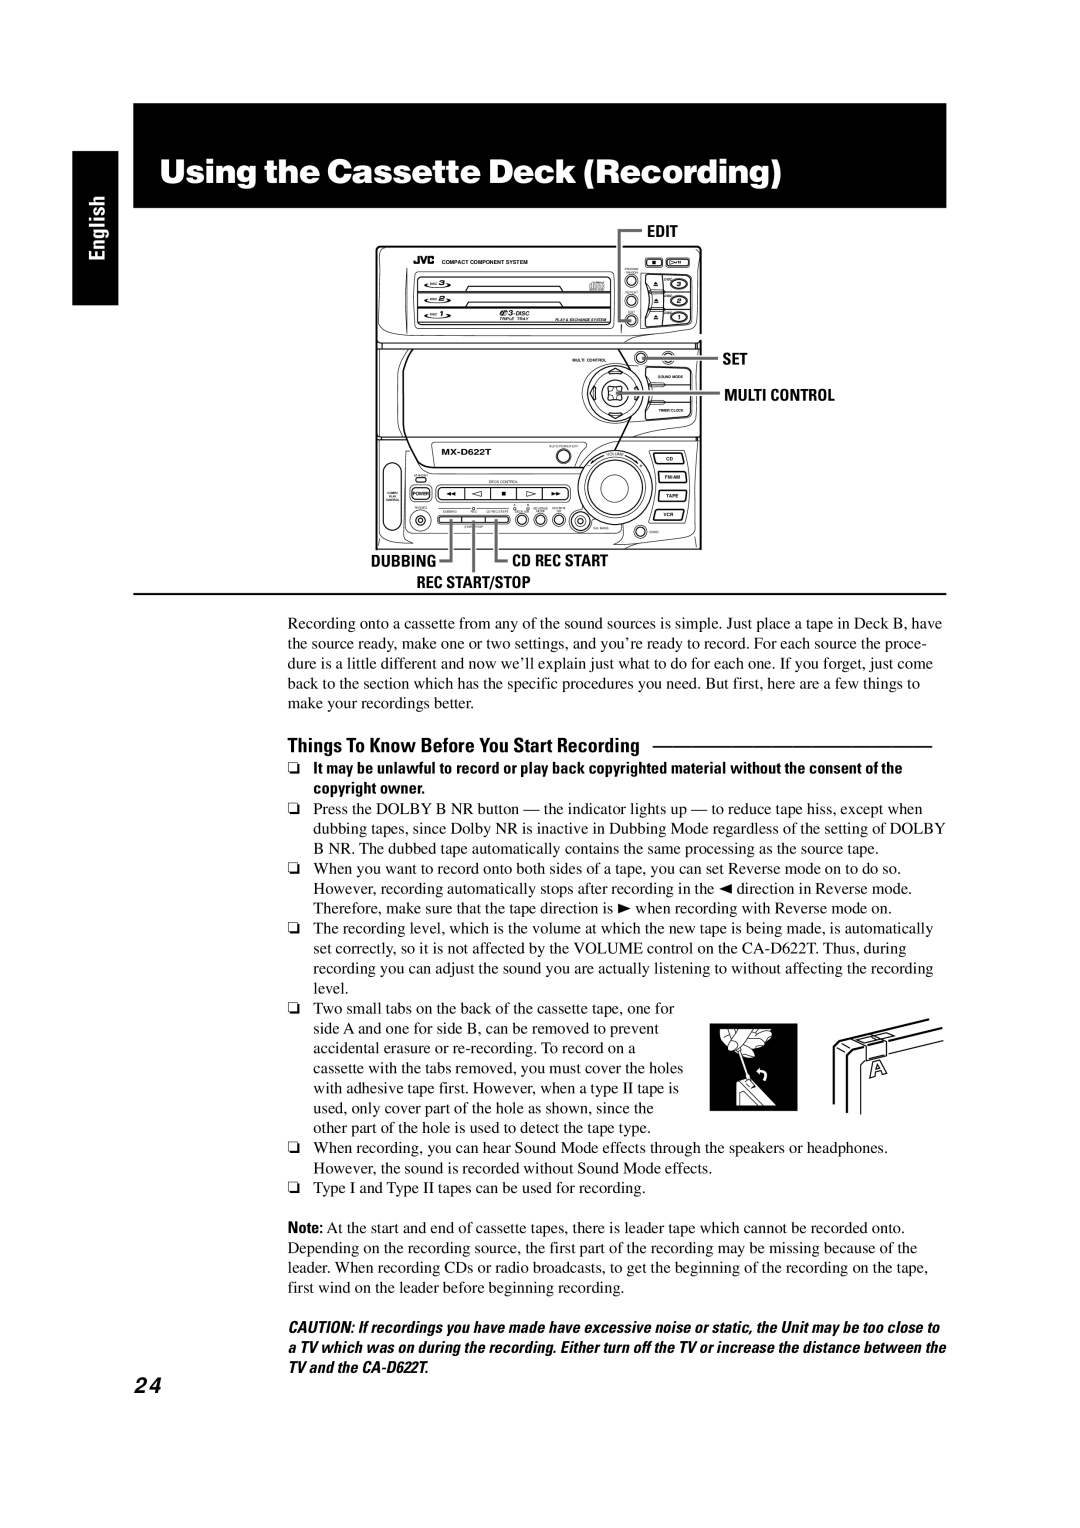
Recording onto a cassette from any of the sound sources is simple. Just place a tape in Deck B, have the source ready, make one or two settings, and you’re ready to record. For each source the proce- dure is a little different and now we’ll explain just what to do for each one. If you forget, just come back to the section which has the specific procedures you need. But first, here are a few things to make your recordings better.

Things To Know Before You Start Recording ——————————————

It may be unlawful to record or play back copyrighted material without the consent of the copyright owner.

Press the DOLBY B NR button — the indicator lights up — to reduce tape hiss, except when dubbing tapes, since Dolby NR is inactive in Dubbing Mode regardless of the setting of DOLBY B NR. The dubbed tape automatically contains the same processing as the source tape.

When you want to record onto both sides of a tape, you can set Reverse mode on to do so. However, recording automatically stops after recording in the 2direction in Reverse mode. Therefore, make sure that the tape direction is 3when recording with Reverse mode on.

The recording level, which is the volume at which the new tape is being made, is automatically set correctly, so it is not affected by the VOLUME control on the CA-D622T. Thus, during recording you can adjust the sound you are actually listening to without affecting the recording level.

Two small tabs on the back of the cassette tape, one for

side A and one for side B, can be removed to prevent accidental erasure or re-recording. To record on a

cassette with the tabs removed, you must cover the holes with adhesive tape first. However, when a type II tape is

used, only cover part of the hole as shown, since the other part of the hole is used to detect the tape type.

When recording, you can hear Sound Mode effects through the speakers or headphones. However, the sound is recorded without Sound Mode effects.

Type I and Type II tapes can be used for recording.

Note: At the start and end of cassette tapes, there is leader tape which cannot be recorded onto. Depending on the recording source, the first part of the recording may be missing because of the leader. When recording CDs or radio broadcasts, to get the beginning of the recording on the tape, first wind on the leader before beginning recording.

CAUTION: If recordings you have made have excessive noise or static, the Unit may be too close to a TV which was on during the recording. Either turn off the TV or increase the distance between the TV and the CA-D622T.

24

Page 26
Image 26
JVC GVT0001-002A manual Using the Cassette Deck Recording, Things To Know Before You Start Recording

GVT0001-002A specifications

The JVC GVT0001-002A is an innovative ultra-high-definition projector that delivers exceptional image quality and offers a range of features tailored for both home entertainment enthusiasts and professional applications. This projector is designed with a keen focus on delivering a truly immersive viewing experience, showcasing JVC's advanced technology and engineering excellence.

One of the standout features of the GVT0001-002A is its use of 4K D-ILA (Direct-Drive Image Light Amplifier) technology. This unique technology combines high brightness with remarkable contrast and color accuracy, resulting in stunning visuals that capture every detail of the content being displayed. The projector supports 4K resolution up to 3840 x 2160 pixels, providing a crisp and clear image that enhances the viewing experience for movies, sports, and gaming alike.

The GVT0001-002A incorporates a wide color gamut, allowing users to enjoy vibrant and lifelike colors that are true to the original source material. With HDR (High Dynamic Range) support, users can experience enhanced contrast and brightness, making shadows darker and highlights brighter, adding depth to the images presented. This feature is particularly beneficial for those who appreciate the cinematic experience in their own homes.

The projector also boasts a versatile connectivity option, including HDMI inputs, which support the latest HDMI standards and enable seamless integration with other devices such as Blu-ray players, gaming consoles, and streaming devices. Additionally, the GVT0001-002A is equipped with a powerful internal 10-watt speaker, providing adequate sound output without the need for external speakers in smaller rooms.

Another characteristic of this projector is its intelligent features, including an automated lens cover and lens shift capabilities. These allow for flexible installation and easy operation while ensuring the longevity of the device.

In terms of design, the GVT0001-002A embodies a sleek and modern aesthetic, making it an attractive addition to any room. The compact form factor combines functionality with style, ensuring it seamlessly integrates into various home or office environments.

Overall, the JVC GVT0001-002A is an impressive ultra-high-definition projector that combines cutting-edge technologies with user-friendly features, making it a compelling choice for anyone seeking high-performance projection solutions. Its remarkable image quality, versatility, and advanced functionalities set it apart, providing a premium viewing experience that is sure to captivate audiences.