TIMER
6
q
7 | SP/LP |
|
|
| 2 | DAILY |
|
| 1 | 2 |
| |
| 3 |
| ||
NUMBER | 4 | 5 | 6 |
|
|
|
| WEEKLY | |
| 7 | 8 | 9 | |
| TIMER 9 | |||
CANCEL |
| 0 |
|
TV PROG. 6
START+/–
|
|
|
|
|
|
|
|
|
|
|
| 29 |
|
|
|
|
|
|
|
|
|
|
|
|
|
| |
|
|
|
|
|
|
|
| ||||||
|
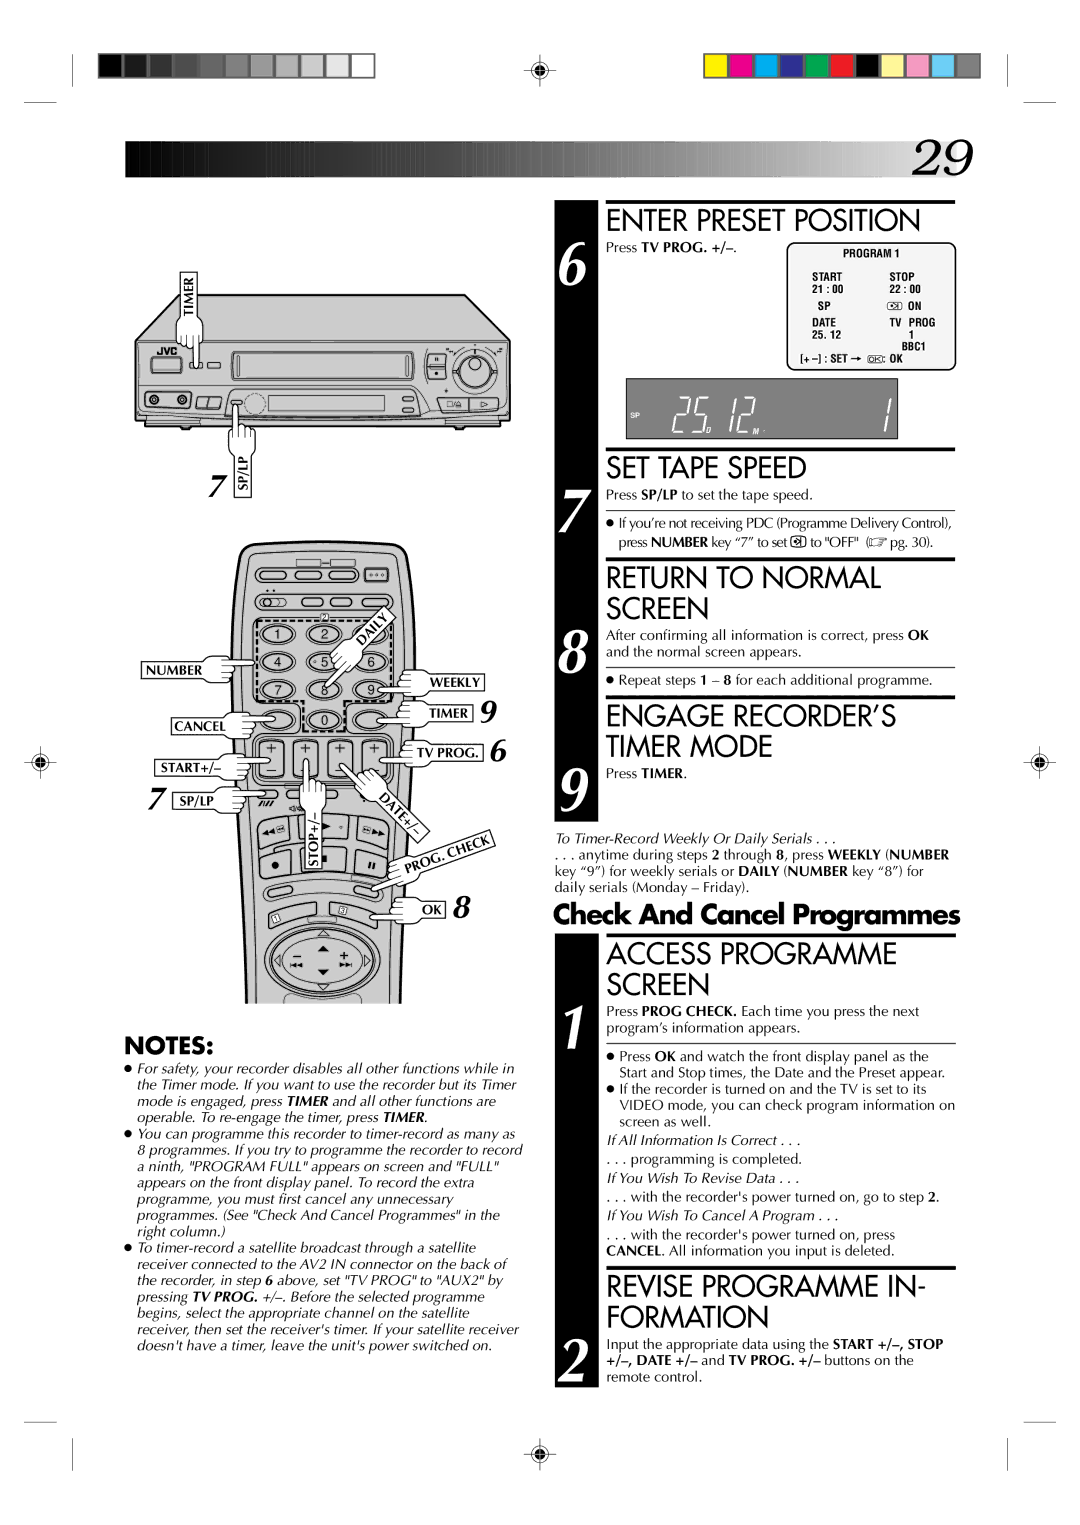
| 6 | ENTER PRESET POSITION |
| |||||||||
|
| Press TV PROG. |
| PROGRAM 1 | |||||||||
|
|
|
|
|
|
|
| ||||||
|
|
|
|
|
|
| START |
| STOP | ||||
|
|
|
|
|
|
| 21 : 00 | 22 : 00 |
|
| |||
|
|
|
|
|
|
|
| SP |
|
| ON | ||
|
|
|
|
|
|
|
|
|
| ||||
|
|
|
|
|
|
|
|
|
| ||||
|
|
|
|
|
|
|
| DATE |
| TV PROG | |||
|
|
|
|
|
|
|
| 25. 12 | 1 |
|
| ||
|
|
|
|
|
| [+ |
|
| BBC1 | ||||
|
|
|
|
|
|
| : OK | ||||||
|
|
|
|
|
|
|
|
|
| ||||
|
|
| SP |
|
|
|
|
|
| ||||
|
|
|
| DM |
|
|
|
|
|
| |||
|
|
|
|
|
|
|
|
|
|
|
|
|
|
|
| 7 | SET TAPE SPEED |
|
|
|
|
|
| ||||
|
| Press SP/LP to set the tape speed. |
|
|
|
|
| ||||||
|
|
|
|
|
|
| |||||||
|
| ● If you’re not receiving PDC (Programme Delivery Control), | |||||||||||
|
| press NUMBER key “7” to set |
| to "OFF" | (☞ pg. 30). | ||||||||
|
|
| |||||||||||
|
|
| |||||||||||
|
|
|
|
| |||||||||
|
|
| RETURN TO NORMAL |
| |||||||||
|
| 8 | SCREEN |
|
|
|
|
|
| ||||
|
| After confirming all information is correct, press OK | |||||||||||
|
| and the normal screen appears. |
|
|
|
|
|
| |||||
|
|
|
|
| |||||||||
|
| ● Repeat steps 1 – 8 for each additional programme. | |||||||||||
|
|
|
|
| |||||||||
|
|
| ENGAGE RECORDER’S |
| |||||||||
|
|
| TIMER MODE |
|
|
|
|
|
| ||||
|
|
| Press TIMER. |
|
|
|
|
|
| ||||
7 SP/LP
1
![]()
3

 DATE+/
–
.CHECK ![]() PROG
PROG
OK 8
9 |
To Timer-Record Weekly Or Daily Serials . . .
. . . anytime during steps 2 through 8, press WEEKLY (NUMBER key “9”) for weekly serials or DAILY (NUMBER key “8”) for daily serials (Monday – Friday).
Check And Cancel Programmes
ACCESS PROGRAMME
SCREEN
1 Press PROG CHECK. Each time you press the next program’s information appears.
NOTES:
●For safety, your recorder disables all other functions while in the Timer mode. If you want to use the recorder but its Timer mode is engaged, press TIMER and all other functions are operable. To
●You can programme this recorder to
●To
●Press OK and watch the front display panel as the Start and Stop times, the Date and the Preset appear.
●If the recorder is turned on and the TV is set to its VIDEO mode, you can check program information on screen as well.
| If All Information Is Correct . . . |
| . . . programming is completed. |
| If You Wish To Revise Data . . . |
| . . . with the recorder's power turned on, go to step 2. |
| If You Wish To Cancel A Program . . . |
. | . . . with the recorder's power turned on, press |
| CANCEL. All information you input is deleted. |
REVISE PROGRAMME IN- FORMATION
2 Input the appropriate data using the START