TV System
B/G
D/K
I
AUTO CH SET
PLEASE WAIT

Initial Settings

Video Channel Set

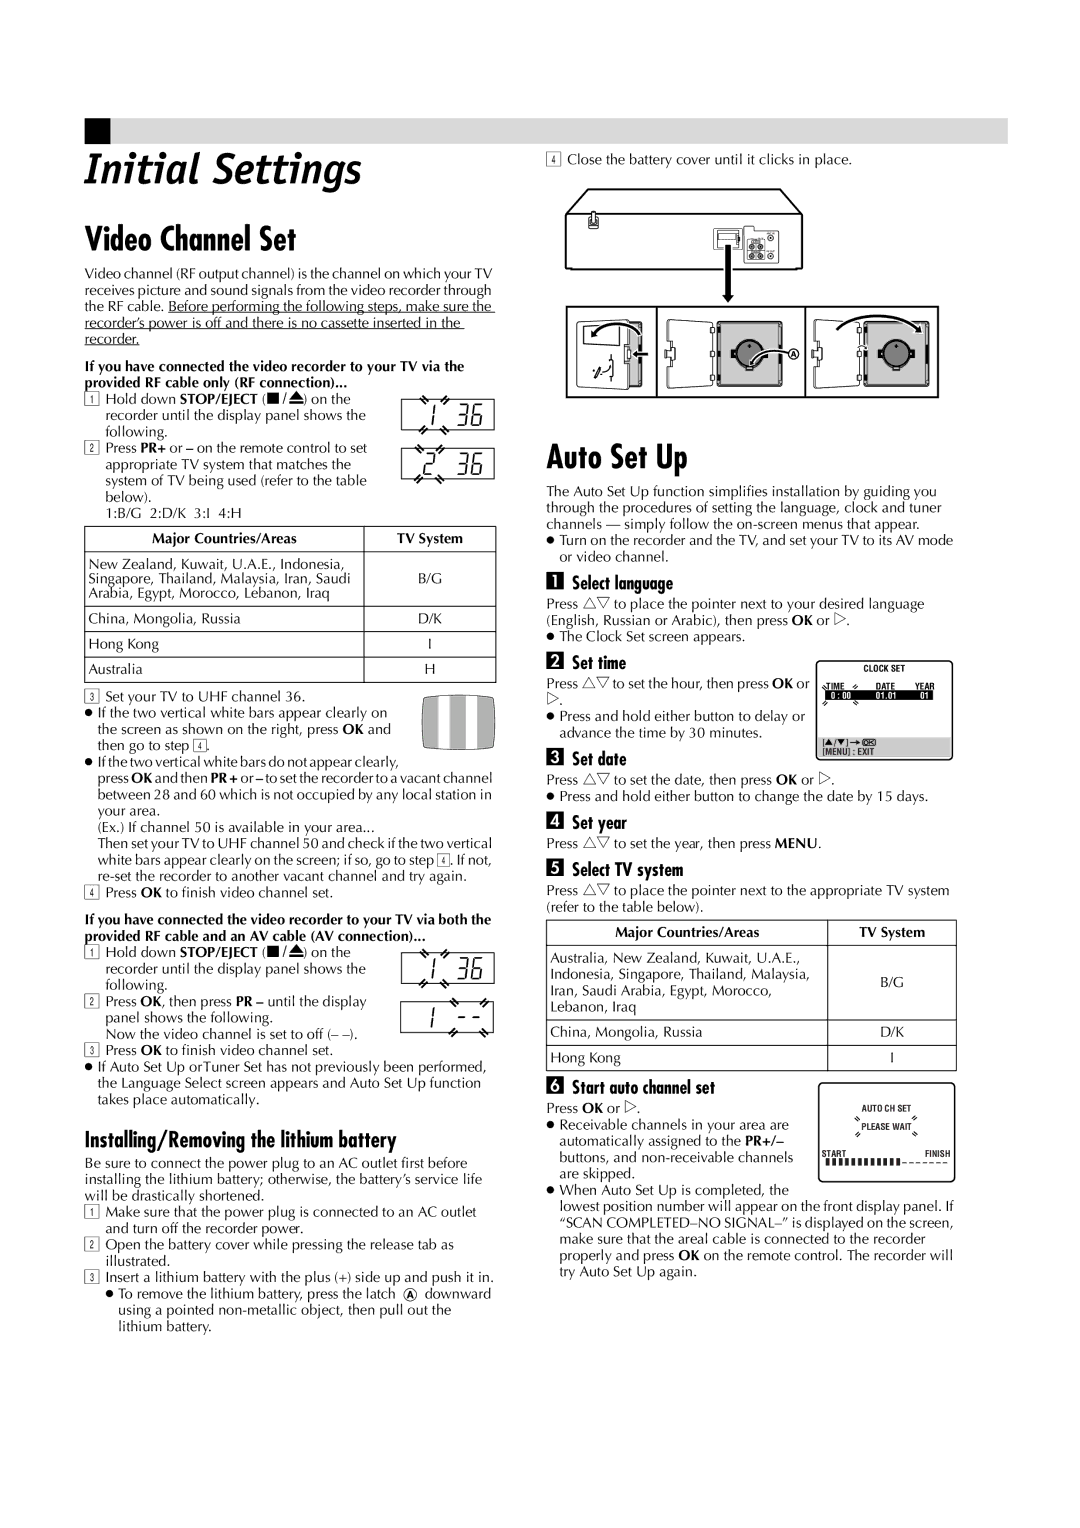
Video channel (RF output channel) is the channel on which your TV receives picture and sound signals from the video recorder through the RF cable. Before performing the following steps, make sure the recorder’s power is off and there is no cassette inserted in the recorder.

If you have connected the video recorder to your TV via the

provided RF cable only (RF connection)...

AHold down STOP/EJECT (0) on the

recorder until the display panel shows the following.

BPress PR+ or on the remote control to set

appropriate TV system that matches the system of TV being used (refer to the table below).

1:B/G 2:D/K 3:I 4:H

Major Countries/Areas

TV System


New Zealand, Kuwait, U.A.E., Indonesia,


Singapore, Thailand, Malaysia, Iran, Saudi

B/G

Arabia, Egypt, Morocco, Lebanon, Iraq


China, Mongolia, Russia

D/K


Hong Kong

I


Australia

H


CSet your TV to UHF channel 36.

If the two vertical white bars appear clearly on the screen as shown on the right, press OK and then go to step D.

If the two vertical white bars do not appear clearly,

press OK and then PR + or to set the recorder to a vacant channel between 28 and 60 which is not occupied by any local station in your area.

(Ex.) If channel 50 is available in your area...

Then set your TV to UHF channel 50 and check if the two vertical white bars appear clearly on the screen; if so, go to step D. If not, re-set the recorder to another vacant channel and try again.

DPress OK to finish video channel set.

If you have connected the video recorder to your TV via both the

provided RF cable and an AV cable (AV connection)...

AHold down STOP/EJECT (0) on the

recorder until the display panel shows the following.

BPress OK, then press PR – until the display

panel shows the following.

Now the video channel is set to off (– –).

CPress OK to finish video channel set.

If Auto Set Up orTuner Set has not previously been performed, the Language Select screen appears and Auto Set Up function takes place automatically.

Installing/Removing the lithium battery

Be sure to connect the power plug to an AC outlet first before installing the lithium battery; otherwise, the battery’s service life will be drastically shortened.

AMake sure that the power plug is connected to an AC outlet and turn off the recorder power.

BOpen the battery cover while pressing the release tab as illustrated.

CInsert a lithium battery with the plus (+) side up and push it in.

To remove the lithium battery, press the latch downward using a pointed non-metallic object, then pull out the lithium battery.

DClose the battery cover until it clicks in place.

Auto Set Up

The Auto Set Up function simplifies installation by guiding you through the procedures of setting the language, clock and tuner channels — simply follow the on-screen menus that appear.

Turn on the recorder and the TV, and set your TV to its AV mode or video channel.

ASelect language

Press rtto place the pointer next to your desired language (English, Russian or Arabic), then press OK or e.

The Clock Set screen appears.

B Set time


CLOCK SET


Press rtto set the hour, then press OK or TIME

DATE

YEAR

e.

0 : 00

01.01

01


Press and hold either button to delay or advance the time by 30 minutes.


[ / ]

C Set date

[MENU] : EXIT


Press rtto set the date, then press OK or e.

Press and hold either button to change the date by 15 days.

DSet year

Press rtto set the year, then press MENU.

ESelect TV system

Press rtto place the pointer next to the appropriate TV system (refer to the table below).

Major Countries/Areas

Australia, New Zealand, Kuwait, U.A.E.,

Indonesia, Singapore, Thailand, Malaysia,

Iran, Saudi Arabia, Egypt, Morocco,

Lebanon, Iraq

China, Mongolia, Russia

Hong Kong

FStart auto channel set

Press OK or e.

Receivable channels in your area are automatically assigned to the PR+/–

buttons, and non-receivable channels STARTFINISH

■ ■ ■ ■ ■ ■ ■ ■ ■ ■ ■ ■ – – – – – – –

are skipped.

When Auto Set Up is completed, the

lowest position number will appear on the front display panel. If “SCAN COMPLETED–NO SIGNAL–” is displayed on the screen, make sure that the areal cable is connected to the recorder properly and press OK on the remote control. The recorder will try Auto Set Up again.

Page 4
Image 4
JVC HR-J491MS, LPT0684-001A manual Initial Settings, Video Channel Set, Auto Set Up, Installing/Removing the lithium battery

LPT0684-001A, HR-J491MS specifications

The JVC HR-J491MS, identified by the model number LPT0684-001A, is a VCR that encapsulates the essence of vintage video technology, showcasing the brand's dedication to quality and user-friendly design. Released during the height of the VHS format's popularity, this model is often recognized for its robust performance and compatibility features that cater to a variety of user needs.

One of the standout features of the HR-J491MS is its excellent tape handling capabilities. The model is equipped with JVC's proprietary Super VHS technology, which enhances video playback quality. Super VHS allows for higher resolution recordings compared to standard VHS, delivering sharper images and more vivid colors. This is particularly appealing for users looking to archive home videos or watch classic films with improved clarity.

Another important characteristic of the HR-J491MS is its built-in timer recording feature. This allows users to schedule recordings well in advance, ensuring that they never miss their favorite programs. The intuitive interface makes setting up recordings straightforward, with options to specify date, time, and duration easily.

The design of the HR-J491MS supports a variety of media formats, allowing users to play both standard VHS tapes and Super VHS tapes. This versatility means that it can serve as a reliable choice for those with a substantial collection of video media from different eras. Its compatibility with various tape formats ensures that it remains functional for a broad user base.

The VCR also integrates noise reduction technologies that help minimize video and audio artifacts during playback. This feature enhances the overall viewing experience, particularly for older or more worn tapes, ensuring that users enjoy a cleaner, more enjoyable playback.

Moreover, the JVC HR-J491MS is equipped with multiple connectivity options, including composite and RF outputs. This makes it easy to connect to a range of televisions and audio systems, allowing users to enjoy their videos on different setups without hassle.

In summary, the JVC HR-J491MS, LPT0684-001A, is a remarkable piece of vintage technology that balances functionality and quality. With features like Super VHS compatibility, timer recording, and noise reduction, it stands out as an excellent choice for both collectors and casual users looking to relive their video memories.