24![]()
![]()
![]() EN
EN![]()
![]()
![]()
![]()
![]()
![]()
![]()
![]()
![]()
![]()
![]()
![]()
![]()
![]()
![]()
![]()
![]()
![]()
![]()
![]()
![]()
![]()
![]()
![]()
![]()
![]()
![]()
![]()
![]()
![]()
![]()
![]()
![]()
![]()
![]()
![]()
![]()
![]()
![]()
![]()
![]()
![]()
![]()
![]()
![]()
![]()
![]()
![]()
![]()
![]()
![]()
![]()
![]()
![]()
![]()


 EDITING


Edit To Or
From Another
Video
Recorder
1 2 3
4 5 6
7 8 9
0 | 4 |
NUMBER "0" ![]()
2
TV PROG
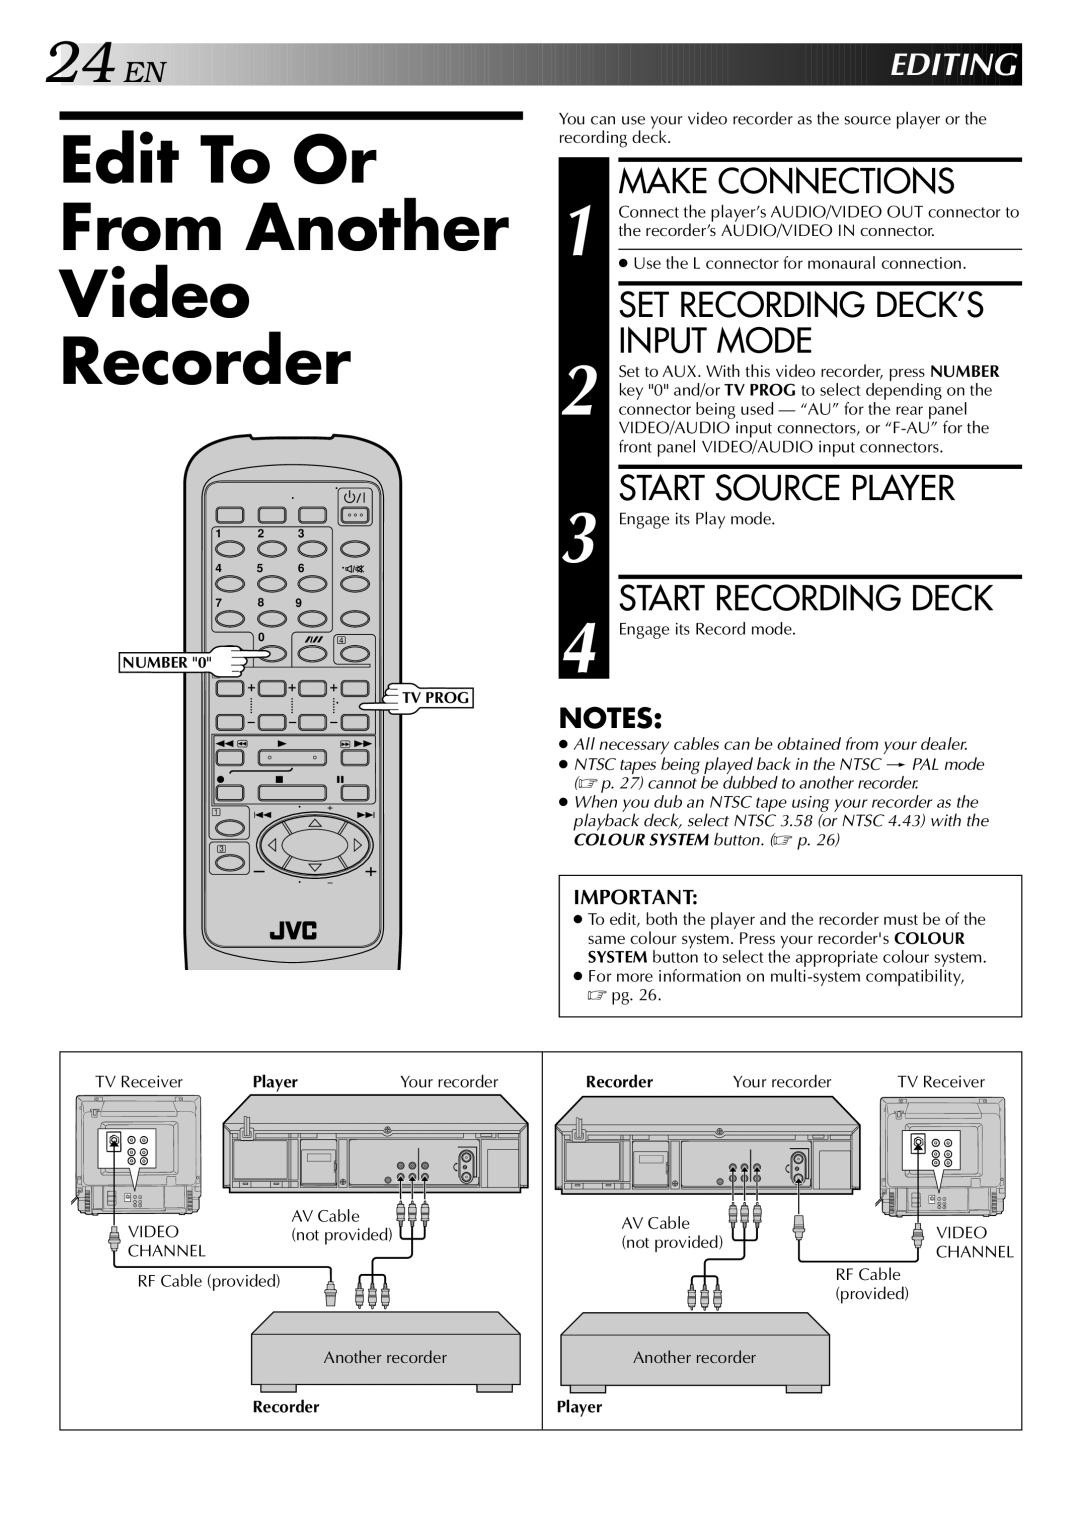
You can use your video recorder as the source player or the recording deck.
MAKE CONNECTIONS
1 Connect the player’s AUDIO/VIDEO OUT connector to the recorder’s AUDIO/VIDEO IN connector.
●Use the L connector for monaural connection.
SET RECORDING DECK’S |
INPUT MODE |
Set to AUX. With this video recorder, press NUMBER |
key "0" and/or TV PROG to select depending on the |
2 connector being used — “AU” for the rear panel |
VIDEO/AUDIO input connectors, or |
front panel VIDEO/AUDIO input connectors. |
START SOURCE PLAYER |
3 Engage its Play mode. |
START RECORDING DECK |
4 Engage its Record mode. |
NOTES: |
1 | 3 |
| Á | ● All necessary cables can be obtained from your dealer. |
¦ | 7 | 8 |
| ● NTSC tapes being played back in the NTSC [PAL mode |
| (☞ p. 27) cannot be dubbed to another recorder. | |||
1 | 4 |
| ¢ | ● When you dub an NTSC tape using your recorder as the |
| playback deck, select NTSC 3.58 (or NTSC 4.43) with the | |||
|
| |||
|
|
|
| |
3 |
|
|
| COLOUR SYSTEM button. (☞ p. 26) |
|
|
|
|
IMPORTANT:
● To edit, both the player and the recorder must be of the same colour system. Press your recorder's COLOUR SYSTEM button to select the appropriate colour system.
● For more information on
TV Receiver | Player | Your recorder | Recorder | Your recorder | TV Receiver |
VIDEO | AV Cable |
| AV Cable |
| VIDEO |
(not provided) |
|
| |||
| (not provided) |
| |||
CHANNEL |
|
|
| CHANNEL | |
|
|
|
| ||
RF Cable (provided) |
|
|
| RF Cable | |
|
|
| (provided) | ||
|
|
|
|
| |
| Another recorder | Another recorder |
| ||
| Recorder |
| Player |
|
|