KD-S717 specifications
The JVC KD-S717 is a car CD receiver that integrates advanced technologies and features to enhance any driving experience. Designed for audiophiles and casual listeners alike, this model merges exceptional sound quality with user-friendly functionality.One of the standout features of the KD-S717 is its compatibility with various media formats. It supports CD, CD-R, CD-RW, and MP3 playback, allowing users to enjoy their favorite music in different formats. The ability to play MP3 files means that drivers can store hundreds of songs on a single disc, making long journeys more enjoyable without the need for constant swapping of CDs.
The KD-S717 is equipped with a powerful 50 watts per channel MOSFET amplifier, ensuring clear and dynamic sound reproduction across a wide range of frequencies. The receiver also features a 3-band parametric equalizer, giving users the ability to customize their sound preferences according to personal taste. Additionally, it includes built-in preset equalizer settings, making it easy to switch between genres and audio styles with just a press of a button.
In terms of connectivity, the JVC KD-S717 offers a front AUX input, allowing users to connect various portable musical devices such as smartphones and MP3 players. This feature promotes seamless integration of personal playlists into the driving experience. The receiver also supports JVC's K2 technology, which enhances the sound quality of compressed audio formats like MP3 by restoring lost frequencies for a richer listening experience.
The KD-S717’s design is both sleek and functional, incorporating a bright LCD display that provides clear visibility of track information, including song title and artist name, even in direct sunlight. The receiver’s user interface is straightforward, enabling easy navigation through playlists and settings without distraction while driving.
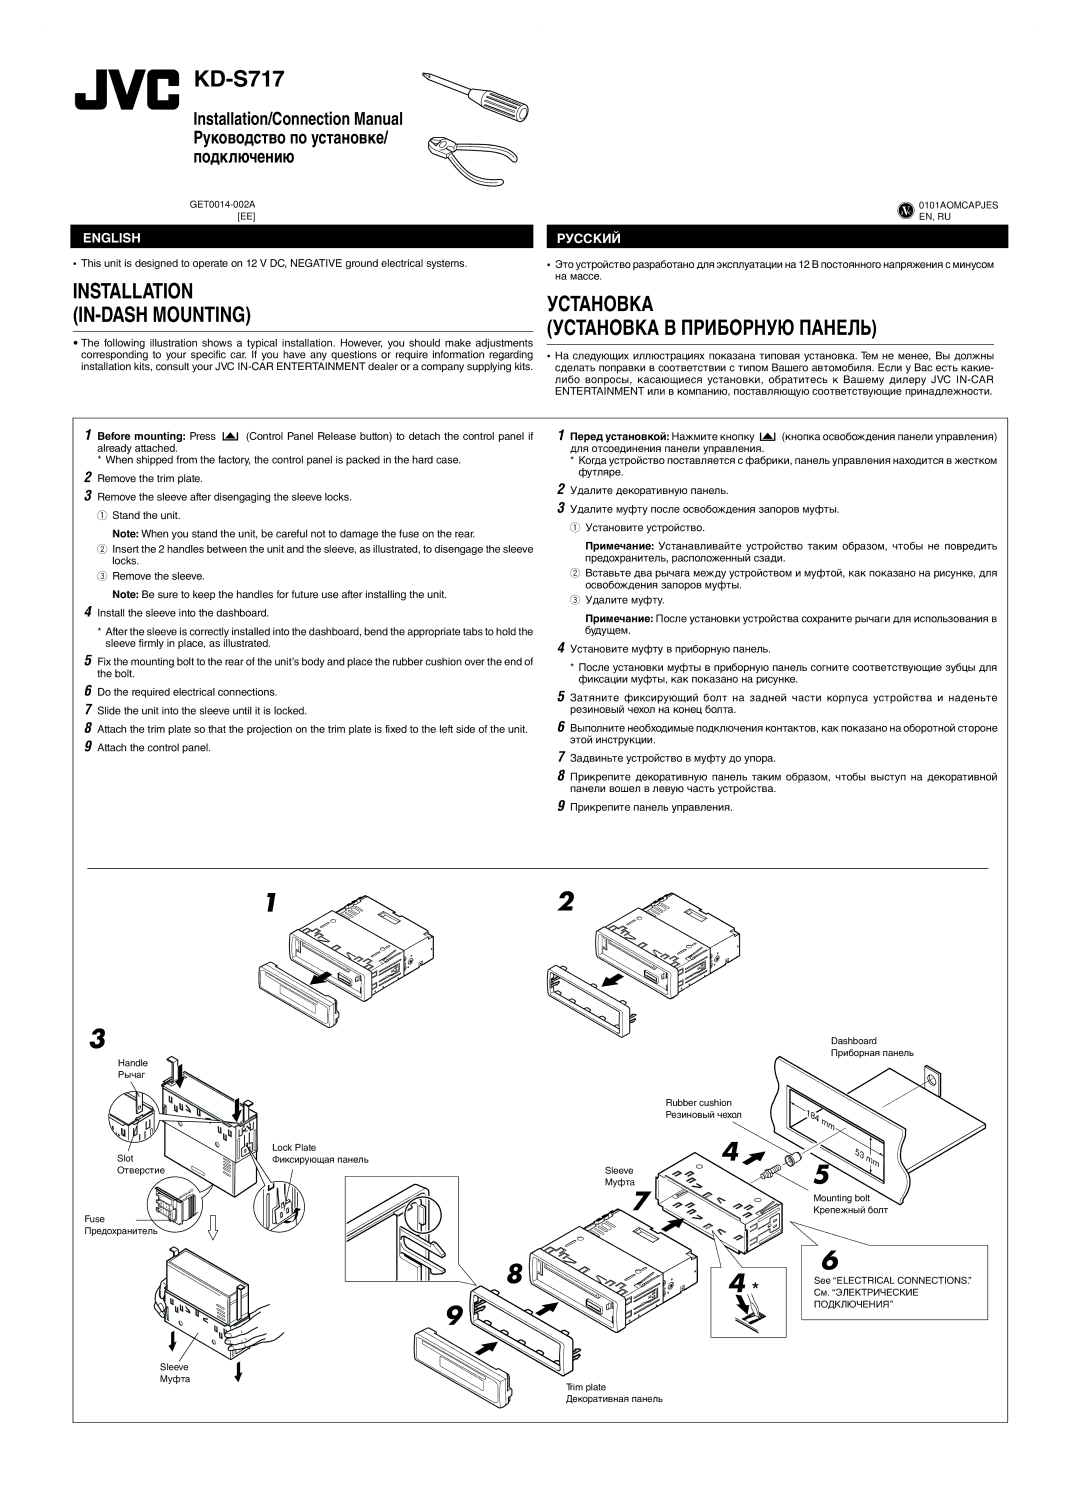
Furthermore, the KD-S717 is designed with vehicle compatibility in mind, featuring a durable build and a standardized size that fits most car dashboards. With its extensive feature set, advanced sound technologies, and user-friendly operation, the JVC KD-S717 remains a compelling choice for drivers seeking to elevate their in-car audio experience.