TAPE OPERATIONS 
Listening to a tape
3 |
|
|
|
|
|
|
|
|
|
|
|
|
|
|
|
|
|
|
|
|
|
|
|
|
|
|
|
| |
|
|
|
|
|
|
|
|
|
|
|
|
|
| |
|
|
|
|
|
|
|
|
|
|
|
|
|
| |
(Only for |
| 1 |
|
| 2 | |||||||||
|
|
|
|
|
|
|
|
|
|
|
|
|
| |
1
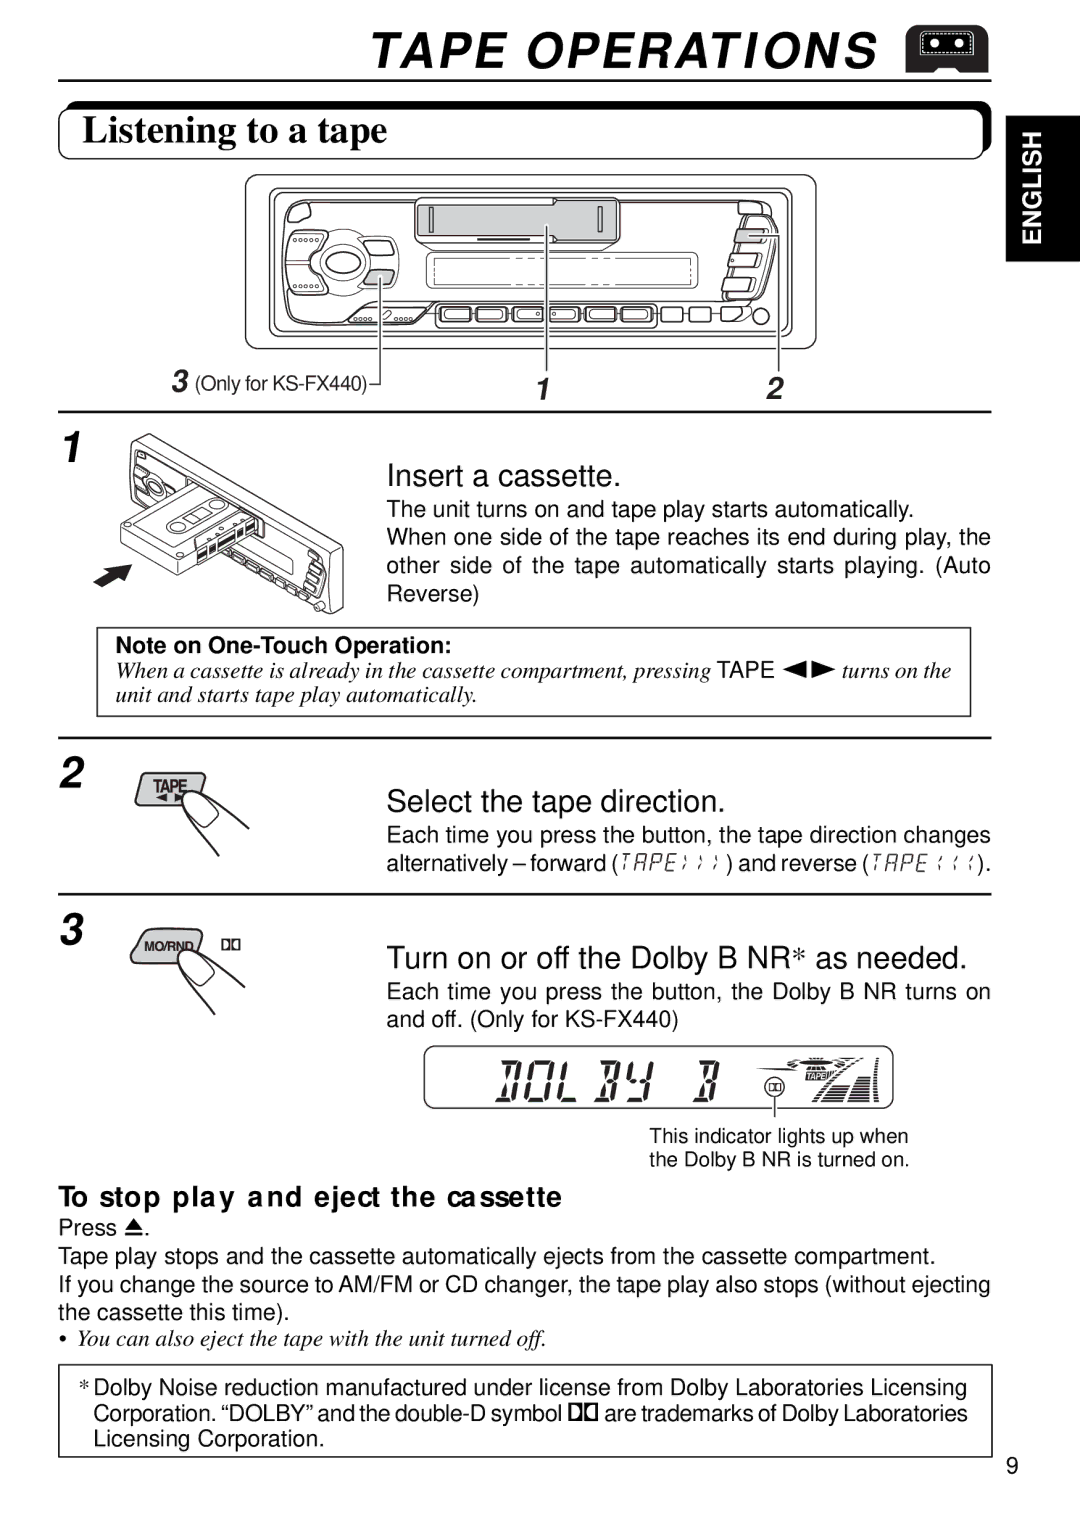
Insert a cassette.
The unit turns on and tape play starts automatically.
When one side of the tape reaches its end during play, the other side of the tape automatically starts playing. (Auto Reverse)
Note on
When a cassette is already in the cassette compartment, pressing TAPE xcturns on the unit and starts tape play automatically.
ENGLISH
2
Select the tape direction.
Each time you press the button, the tape direction changes
alternatively – forward (![]()
![]()
![]()
![]()
![]()
![]()
![]()
![]()
![]() ) and reverse (
) and reverse (![]()
![]()
![]()
![]()
![]()
![]()
![]()
![]() ).
).
3
Turn on or off the Dolby B NR* as needed.
Each time you press the button, the Dolby B NR turns on and off. (Only for
This indicator lights up when the Dolby B NR is turned on.
To stop play and eject the cassette
Press 0.
Tape play stops and the cassette automatically ejects from the cassette compartment.
If you change the source to AM/FM or CD changer, the tape play also stops (without ejecting the cassette this time).
•You can also eject the tape with the unit turned off.
*Dolby Noise reduction manufactured under license from Dolby Laboratories Licensing Corporation. “DOLBY” and the
9
