ENGLISH


 EXTERNAL COMPONENT OPERATIONS
Playing an external component
You can connect the external component to the CD changer jack on the rear using the Line Input Adaptor
31
Preparations:
•For connecting the Line Input Adaptor
•Before operating the external component using the following procedure, select the external input correctly. (See “Selecting the external component to use” on page 22.)
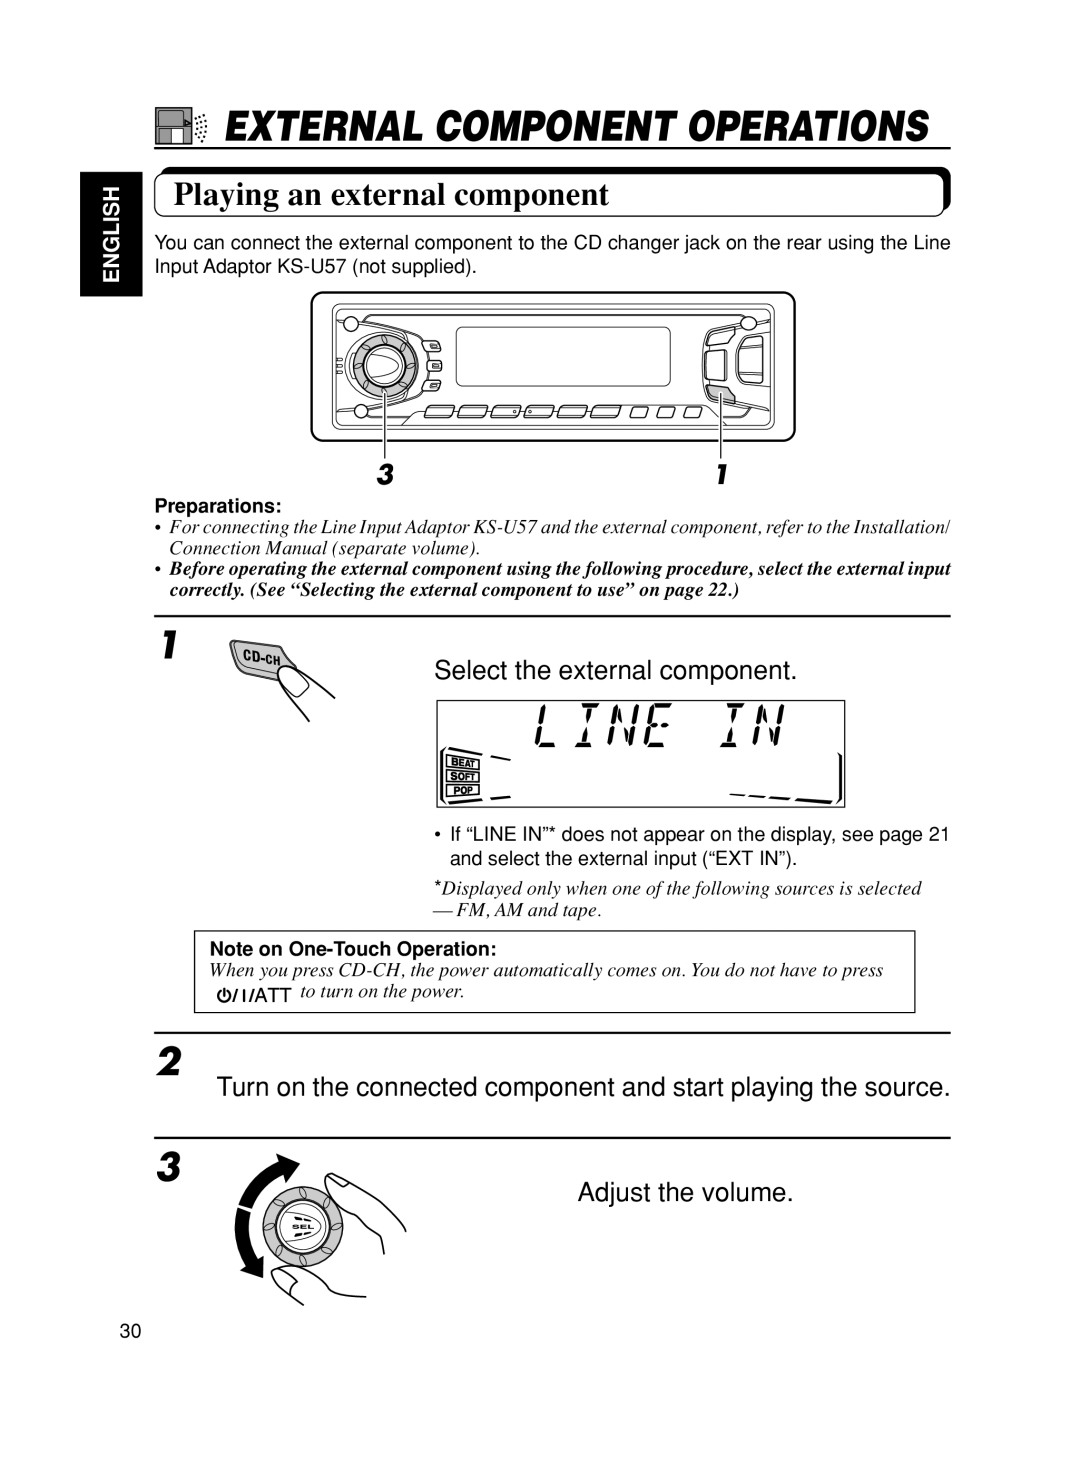
1
Select the external component.
•If “LINE IN”* does not appear on the display, see page 21 and select the external input (“EXT IN”).
*Displayed only when one of the following sources is selected
— FM, AM and tape.
Note on
When you press ![]()
![]()
![]()
![]() to turn on the power.
to turn on the power.
2
Turn on the connected component and start playing the source.
3
Adjust the volume.
30