INSTALLATION
|
|
| 3 |
|
| 8 | 9 p | q |
| |
|
|
|
|
|
|
| OUTPUT |
|
|
|
|
| INPUT |
|
| RED/Pr | GREEN/Y BLUE/Pb H/C SYNC V SYNC | I/R REMOTE SCREEN |
| ||
|
|
|
|
|
|
| ||||
Y/C | VIDEO | RED/Pr | GREEN/Y | BLUE/Pb | HDTV INPUT | MONITOR OUTPUT | DVI INPUT | DVI OUTPUT | ||
1 2 |
|
|
|
| 4 | 5 | 6 | 7 | w | |
INSTALLATION
Accessories
The following accessories are packed together with this unit. Please confirm all items. If any item is missing, please contact your dealer.
• Instructions | • Remote Control |
• Power Cord | • AA/R6 size Battery |
| (for operation confirmation) |
| • Guarantee |
|
|
Placement
The processor can be either placed on a table or rack mounted. A rack mounting installation kit is available. Securely mount the side rack brackets with the screws that are provided with the kit.
Ventilation
The unit uses convection to cool. A fan is not needed. As hot air raises out of the top vent, cool air is drawn in from the bottom and side. These vents must not be blocked. When rack mounted, a minimum of 1.75” (1 rack unit height) of free space is required above and below the unit to allow for proper cooling. A forced air fan should be added to the rack installation if power amps are located in the same air space. Do not install unit above power amps.
Connections
Because of the high performance of this unit it is very important to use the highest quality cables possible, for both input and output signals.
To avoid AC ground loop problems, the source equipment, this unit and projector should all be running on the same grounded AC power line (one rated for the power requirements).
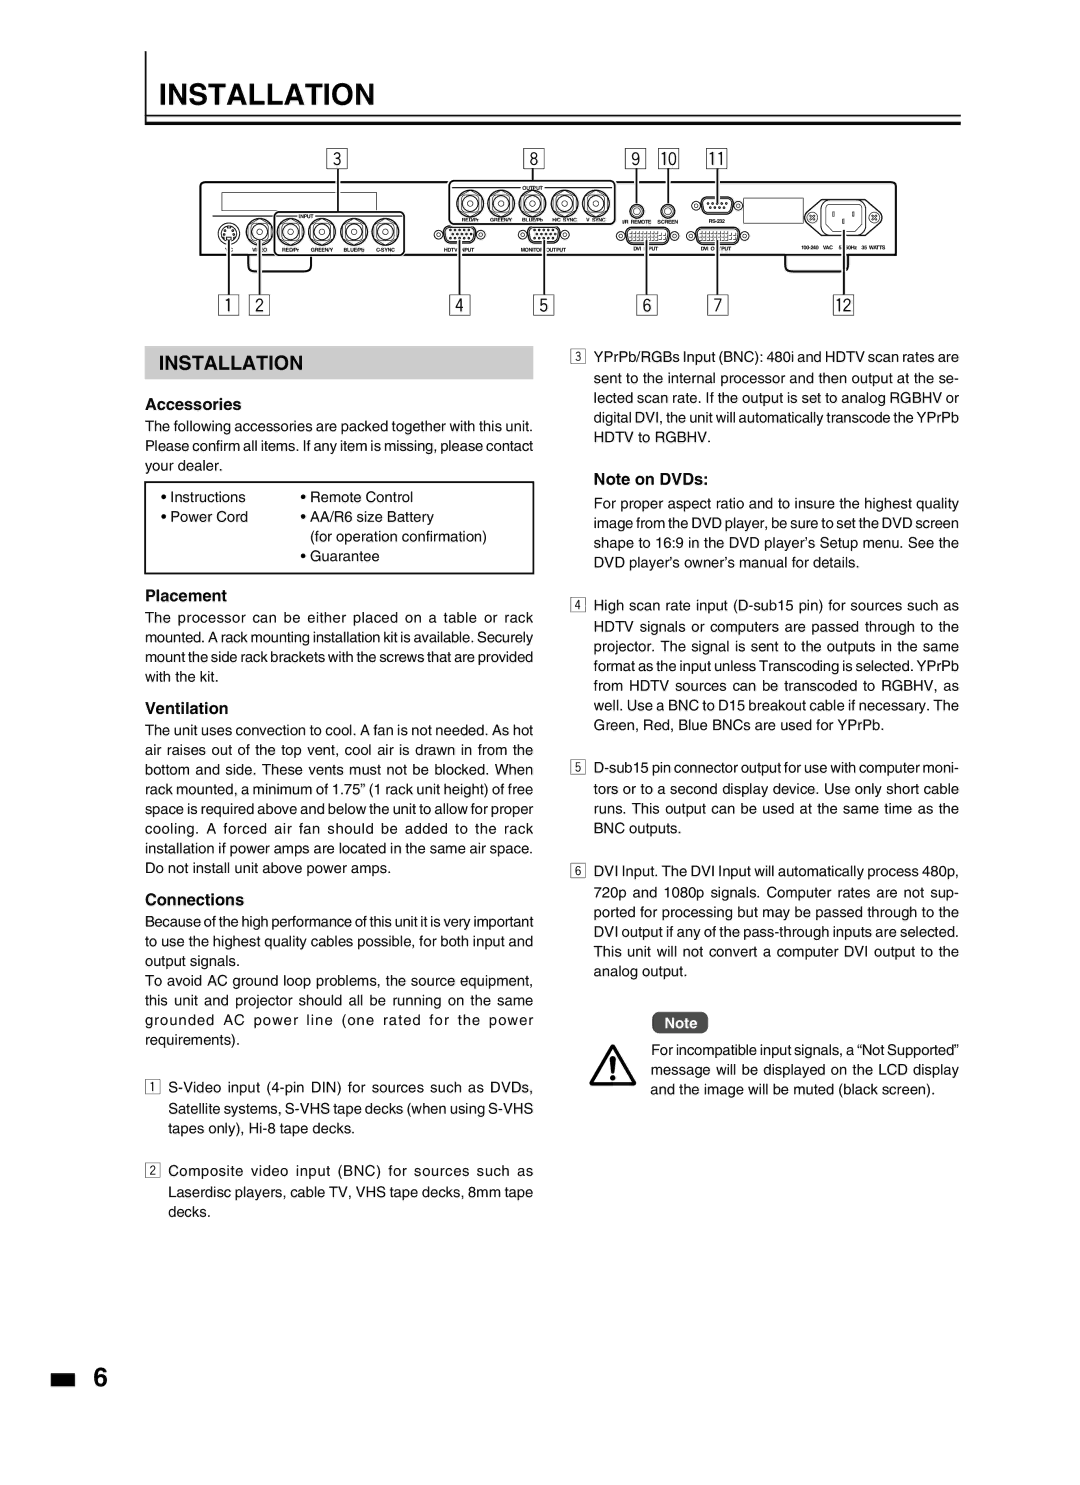
1
2Composite video input (BNC) for sources such as Laserdisc players, cable TV, VHS tape decks, 8mm tape decks.
3YPrPb/RGBs Input (BNC): 480i and HDTV scan rates are sent to the internal processor and then output at the se- lected scan rate. If the output is set to analog RGBHV or digital DVI, the unit will automatically transcode the YPrPb HDTV to RGBHV.
Note on DVDs:
For proper aspect ratio and to insure the highest quality image from the DVD player, be sure to set the DVD screen shape to 16:9 in the DVD player’s Setup menu. See the DVD player’s owner’s manual for details.
4High scan rate input
5
6DVI Input. The DVI Input will automatically process 480p, 720p and 1080p signals. Computer rates are not sup- ported for processing but may be passed through to the DVI output if any of the
Note
For incompatible input signals, a “Not Supported” message will be displayed on the LCD display and the image will be muted (black screen).
6