Listening to an iPod/Viewing Images on the iPod
 Connecting an iPod
Insert the iPod directly to the connector pins.
Apple iPod (separately purchased) |
Dock adapter |
(supplied with |
To | Press |
| Indication/Result |
Display the menu/ |
| — | |
Go back to the |
| ||
previous menu |
|
|
|
Select an item on | or | • The UP/DOWN buttons work | |
the menu |
| in the same way as operating | |
|
| ||
|
|
| the click wheel of iPod |
|
|
| counterclockwise/clockwise. |
|
|
| (Refer to the instruction manual |
|
|
| for the iPod for details.) |
|
|
|
|
Play back at |
| • | Refer to the instruction manual for |
 Presetting Stations
You can preset 30 FM and 15 AM stations manually.
1Tune in to a station you want to preset.
• You can also store the FM reception mode.
2Press to activate the preset number entry mode.
• Finish the following steps while the indication on the display is flashing.
3Press to select a preset number for the station you want to ![]() store.
store.
or
Learning More about This System
Basic and Common Operations (see page 3) | Listening to an iPod/Viewing Images on the iPod (see | ||
• Pressing one of the source buttons also turns on the System | page 5) |
| |
and starts playing back if the source is ready or connected. | • Compatible iPod: |
| |
• You cannot use the Sound Mode and Sound Turbo at the |
|
|
|
| iPod model | Audio Video | |
same time. |
| ||
Playing Back a Disc/USB Mass Storage Class Device |
| iPod nano 1GB/2GB/4GB | – |
| iPod nano (2nd Generation) | – | |
(see page 4) |
| 2GB/4GB/8GB | |
|
| ||
• This System cannot play “packet write” discs. |
| iPod nano (3rd Generation) 4GB/8GB |
|
• For MP3/WMA playback... |
|
|
|
| iPod nano (4th Generation) 8GB/16GB |
| |
Display Information | S.TURBO (Sound Turbo) | HBS indicator |
| SOUND indicator |
|
|
|
| |||||||||||||||
|
|
|
|
|
|
|
| ||||||||||||||||
|
|
| indicator (See page 3.) | (See page 3.) |
| (See page 3.) | Source indicators | ||||||||||||||||
Play mode indicators |
|
|
|
|
|
|
|
|
|
|
|
|
|
|
|
|
|
|
|
|
| ||
|
|
|
|
|
|
|
|
|
|
|
|
|
|
|
|
|
|
|
|
| |||
(See page 4.) |
|
|
|
|
|
|
|
|
|
|
|
|
|
|
|
|
|
|
|
|
| FM reception indicators | |
|
|
|
|
|
|
|
|
|
|
|
|
|
|
|
|
|
|
|
| ||||
|
|
|
|
|
|
|
|
|
|
|
|
|
|
|
|
|
|
|
|
|
| (See page 5.) | |
|
|
|
|
|
|
|
|
|
|
|
|
|
|
|
|
|
|
|
|
|
|
| Timer mode indicators |
Source indicators |
|
|
|
|
|
|
|
|
|
|
|
|
|
|
|
|
|
|
|
|
|
| (See page 6.) |
|
|
|
|
|
|
|
|
|
|
|
|
|
|
|
|
|
| ||||||
|
|
|
|
|
|
|
|
|
|
|
|
|
|
|
|
|
|
| |||||
File type indicators (See |
| page 4.) |
|
|
|
|
|
|
|
|
|
|
|
|
|
|
|
| |||||
|
|
| Main display | A.STBY (Auto Standby) | SLEEP indicator (See page 6.) | ||||||||||||||||||
|
|
|
|
|
|
|
|
|
|
|
|
|
|
| indicator (See page 6.) |
|
|
|
| ||||
|
|
|
|
|
|
|
|
|
|
|
|
|
|
|
|
|
|
|
|
|
|
|
|
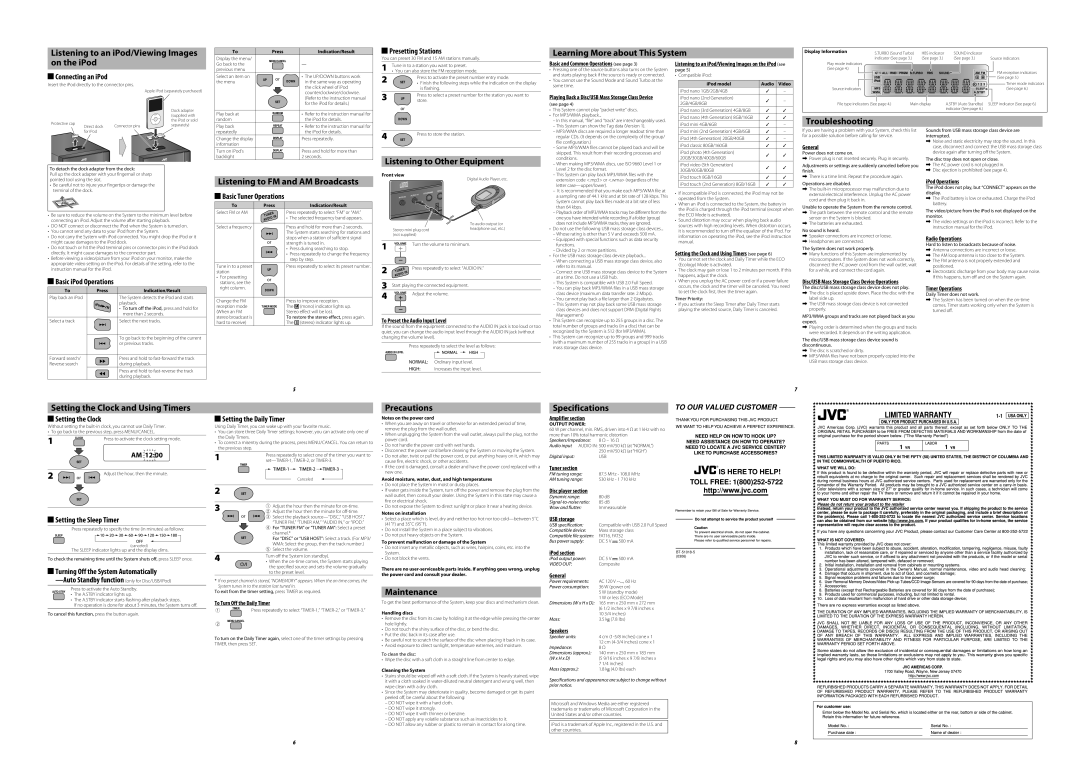
Protective cap |
| the iPod or sold | |
Connector pins | separately) | ||
Direct dock | |||
for iPod |
|
|
To detach the dock adapter from the dock:
Pull up the dock adapter with your fingernail or sharp pointed tool using the slot.
•Be careful not to injure your fingertips or damage the terminal of the dock.
•Be sure to reduce the volume on the System to the minimum level before connecting an iPod. Adjust the volume after starting playback.
•DO NOT connect or disconnect the iPod when the System is turned on.
•You cannot send any data to your iPod from the System.
•Do not carry the System with iPod connected. You might drop the iPod or it might cause damages to the iPod dock.
•Do not touch or hit the iPod terminal pins or connector pins in the iPod dock directly. It might cause damages to the connector part.
•Before viewing a video/picture from your iPod on your monitor, make the appropriate video setting on the iPod. For details of the setting, refer to the instruction manual for the iPod.
 Basic iPod Operations
To | Press | Indication/Result | ||
Play back an iPod |
|
|
| The System detects the iPod and starts |
|
|
|
| playback. |
|
|
|
| • To turn off the iPod, press and hold for |
|
|
|
| more than 2 seconds. |
Select a track |
|
|
| Select the next tracks. |
|
|
|
|
|
|
|
|
|
|
|
|
|
| To go back to the beginning of the current |
|
|
|
| or previous tracks. |
|
|
|
| |
|
|
|
| |
|
|
|
|
|
Forward search/ |
|
|
| Press and hold to |
Reverse search |
|
|
| during playback. |
|
|
|
| Press and hold to |
|
|
|
| during playback. |
random |
| the iPod for details. |
Play back |
| • Refer to the instruction manual for |
repeatedly |
| the iPod for details. |
Change the display |
| Press repeatedly. |
| ||
| ||
information |
|
|
Turn on iPod’s |
| Press and hold for more than |
| ||
| ||
backlight |
| 2 seconds. |
Listening to FM and AM Broadcasts
 Basic Tuner Operations
To | Press |
| Indication/Result | ||
Select FM or AM |
|
|
| Press repeatedly to select “FM” or “AM.” | |
|
|
|
| • The selected frequency band appears. | |
|
|
|
|
| |
Select a frequency |
|
|
| Press and hold for more than 2 seconds. | |
|
|
|
| The System starts searching for stations and | |
|
|
|
| ||
|
| or | stops when a station of sufficient signal | ||
|
| strength is tuned in. | |||
|
|
|
| • Press during searching to stop. | |
|
|
|
| • Press repeatedly to change the frequency | |
|
|
|
| ||
|
|
|
| step by step. | |
Tune in to a preset |
|
|
| Press repeatedly to select its preset number. | |
station |
|
|
|
|
|
• For presetting |
| or |
|
| |
stations, see the |
|
|
| ||
|
|
|
|
| |
right column. |
|
|
|
|
|
|
|
|
|
| |
Change the FM |
|
|
| Press to improve reception. | |
reception mode |
|
|
| The | (mono) indicator lights up. |
(When an FM |
|
|
| Stereo effect will be lost. | |
stereo broadcast is |
|
|
| To restore the stereo effect, press again. | |
hard to receive) |
|
|
| The | (stereo) indicator lights up. |
4Press to store the station.
Listening to Other Equipment
Front view
Digital Audio Player, etc.
To audio output (or
Stereo mini plug cordheadphone out, etc.) (not supplied)
1 | Turn the volume to minimum. |
| |
2 | Press repeatedly to select “AUDIO IN.” |
|
3Start playing the connected equipment.
4 | Adjust the volume. |
|
To Preset the Audio Input Level
If the sound from the equipment connected to the AUDIO IN jack is too loud or too quiet, you can change the audio input level through the AUDIO IN jack (without changing the volume level).
Press repeatedly to select the level as follows:
NORMAL: Ordinary input level.
HIGH: Increases the input level.
– In this manual, “file” and “track” are interchangeably used. |
|
|
| |
| iPod mini 4GB/6GB | – | ||
– This System can show the Tag data (Version 1). |
| |||
– MP3/WMA discs are required a longer readout time than |
| iPod mini (2nd Generation) 4GB/6GB | – | |
regular CDs. (It depends on the complexity of the group/ |
| iPod (4th Generation) 20GB/40GB | – | |
file configuration.) |
| |||
| iPod classic 80GB/160GB |
| ||
– Some MP3/WMA files cannot be played back and will be |
|
| ||
| iPod photo (4th Generation) |
| ||
skipped. This result from their recording processes and |
|
| ||
conditions. |
| 20GB/30GB/40GB/60GB |
| |
– When making MP3/WMA discs, use ISO 9660 Level 1 or |
| iPod video (5th Generation) |
| |
Level 2 for the disc format. |
| 30GB/60GB/80GB |
| |
– This System can play back MP3/WMA files with the |
|
|
| |
| iPod touch 8GB/16GB |
| ||
extension code <.mp3> or <.wma> (regardless of the |
|
| ||
| iPod touch (2nd Generation) 8GB/16GB |
| ||
letter |
|
| ||
– It is recommended that you make each MP3/WMA file at | • If incompatible iPod is connected, the iPod may not be | |||
a sampling rate of 44.1 kHz and at bit rate of 128 kbps. This | ||||
operated from the System. |
| |||
System cannot play back files made at a bit rate of less |
| |||
• When an iPod is connected to the System, the battery in | ||||
than 64 kbps. | ||||
the iPod is charged through the iPod terminal (except when | ||||
– Playback order of MP3/WMA tracks may be different from the | ||||
the ECO Mode is activated). |
| |||
one you have intended while recording. If a folder (group) |
| |||
• Sound distortion may occur when playing back audio |
| |||
does not include MP3/WMA tracks, they are ignored. |
| |||
sources with high recording levels. When distortion occurs, | ||||
• Do not use the following USB mass storage class devices... | ||||
it is recommended to turn off the equalizer of the iPod. For | ||||
– Whose rating is other than 5 V and exceeds 500 mA. | ||||
information on operating the iPod, see the iPod instruction | ||||
– Equipped with special functions such as data security | ||||
manual. |
| |||
functions. |
| |||
|
|
| ||
– Divided by 2 or more partitions. | Setting the Clock and Using Timers (see page 6) |
| ||
• For the USB mass storage class device playback... |
| |||
• You cannot set the clock and Daily Timer while the ECO | ||||
– When connecting a USB mass storage class device, also | ||||
(Ecology) Mode is activated. |
| |||
refer to its manual. |
| |||
• The clock may gain or lose 1 to 2 minutes per month. If this | ||||
– Connect one USB mass storage class device to the System | ||||
happens, adjust the clock. |
| |||
at a time. Do not use a USB hub. |
| |||
• When you unplug the AC power cord or if a power failure | ||||
– This System is compatible with USB 2.0 Full Speed. | ||||
occurs, the clock and the timer will be canceled. You need | ||||
– You can play back MP3/WMA files in a USB mass storage | ||||
to set the clock first, then the timer again. |
| |||
class device (maximum data transfer rate: 2 Mbps). |
| |||
Timer Priority: |
| |||
– You cannot play back a file larger than 2 Gigabytes. |
| |||
– This System may not play back some USB mass storage | • If you activate the Sleep Timer after Daily Timer starts |
| ||
class devices and does not support DRM (Digital Rights | playing the selected source, Daily Timer is canceled. |
| ||
Management) |
|
|
| |
• This System can recognize up to 255 groups in a disc. The |
|
|
| |
total number of groups and tracks (in a disc) that can be |
|
|
| |
recognized by the System is 512 (for MP3/WMA). |
|
|
| |
• This System can recognize up to 99 groups and 999 tracks |
|
|
| |
(with a maximum number of 255 tracks in a group) in a USB |
|
|
| |
mass storage class device. |
|
|
| |
Troubleshooting
If you are having a problem with your System, check this list for a possible solution before calling for service.
General
Power does not come on.
\Power plug is not inserted securely. Plug in securely.
Adjustments or settings are suddenly canceled before you finish.
\There is a time limit. Repeat the procedure again.
Operations are disabled.
\The
Unable to operate the System from the remote control.
\The path between the remote control and the remote sensor on the System is blocked.
\The batteries are exhausted.
No sound is heard.
\Speaker connections are incorrect or loose.
\Headphones are connected.
The System does not work properly.
\Many functions of this System are implemented by microcomputers. If the System does not work correctly, disconnect the AC power cord from the wall outlet, wait for a while, and connect the cord again.
Disc/USB Mass Storage Class Device Operations
The disc/USB mass storage class device does not play.
\The disc is placed upside down. Place the disc with the label side up.
\The USB mass storage class device is not connected properly.
MP3/WMA groups and tracks are not played back as you expect.
\Playing order is determined when the groups and tracks were recorded. It depends on the writing application.
The disc/USB mass storage class device sound is discontinuous.
\The disc is scratched or dirty.
\MP3/WMA files have not been properly copied into the USB mass storage class device.
Sounds from USB mass storage class device are interrupted.
\Noise and static electricity may stop the sound. In this case, disconnect and connect the USB mass storage class device again after turning off the System.
The disc tray does not open or close.
\The AC power cord is not plugged in.
\Disc ejection is prohibited (see page 4).
iPod Operations
The iPod does not play, but “CONNECT” appears on the display.
\The iPod battery is low or exhausted. Charge the iPod battery.
The video/picture from the iPod is not displayed on the monitor.
\The video settings on the iPod is incorrect. Refer to the instruction manual for the iPod.
Radio Operations
Hard to listen to broadcasts because of noise.
\Antenna connections are incorrect or loose.
\The AM loop antenna is too close to the System.
\The FM antenna is not properly extended and positioned.
\Electrostatic discharge from your body may cause noise. If this happens, turn off and on the System again.
Timer Operations
Daily Timer does not work.
\The System has been turned on when the
5 | 7 |
Setting the Clock and Using Timers
 Setting the Clock
Without setting the
• To go back to the previous step, press MENU/CANCEL.
1 | Press to activate the clock setting mode. |
| |
| AM 12:00 |
2 | Adjust the hour, then the minute. |
or |
 Setting the Sleep Timer
Press repeatedly to specify the time (in minutes) as follows:
(canceled)
The SLEEP indicator lights up and the display dims.
To check the remaining time until the System shuts off, press SLEEP once.
 Turning Off the System Automatically
Press to activate the Auto Standby.
•The A.STBY indicator lights up.
•The A.STBY indicator starts flashing after playback stops.
If no operation is done for about 3 minutes, the System turns off.
To cancel this function, press the button again.
 Setting the Daily Timer
Using Daily Timer, you can wake up with your favorite music.
•You can store three Daily Timer settings; however, you can activate only one of the Daily Timers.
•To correct a misentry during the process, press MENU/CANCEL. You can return to the previous step.
1 | Press repeatedly to select one of the timer you want to | ||||||||||
| |||||||||||
|
|
|
|
|
|
|
|
|
|
|
|
|
|
|
|
|
|
|
|
|
|
|
|
Canceled
2
31 Adjust the hour then the minute for
or |
| 3 Select the playback |
| ||
|
| “TUNER FM,” “TUNER AM,” “AUDIO IN,” or “IPOD.” |
4For “TUNER FM” or “TUNER AM”: Select a preset channel.*
For “DISC” or “USB HOST”: Select a track. (For MP3/
WMA: Select the group, then the track number.)
5Select the volume.
4 | Turn off the System (on standby). |
• When the | |
| the specified source and sets the volume gradually |
| |
| to the preset level. |
* If no preset channel is stored, “NOMEMORY” appears. When the on time comes, the System tunes in to the station last tuned in.
To exit from the timer setting, press TIMER as required.
To Turn Off the Daily Timer
1 |
| Press repeatedly to select |
2
To turn on the Daily Timer again, select one of the timer settings by pressing TIMER, then press SET.
Precautions
Notes on the power cord
•When you are away on travel or otherwise for an extended period of time, remove the plug from the wall outlet.
•When unplugging the System from the wall outlet, always pull the plug, not the power cord.
•Do not handle the power cord with wet hands.
•Disconnect the power cord before cleaning the System or moving the System.
•Do not alter, twist or pull the power cord, or put anything heavy on it, which may cause fire, electric shock, or other accidents.
•If the cord is damaged, consult a dealer and have the power cord replaced with a new one.
Avoid moisture, water, dust, and high temperatures
•Do not place the System in moist or dusty places.
•If water gets inside the System, turn off the power and remove the plug from the wall outlet, then consult your dealer. Using the System in this state may cause a fire or electrical shock.
•Do not expose the System to direct sunlight or place it near a heating device.
Notes on installation
•Select a place which is level, dry and neither too hot nor too
•Do not install the System in a place subject to vibrations.
•Do not put heavy objects on the System.
To prevent malfunction or damage of the System
•Do not insert any metallic objects, such as wires, hairpins, coins, etc. into the System.
•Do not block the vents.
There are no
Maintenance
To get the best performance of the System, keep your discs and mechanism clean.
Handling discs
•Remove the disc from its case by holding it at the edge while pressing the center hole lightly.
•Do not touch the shiny surface of the disc, or bend the disc.
•Put the disc back in its case after use.
•Be careful not to scratch the surface of the disc when placing it back in its case.
•Avoid exposure to direct sunlight, temperature extremes, and moisture.
To clean the disc:
• Wipe the disc with a soft cloth in a straight line from center to edge.
Cleaning the System
•Stains should be wiped off with a soft cloth. If the System is heavily stained, wipe it with a cloth soaked in
•Since the System may deteriorate in quality, become damaged or get its paint peeled off, be careful about the following:
–DO NOT wipe it with a hard cloth.
–DO NOT wipe it strongly.
–DO NOT wipe it with thinner or benzine.
–DO NOT apply any volatile substance such as insecticides to it.
–DO NOT allow any rubber or plastic to remain in contact for a long time.
6 | 8 |