SAVE PICTURE 


 29
29
SAVING
Select when storing the contents displayed in the image display area (page 21).
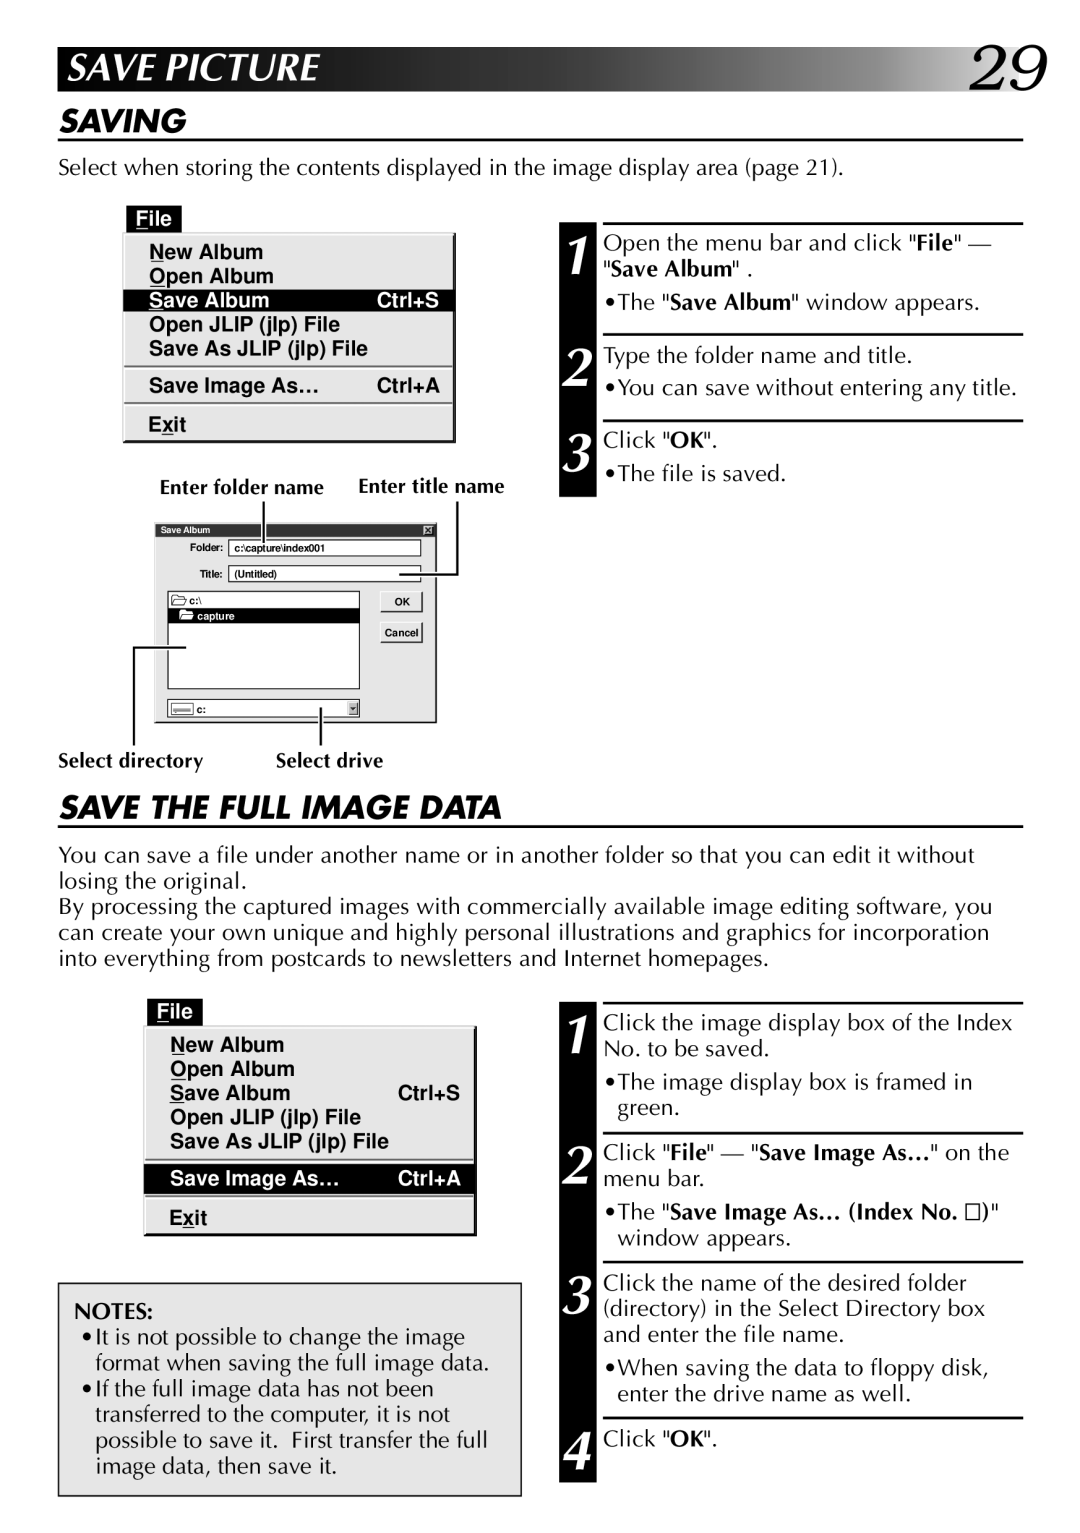
File
| New Album |
|
|
|
|
|
|
| |||||
| Open Album |
|
|
|
|
|
|
| |||||
| Save Album | Ctrl+S |
| ||||||||||
| |||||||||||||
| Open JLIP (jlp) File |
|
|
|
|
|
|
| |||||
| Save As JLIP (jlp) File |
| |||||||||||
| Save Image As… | Ctrl+A |
| ||||||||||
| Exit |
|
|
|
|
|
|
|
|
| |||
|
|
|
|
|
|
|
|
|
|
|
|
|
|
| Enter folder name | Enter title name | |||||||||||
| Save Album |
|
|
|
|
|
|
|
|
| |||
|
|
| Folder: |
|
|
|
|
|
|
|
|
|
|
|
|
|
| c:\capture\index001 |
|
|
|
|
|
|
| ||
|
|
|
|
|
|
|
|
|
|
|
|
| |
|
|
| Title: |
| (Untitled) |
|
|
|
|
|
|
| |
|
|
|
|
|
|
|
|
|
|
| |||
|
|
|
|
|
|
|
|
|
|
|
|
|
|
|
|
| c:\ |
|
|
| OK |
|
|
|
| ||
|
|
| capture |
|
|
|
|
|
|
|
|
| |
|
|
|
|
|
|
|
| Cancel |
|
|
|
| |
|
|
|
|
|
|
|
|
|
|
|
|
|
|
|
|
|
|
|
|
|
|
|
|
|
|
|
|
1 Open the menu bar and click "File" — "Save Album" .
•The "Save Album" window appears.
2 Type the folder name and title.
•You can save without entering any title.
3 Click "OK".
•The file is saved.
c:
Select directory | Select drive |
SAVE THE FULL IMAGE DATA
You can save a file under another name or in another folder so that you can edit it without losing the original.
By processing the captured images with commercially available image editing software, you can create your own unique and highly personal illustrations and graphics for incorporation into everything from postcards to newsletters and Internet homepages.
File
New Album
Open Album
Save AlbumCtrl+S
Open JLIP (jlp) File
Save As JLIP (jlp) File
Save Image As… | Ctrl+A |
Exit
NOTES:
•It is not possible to change the image format when saving the full image data.
•If the full image data has not been transferred to the computer, it is not possible to save it. First transfer the full image data, then save it.
1 Click the image display box of the Index No. to be saved.
•The image display box is framed in green.
2 Click "File" — "Save Image As…" on the menu bar.
•The "Save Image As… (Index No. ![]() )"
)"
window appears.
3 Click the name of the desired folder (directory) in the Select Directory box and enter the file name.
•When saving the data to floppy disk, enter the drive name as well.
4 Click "OK".