26

 EN
EN 


 RECORDING
 Advanced Features (Cont.)
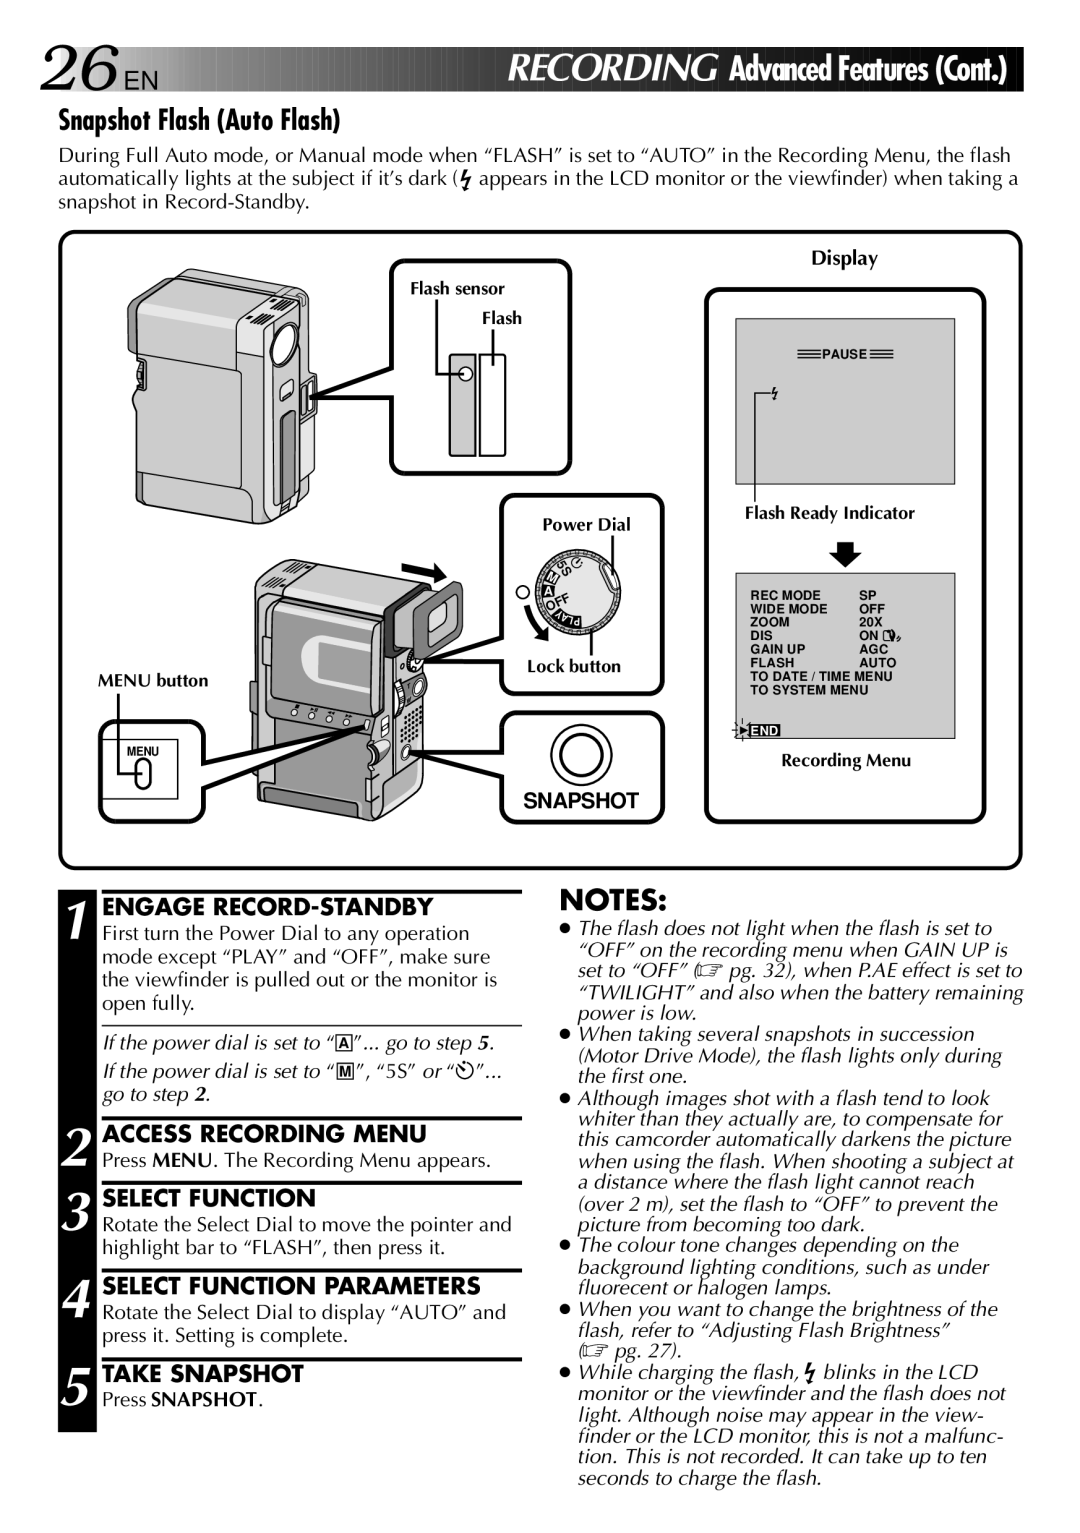
Snapshot Flash (Auto Flash)
During Full Auto mode, or Manual mode when “FLASH” is set to “AUTO” in the Recording Menu, the flash automatically lights at the subject if it’s dark ( appears in the LCD monitor or the viewfinder) when taking a snapshot in
MENU button
MENU
Flash sensor
Flash
Power Dial
5S ![]() M
M ![]()
![]() A
A ![]() OFF
OFF ![]() YALP
YALP
Lock button
SNAPSHOT
Display
![]() PAUSE
PAUSE ![]()
Flash Ready Indicator
REC MODE | SP |
WIDE MODE | OFF |
ZOOM | 20X |
DIS | ON |
GAIN UP | AGC |
FLASH | AUTO |
TO DATE / TIME MENU TO SYSTEM MENU
4END
Recording Menu
1 ENGAGE
If the power dial is set to “ A ”... go to step 5.
If the power dial is set to “ M ”, “5S” or “![]() ”...
”...
go to step 2.
2 ACCESS RECORDING MENU Press MENU. The Recording Menu appears.
3 SELECT FUNCTION
Rotate the Select Dial to move the pointer and highlight bar to “FLASH”, then press it.
4 SELECT FUNCTION PARAMETERS Rotate the Select Dial to display “AUTO” and press it. Setting is complete.
5 TAKE SNAPSHOT
Press SNAPSHOT.
NOTES:
●The flash does not light when the flash is set to
“OFF” on the recording menu when GAIN UP is set to “OFF” (☞ pg. 32), when P.AE effect is set to “TWILIGHT” and also when the battery remaining power is low.
●When taking several snapshots in succession (Motor Drive Mode), the flash lights only during the first one.
●Although images shot with a flash tend to look whiter than they actually are, to compensate for this camcorder automatically darkens the picture when using the flash. When shooting a subject at a distance where the flash light cannot reach (over 2 m), set the flash to “OFF” to prevent the picture from becoming too dark.
●The colour tone changes depending on the background lighting conditions, such as under fluorecent or halogen lamps.
●When you want to change the brightness of the flash, refer to “Adjusting Flash Brightness” (☞ pg. 27).
● While charging the flash, blinks in the LCD monitor or the viewfinder and the flash does not light. Although noise may appear in the view- finder or the LCD monitor, this is not a malfunc- tion. This is not recorded. It can take up to ten seconds to charge the flash.