Using the CD Player

Basics of Using the CD Player- Normal Play

To Play CDs

1 Load CDs.

2 Press one of the Disc button (CD1-CD3) you want to play.

The selected disc number (e.g. “CD-1” ) appears on the dis- play.

The first track of the selected CD begins playing. When the first CD finishes playing, the next and the third CDs are con- tinuously played back.

When the last CD has finished playing, the CD Player auto- matically stops.

Examples:

CD1 = CD2 = CD3 = (stop)

CD2 = CD3 = CD1 = (stop)

You can start to play the currently selected disc by simply press- ing the CD 6 button.

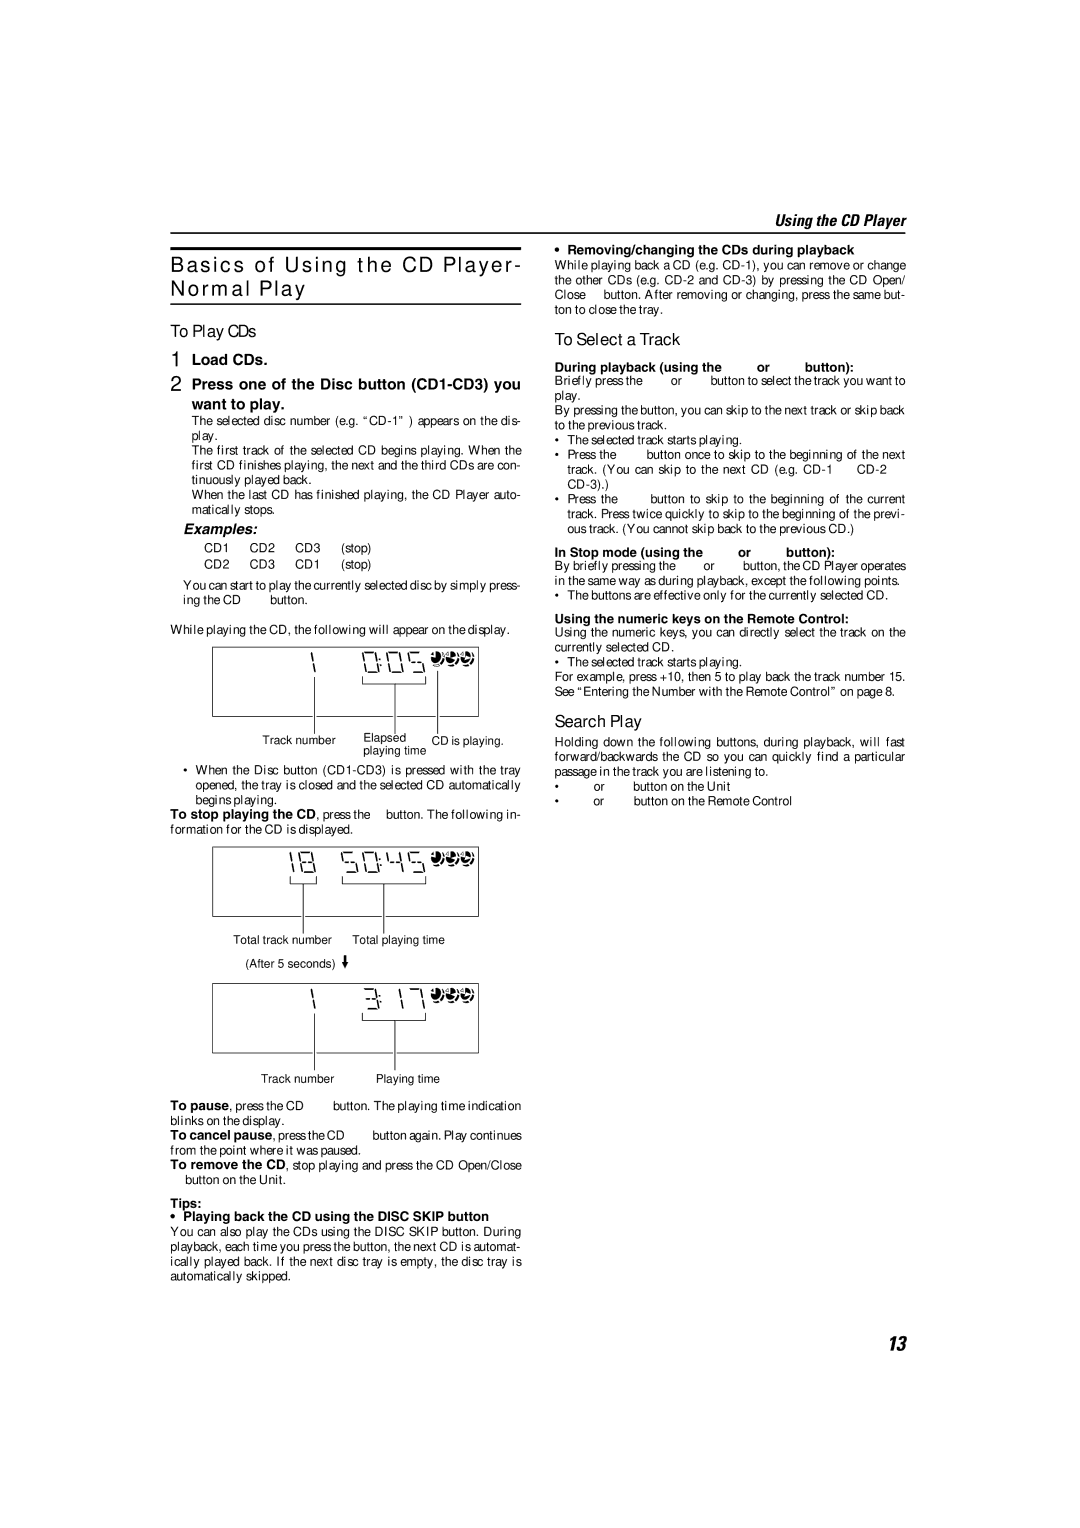
While playing the CD, the following will appear on the display.

1 2 3


Track number

Elapsed

CD is playing.


playing time


When the Disc button (CD1-CD3) is pressed with the tray opened, the tray is closed and the selected CD automatically begins playing.

To stop playing the CD, press the 7 button. The following in- formation for the CD is displayed.

1 2 3

Total track number

Total playing time

(After 5 seconds)


1 2 3

Track number

Playing time

To pause, press the CD 6 button. The playing time indication blinks on the display.

To cancel pause, press the CD 6button again. Play continues from the point where it was paused.

To remove the CD, stop playing and press the CD Open/Close

0button on the Unit.

Tips:

Playing back the CD using the DISC SKIP button

You can also play the CDs using the DISC SKIP button. During playback, each time you press the button, the next CD is automat- ically played back. If the next disc tray is empty, the disc tray is automatically skipped.

Removing/changing the CDs during playback

While playing back a CD (e.g. CD-1), you can remove or change the other CDs (e.g. CD-2 and CD-3) by pressing the CD Open/ Close 0 button. After removing or changing, press the same but- ton to close the tray.

To Select a Track

During playback (using the 4or ¢button):

Briefly press the 4or ¢button to select the track you want to play.

By pressing the button, you can skip to the next track or skip back to the previous track.

The selected track starts playing.

Press the ¢ button once to skip to the beginning of the next track. (You can skip to the next CD (e.g. CD-1 = CD-2 = CD-3).)

Press the 4 button to skip to the beginning of the current track. Press twice quickly to skip to the beginning of the previ- ous track. (You cannot skip back to the previous CD.)

In Stop mode (using the 4or ¢button):

By briefly pressing the 4or ¢button, the CD Player operates in the same way as during playback, except the following points.

The buttons are effective only for the currently selected CD.

Using the numeric keys on the Remote Control:

Using the numeric keys, you can directly select the track on the currently selected CD.

The selected track starts playing.

For example, press +10, then 5 to play back the track number 15. See “Entering the Number with the Remote Control” on page 8.

Search Play

Holding down the following buttons, during playback, will fast forward/backwards the CD so you can quickly find a particular passage in the track you are listening to.

22 or ¡ button on the Unit

4 or ¢ button on the Remote Control

13

Page 15
Image 15
JVC MX-K10 manual Basics of Using the CD Player- Normal Play, To Play CDs, To Select a Track, Search Play

MX-K10 specifications

The JVC MX-K10 is a compact yet powerful home audio system that combines modern technology with a sleek design. Released in the early 2000s, the MX-K10 has remained popular among audiophiles and casual listeners alike for its impressive performance and versatility.

One of the standout features of the JVC MX-K10 is its dual cassette decks, which allow users to play and record tapes with ease. This feature appeals to nostalgic consumers who still enjoy physical media and want to preserve their cassette collections. The unit includes a high-speed dubbing function, enabling users to copy their favorite cassettes quickly, without compromising sound quality.

In addition to the cassette decks, the MX-K10 also supports CD playback, accommodating the transition from analog to digital media. The system can play various CD formats, including audio CDs and CD-R/RW. The inclusion of a programmable memory feature allows users to create custom playlists, making it convenient to listen to favorite tracks without interruptions.

The audio output is powered by an impressive integrated amplifier that delivers robust sound quality. With a peak power output of up to 110 watts, the MX-K10 offers dynamic audio performance, ensuring that users experience rich bass and clear treble across a range of music genres. The system features a 3-band equalizer, providing listeners with the ability to fine-tune their audio experience according to their preferences.

Connectivity is another strong point of the JVC MX-K10. It offers multiple input options, including auxiliary inputs, which allows users to connect external devices such as smartphones and tablets. The built-in FM/AM tuner provides access to radio stations, broadening the listening options available to users.

The design of the MX-K10 is both stylish and functional. The compact unit fits easily into any room layout, while its clean lines and modern aesthetics make it an attractive addition to home decor. The front-facing display is easy to read, providing essential information at a glance, including track number and radio frequency.

Overall, the JVC MX-K10 is a versatile and reliable audio system, offering an array of features that cater to both modern and classic media formats. Its enduring popularity speaks to its quality and performance, making it a notable choice for anyone seeking an impressive home audio experience.