
RX-558RBK specifications
The JVC RX-558RBK is a versatile and feature-rich audio receiver that caters to home theater enthusiasts and casual listeners alike. This receiver is designed to deliver impressive audio performance while providing a wide range of connectivity options and user-friendly features.One of the standout characteristics of the JVC RX-558RBK is its power output, which can produce up to 100 watts per channel. This ample power ensures that your audio experiences, whether from movies, music, or gaming, are immersive and filled with vibrant sound. The receiver is equipped with a robust amplifier that offers clear and dynamic audio reproduction across various frequencies.
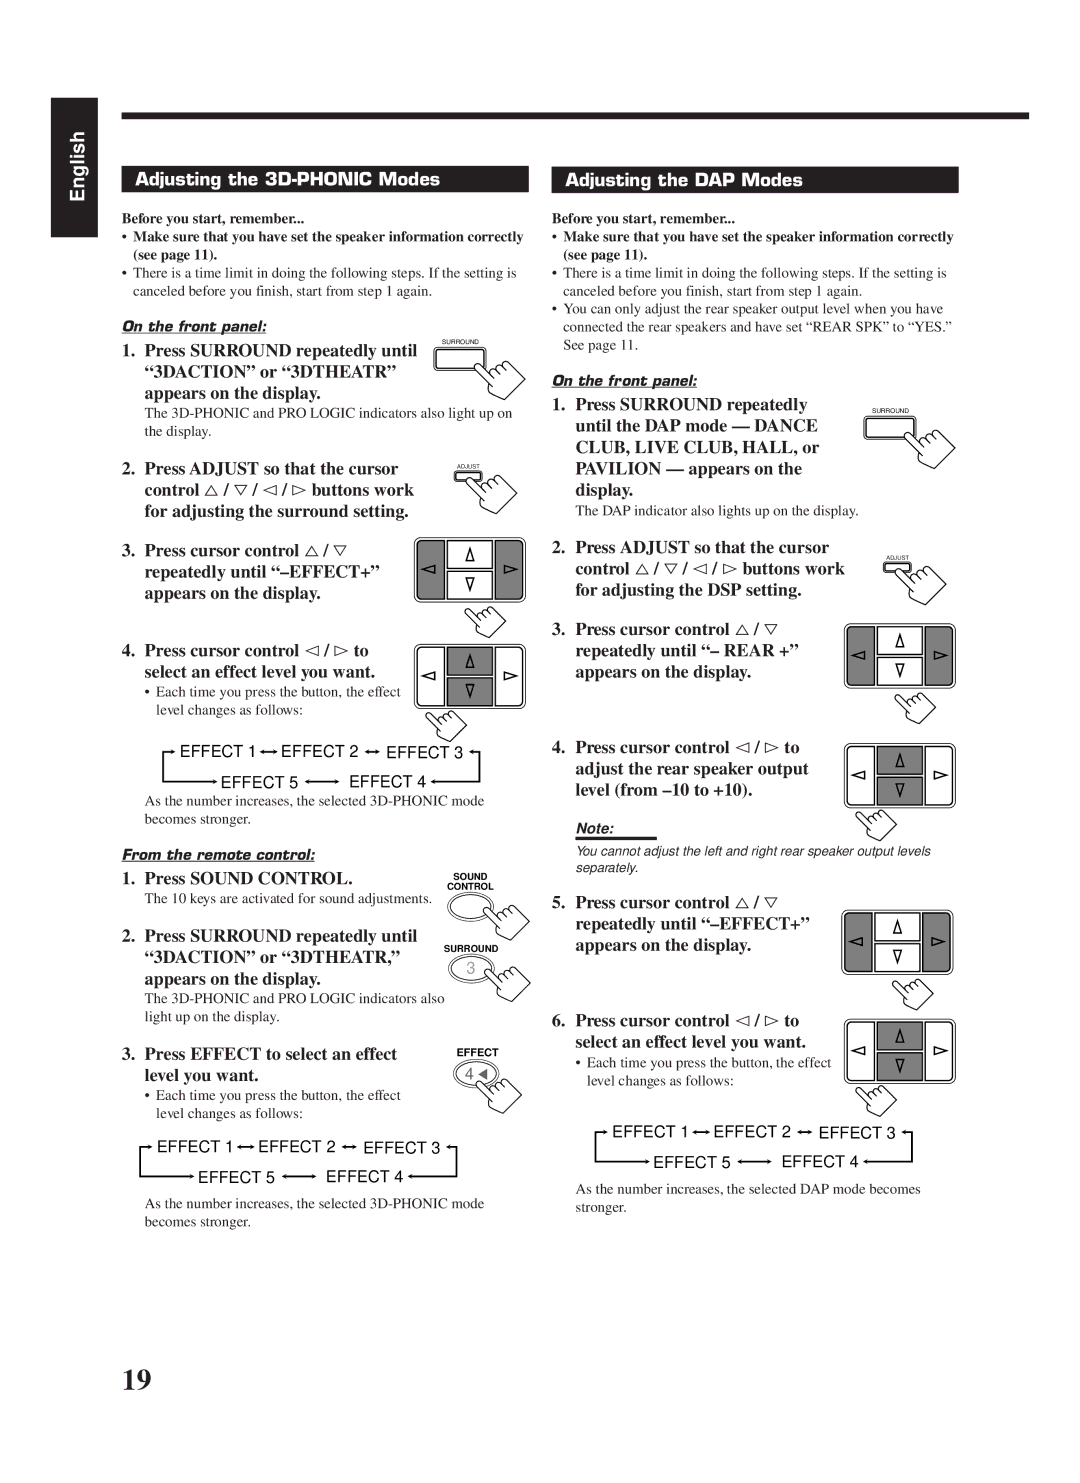
The RX-558RBK features multiple audio decoding technologies, including Dolby Digital and DTS, which allow for an enhanced surround sound experience. This makes it an excellent choice for creating a stunning home theater setup. The receiver supports various audio formats, providing flexibility for users who enjoy diverse content.
Connectivity options are abundant with the RX-558RBK. It comes with multiple HDMI inputs, allowing users to connect their Blu-ray players, gaming consoles, and streaming devices seamlessly. The HDMI ARC (Audio Return Channel) capability simplifies connectivity by allowing audio signals to be sent back to the receiver from a TV, eliminating the need for additional cables.
Another notable feature of the JVC RX-558RBK is its built-in FM/AM tuner, which enables users to enjoy their favorite radio stations with ease. The receiver includes digital presets for convenient access to preferred channels. Additionally, for those who prefer modern streaming options, the RX-558RBK is compatible with Bluetooth technology, allowing for wireless audio streaming from smartphones, tablets, and other devices.
User convenience is prioritized with the RX-558RBK, featuring an intuitive interface and a well-designed remote control. The on-screen display makes setup and navigation straightforward, minimizing the learning curve for new users.
In terms of build quality, the JVC RX-558RBK boasts a sleek design with a clean aesthetic that complements any home decor. It also incorporates protective circuit designs to ensure longevity and reliability.
In summary, the JVC RX-558RBK is a powerful, feature-packed audio receiver that combines advanced technologies, robust performance, and ease of use. Whether you are looking to enhance your movie watching or elevate your music listening experience, the RX-558RBK stands out as a solid option in the audio receiver market.