Basic Settings

Some of the following settings are required after connecting and positioning your speakers in your listening room, while others will make operations easier.

Changing the Source Name

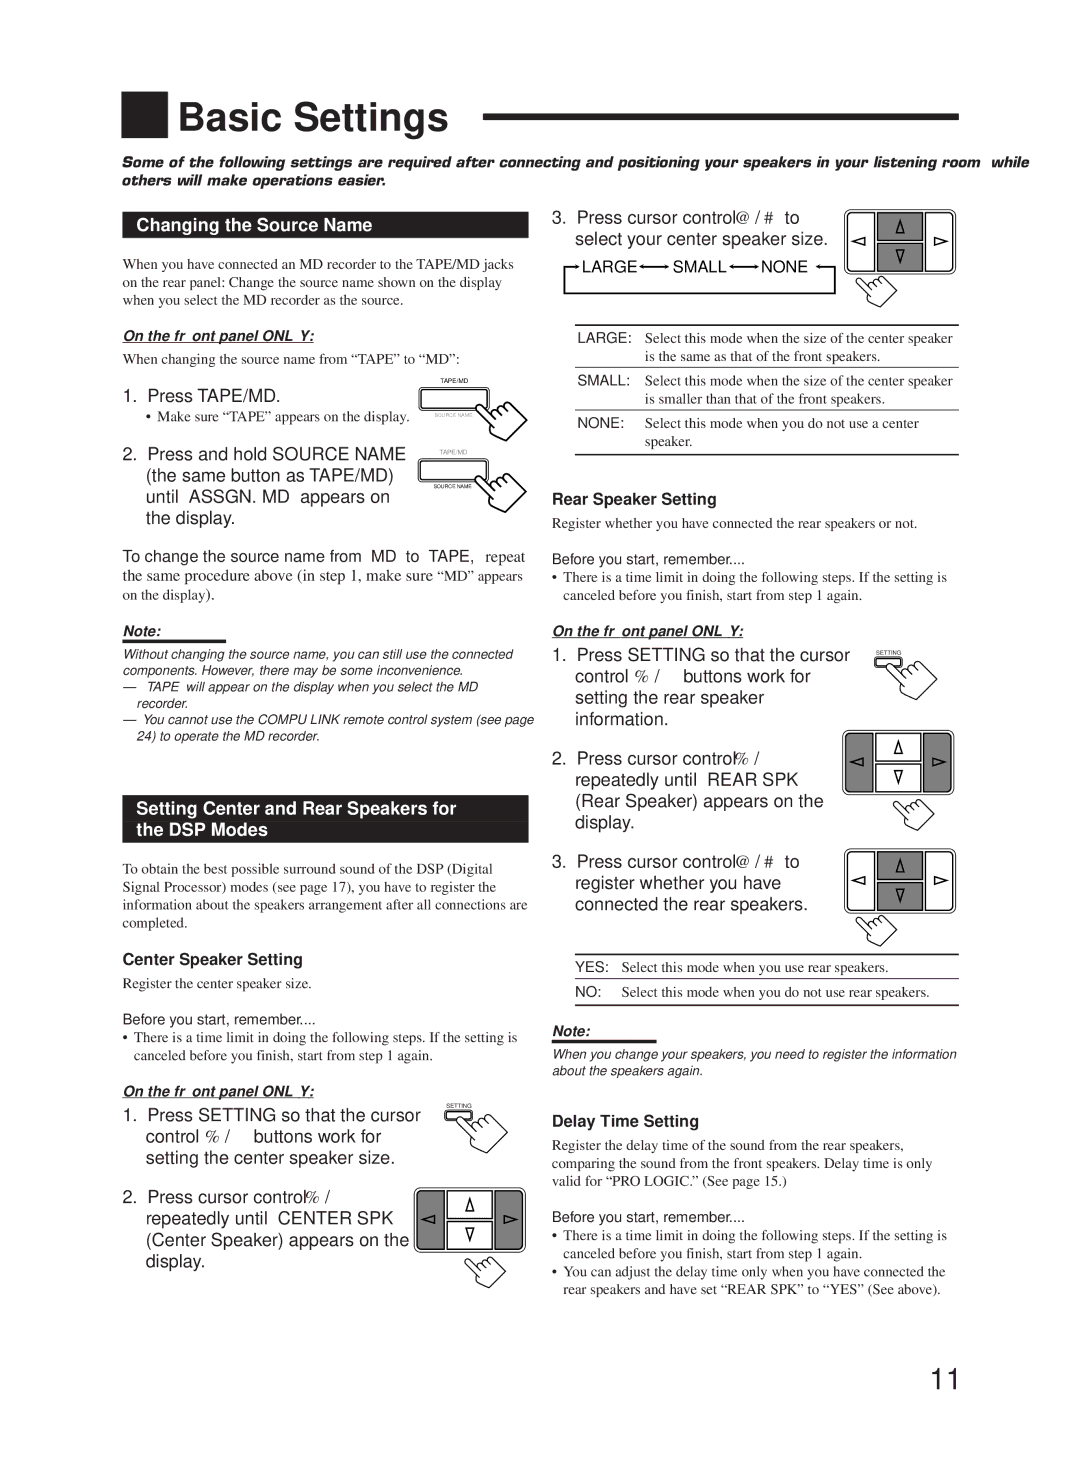
When you have connected an MD recorder to the TAPE/MD jacks on the rear panel: Change the source name shown on the display when you select the MD recorder as the source.

On the front panel ONLY:

When changing the source name from “TAPE” to “MD”:

3. Press cursor control @/ #to select your center speaker size.

LARGE SMALLNONE

LARGE: Select this mode when the size of the center speaker is the same as that of the front speakers.

1.Press TAPE/MD.

• Make sure “TAPE” appears on the display.

2.Press and hold SOURCE NAME (the same button as TAPE/MD) until “ASSGN. MD” appears on the display.

TAPE/MD

SOURCE NAME

TAPE/MD

SOURCE NAME

SMALL: Select this mode when the size of the center speaker

is smaller than that of the front speakers.

NONE: Select this mode when you do not use a center speaker.

Rear Speaker Setting

Register whether you have connected the rear speakers or not.

To change the source name from “MD” to “TAPE,” repeat

the same procedure above (in step 1, make sure “MD” appears on the display).

Note:

Without changing the source name, you can still use the connected components. However, there may be some inconvenience.

“TAPE” will appear on the display when you select the MD recorder.

You cannot use the COMPU LINK remote control system (see page 24) to operate the MD recorder.

Setting Center and Rear Speakers for

the DSP Modes

To obtain the best possible surround sound of the DSP (Digital Signal Processor) modes (see page 17), you have to register the information about the speakers arrangement after all connections are completed.

Center Speaker Setting

Register the center speaker size.

Before you start, remember....

There is a time limit in doing the following steps. If the setting is canceled before you finish, start from step 1 again.

Before you start, remember....

There is a time limit in doing the following steps. If the setting is canceled before you finish, start from step 1 again.

On the front panel ONLY:

1. Press SETTING so that the cursor

SETTING

control % / Þbuttons work for


setting the rear speaker


information.


2. Press cursor control %/ Þ repeatedly until “REAR SPK” (Rear Speaker) appears on the display.

3. Press cursor control @/ #to register whether you have connected the rear speakers.

YES: Select this mode when you use rear speakers.

NO: Select this mode when you do not use rear speakers.

Note:

When you change your speakers, you need to register the information

about the speakers again.

On the front panel ONLY:

SETTING

1. Press SETTING so that the cursor control %/ Þbuttons work for setting the center speaker size.

2. Press cursor control % / Þ repeatedly until “CENTER SPK” (Center Speaker) appears on the display.

Delay Time Setting

Register the delay time of the sound from the rear speakers, comparing the sound from the front speakers. Delay time is only valid for “PRO LOGIC.” (See page 15.)

Before you start, remember....

There is a time limit in doing the following steps. If the setting is canceled before you finish, start from step 1 again.

You can adjust the delay time only when you have connected the rear speakers and have set “REAR SPK” to “YES” (See above).

11

Page 13
Image 13
JVC RX-668VBK manual Changing the Source Name, Press TAPE/MD, Setting Center and Rear Speakers for DSP Modes

RX-668VBK specifications

The JVC RX-668VBK is a versatile and robust A/V receiver designed to meet the needs of home theatre enthusiasts. With its blend of advanced features and impressive sound quality, this receiver is suitable for both casual viewers and audiophiles alike. It is packed with technologies that enhance listening experiences, making it a popular choice among consumers.

One of the standout features of the RX-668VBK is its powerful amplification capabilities. It delivers 100 watts per channel into 8 ohms, providing enough power to drive a variety of speaker setups. This level of power ensures rich, dynamic sound reproduction suitable for everything from music playback to movie watching. The receiver supports surround sound formats, including Dolby Digital and DTS, allowing for an immersive audio environment that draws viewers deeper into their favorite films.

In terms of connectivity, the JVC RX-668VBK boasts an array of inputs and outputs. It includes multiple HDMI ports, facilitating easy connections to modern devices such as Blu-ray players, gaming consoles, and streaming devices. The receiver supports 4K pass-through, ensuring that it can keep up with the latest video formats and resolutions, thus future-proofing your home entertainment system.

Furthermore, the RX-668VBK integrates various audio technologies that enhance sound quality. The built-in DSP (Digital Signal Processing) allows users to select different sound modes tailored for movies, music, or gaming, providing flexibility for different types of content. The receiver also features a comprehensive equalizer that enables users to optimize sound profiles based on personal preferences and room acoustics.

One notable aspect of the RX-668VBK is its user-friendly interface. The on-screen display and intuitive remote control make it easy to navigate through settings and options, ensuring a seamless experience for users of all technical levels. Additionally, the receiver is equipped with a sleep timer and programmable memory functions, enhancing convenience during use.

Overall, the JVC RX-668VBK is a comprehensive A/V receiver that combines robust power, advanced audio technologies, and versatile connectivity options. Its excellent sound quality and user-friendly features make it an attractive option for both home cinema setups and music lovers, ensuring that it meets the demands of today's audio-visual landscape. With the RX-668VBK, JVC continues to establish its reputation as a reliable brand in the home entertainment market.