How to Mount
The following describes how to operate the front panel of the
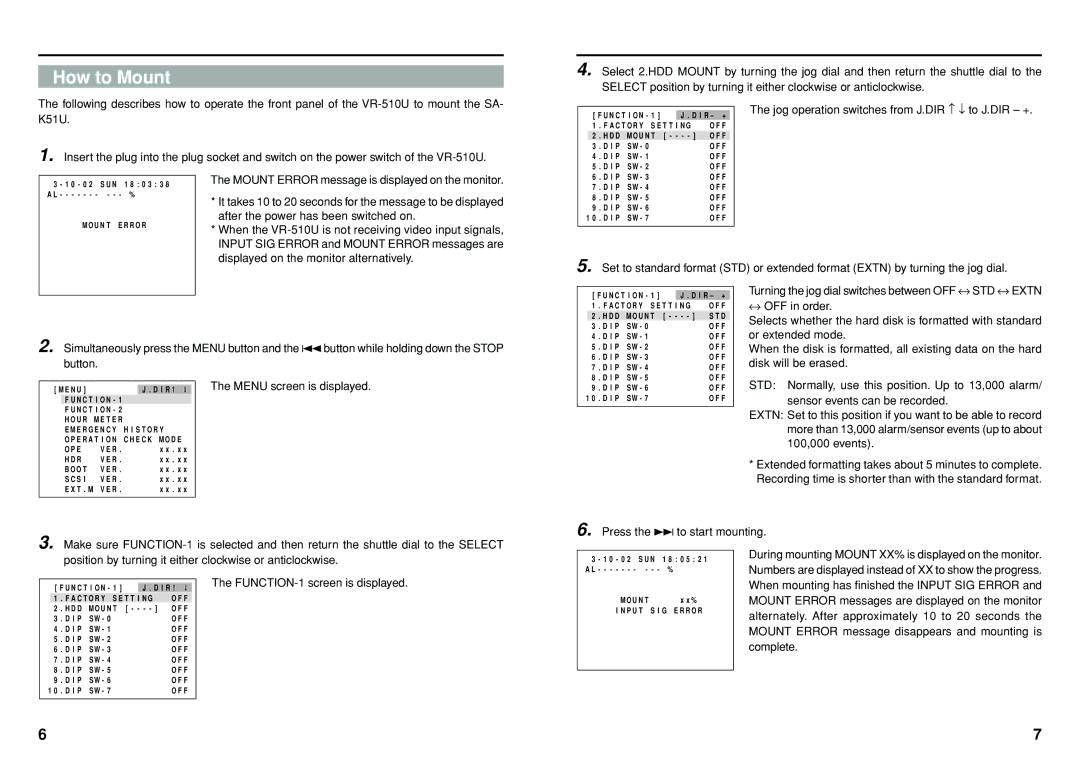
1. Insert the plug into the plug socket and switch on the power switch of the
4. Select 2.HDD MOUNT by turning the jog dial and then return the shuttle dial to the SELECT position by turning it either clockwise or anticlockwise.
|
|
| The jog operation switches from J.DIR ↑ ↓ to J.DIR – +. | |
[ F U N C T I O N - 1 ] | J . D I R – + | |||
| ||||
1 . F A C T O R Y S E T T I N G | O F F |
| ||
2 . H D D M O U N T [ - - - - ] | O F F |
| ||
3 . D I P S W - 0 |
| O F F |
| |
4 . D I P S W - 1 |
| O F F |
| |
5 . D I P S W - 2 |
| O F F |
| |
3 - 1 0 - 0 2 S U N 1 8 : 0 3 : 3 8 A L - - - - - - - - - - %
M O U N T E R R O R
The MOUNT ERROR message is displayed on the monitor.
*It takes 10 to 20 seconds for the message to be displayed after the power has been switched on.
*When the
6 . D I P S W - 3 | O F F | |
7 . D I P S W - 4 | O F F | |
8 . D I P S W - 5 | O F F | |
9 . D I P | S W - 6 | O F F |
1 0 . D I P | S W - 7 | O F F |
5. Set to standard format (STD) or extended format (EXTN) by turning the jog dial.
[ F U N C T I O N - 1 ] | J . D I R – + | ||
1 . F A C T O R Y S E T T I N G | O F F | ||
2 . H D D M O U N T [ - - - - ] | S T D | ||
3 . D I P | S W - 0 |
| O F F |
4 . D I P | S W - 1 |
| O F F |
Turning the jog dial switches between OFF ↔ STD ↔ EXTN
↔OFF in order.
Selects whether the hard disk is formatted with standard or extended mode.
2. Simultaneously press the MENU button and the 4button while holding down the STOP button.
5 . D I P S W - 2 | O F F | |
6 . D I P S W - 3 | O F F | |
7 . D I P | S W - 4 | O F F |
8 . D I P | S W - 5 | O F F |
When the disk is formatted, all existing data on the hard disk will be erased.
[ M E N U ] |
| J . D I R |
F U N C T I O N - 1 |
| |
F U N C T I O N - 2 |
| |
H O U R | M E T E R |
|
E M E R G E N C Y H I S T O R Y | ||
O P E R A T I O N C H E C K M O D E | ||
O P E | V E R . | x x . x x |
H D R | V E R . | x x . x x |
B O O T | V E R . | x x . x x |
S C S I | V E R . | x x . x x |
E X T . M V E R . | x x . x x | |
The MENU screen is displayed.
9 . D I P | S W - 6 | O F F |
1 0 . D I P | S W - 7 | O F F |
STD: Normally, use this position. Up to 13,000 alarm/ sensor events can be recorded.
EXTN: Set to this position if you want to be able to record more than 13,000 alarm/sensor events (up to about 100,000 events).
*Extended formatting takes about 5 minutes to complete. Recording time is shorter than with the standard format.
6. Press the ¢to start mounting.
3. Make sure
3 - 1 0 - 0 2 S U N 1 8 : 0 5 : 2 1
During mounting MOUNT XX% is displayed on the monitor.
[ F U N C T I O N - 1 ] | J . D I R |
|
1 . F A C T O R Y S E T T I N G | O F F | |
2 . H D D M O U N T [ - - - - ] | O F F | |
3 . D I P S W - 0 |
| O F F |
4 . D I P S W - 1 |
| O F F |
5 . D I P S W - 2 |
| O F F |
6 . D I P S W - 3 |
| O F F |
7 . D I P S W - 4 |
| O F F |
8 . D I P S W - 5 |
| O F F |
9 . D I P S W - 6 |
| O F F |
1 0 . D I P S W - 7 |
| O F F |
|
|
|
The
A L - - - - - - - - - - | % |
M O U N T | x x % |
I N P U T S I G E R R O R
Numbers are displayed instead of XX to show the progress. When mounting has finished the INPUT SIG ERROR and MOUNT ERROR messages are displayed on the monitor alternately. After approximately 10 to 20 seconds the MOUNT ERROR message disappears and mounting is complete.
6 | 7 |