Controls and Features
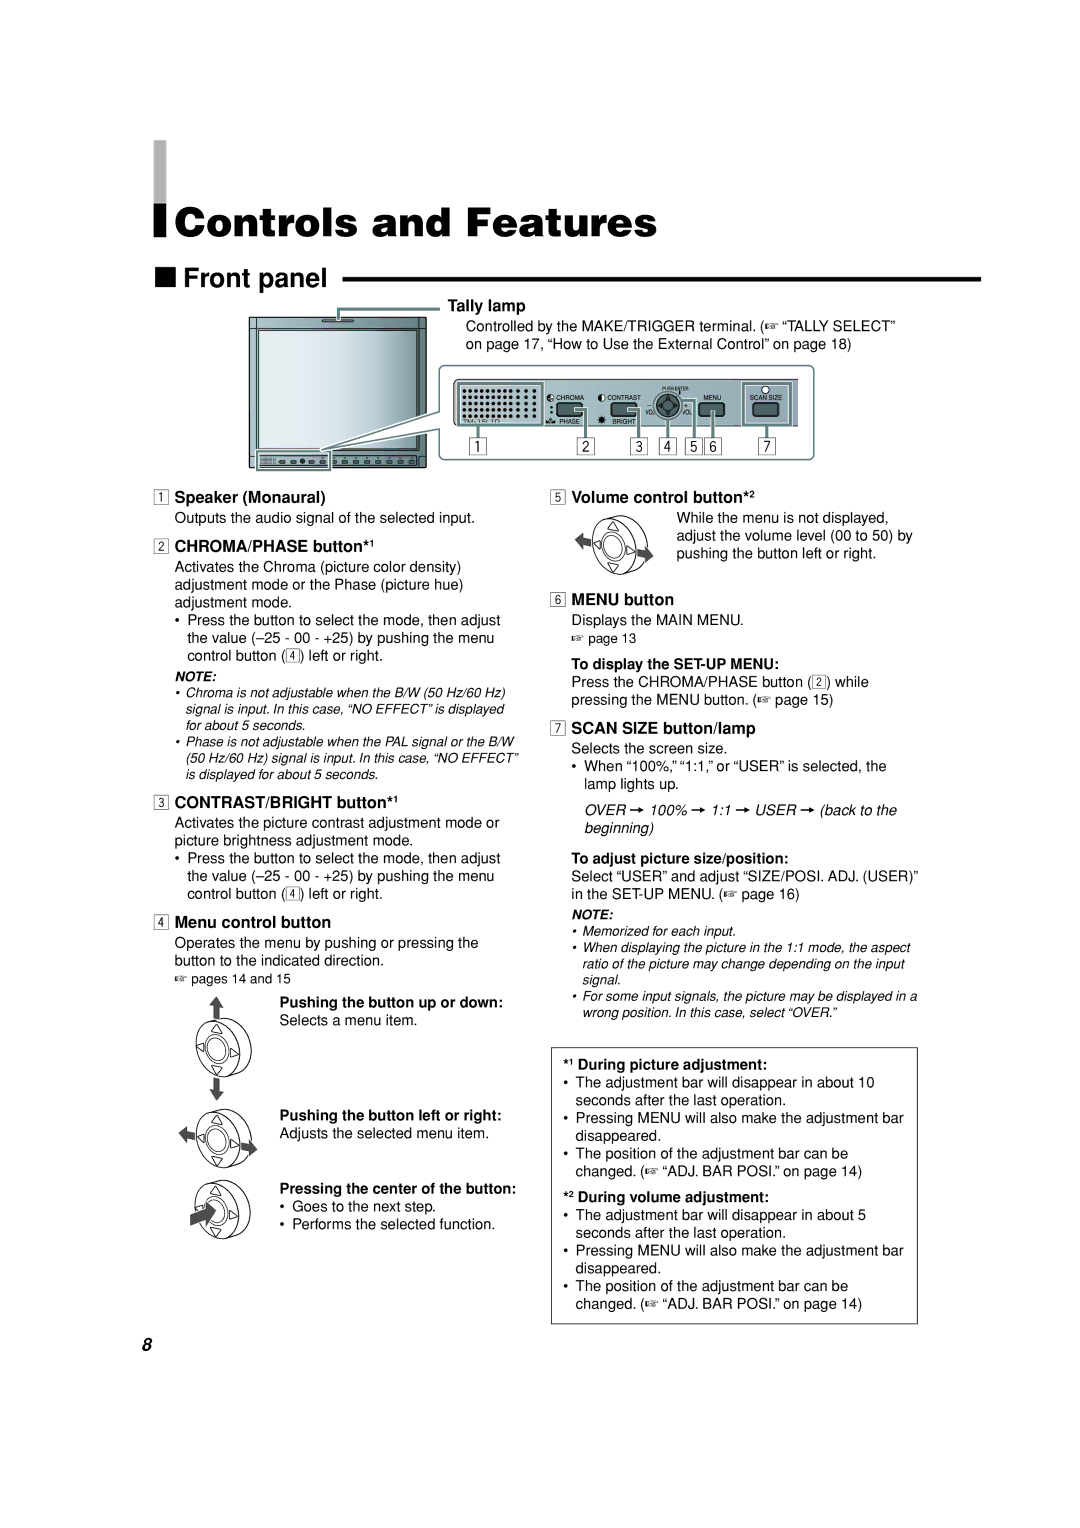
7Front panel
Tally lamp
Controlled by the MAKE/TRIGGER terminal. (☞ “TALLY SELECT” on page 17, “How to Use the External Control” on page 18)
1 | 2 |
3 4 56 | 7 |
1Speaker (Monaural)
Outputs the audio signal of the selected input.
2CHROMA/PHASE button*1
Activates the Chroma (picture color density) adjustment mode or the Phase (picture hue) adjustment mode.
•Press the button to select the mode, then adjust the value
NOTE:
•Chroma is not adjustable when the B/W (50 Hz/60 Hz) signal is input. In this case, “NO EFFECT” is displayed for about 5 seconds.
•Phase is not adjustable when the PAL signal or the B/W (50 Hz/60 Hz) signal is input. In this case, “NO EFFECT” is displayed for about 5 seconds.
5Volume control button*2
While the menu is not displayed, adjust the volume level (00 to 50) by pushing the button left or right.
6MENU button
Displays the MAIN MENU.
☞ page 13
To display the
Press the CHROMA/PHASE button (2) while pressing the MENU button. (☞ page 15)
7SCAN SIZE button/lamp
Selects the screen size.
•When “100%,” “1:1,” or “USER” is selected, the lamp lights up.
3CONTRAST/BRIGHT button*1
Activates the picture contrast adjustment mode or picture brightness adjustment mode.
•Press the button to select the mode, then adjust the value
4Menu control button
Operates the menu by pushing or pressing the button to the indicated direction.
☞ pages 14 and 15
Pushing the button up or down:
Selects a menu item.
Pushing the button left or right:
Adjusts the selected menu item.
Pressing the center of the button:
• Goes to the next step.
• Performs the selected function.
OVER = 100% = 1:1 = USER = (back to the beginning)
To adjust picture size/position:
Select “USER” and adjust “SIZE/POSI. ADJ. (USER)” in the
NOTE:
•Memorized for each input.
•When displaying the picture in the 1:1 mode, the aspect ratio of the picture may change depending on the input signal.
•For some input signals, the picture may be displayed in a wrong position. In this case, select “OVER.”
*1 During picture adjustment:
•The adjustment bar will disappear in about 10 seconds after the last operation.
•Pressing MENU will also make the adjustment bar disappeared.
•The position of the adjustment bar can be changed. (☞ “ADJ. BAR POSI.” on page 14)
*2 During volume adjustment:
•The adjustment bar will disappear in about 5 seconds after the last operation.
•Pressing MENU will also make the adjustment bar disappeared.
•The position of the adjustment bar can be changed. (☞ “ADJ. BAR POSI.” on page 14)
8