BASIC OPERATIONS
MONITORING THE PICTURE
| 3 |
| 2 |
|
| 1 |
– | + |
|
|
|
|
|
VOLUME(CHANNEL) | TV | VIDEO A VIDEO B MENU | BLUE | SIZE | POWER | |
|
|
|
| CHECK | SELECT |
|
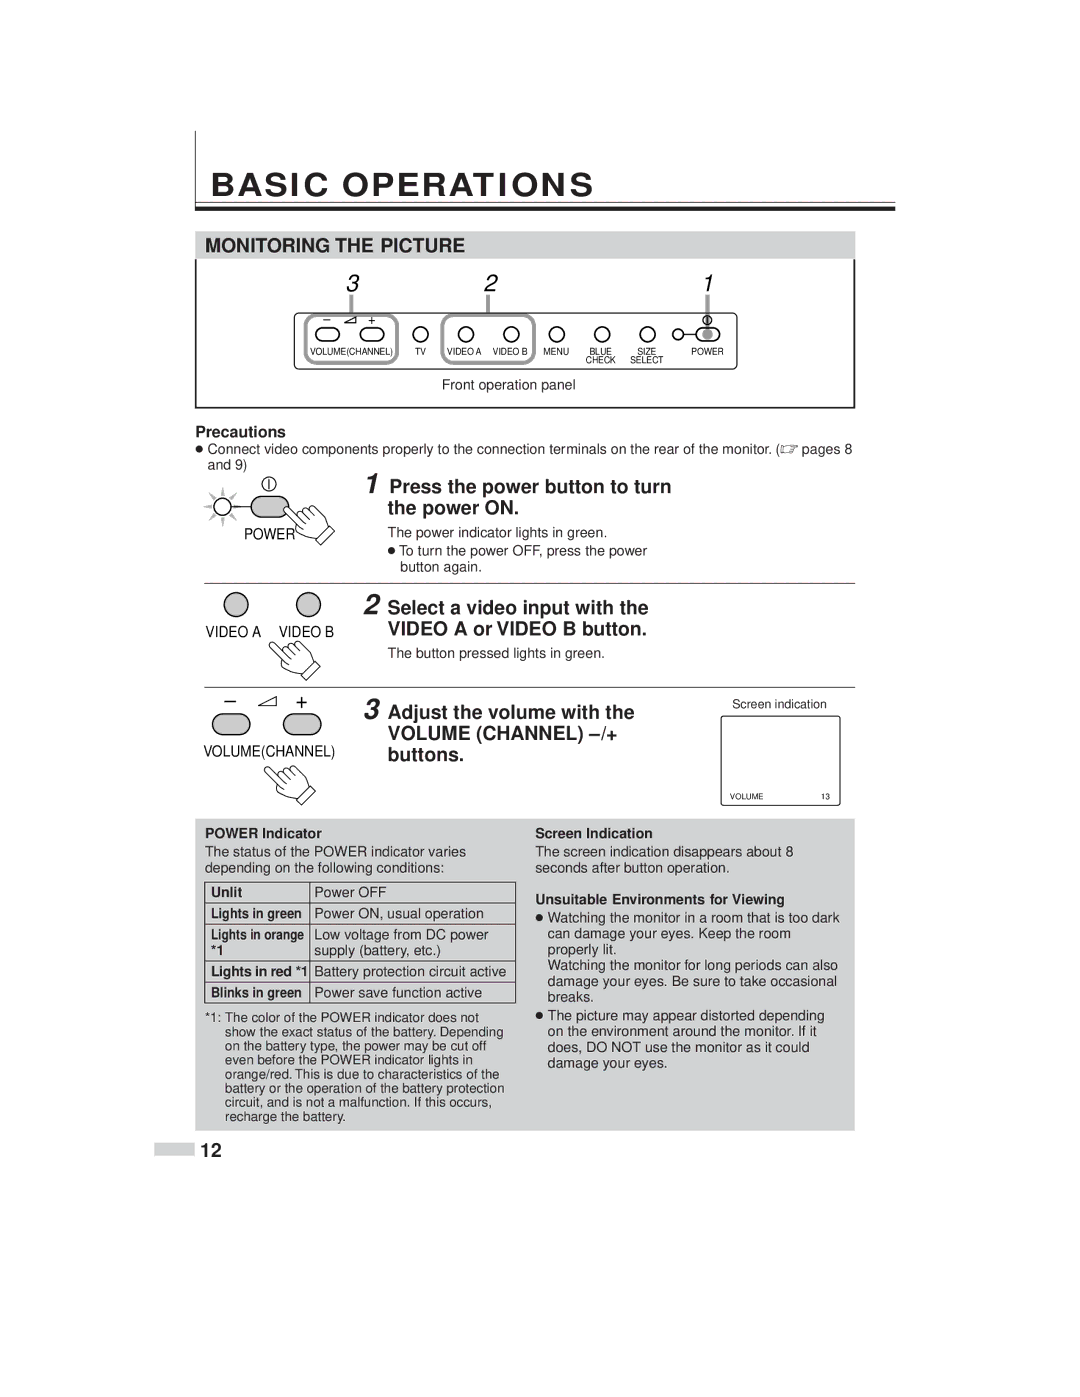
Front operation panel
Precautions
Connect video components properly to the connection terminals on the rear of the monitor. ( pages 8 and 9)
| 1 Press the power button to turn |
| the power ON. |
POWER | The power indicator lights in green. |
| To turn the power OFF, press the power |
| button again. |
| 2 Select a video input with the |
VIDEO A VIDEO B | VIDEO A or VIDEO B button. |
The button pressed lights in green.
– | + | 3 Adjust the volume with the |
|
| VOLUME (CHANNEL) |
VOLUME(CHANNEL) | buttons. | |
Screen indication
VOLUME13
POWER Indicator
The status of the POWER indicator varies depending on the following conditions:
Unlit | Power OFF |
Lights in green | Power ON, usual operation |
Lights in orange | Low voltage from DC power |
*1 | supply (battery, etc.) |
Lights in red *1 | Battery protection circuit active |
|
|
Blinks in green | Power save function active |
|
|
*1: The color of the POWER indicator does not show the exact status of the battery. Depending on the battery type, the power may be cut off even before the POWER indicator lights in orange/red. This is due to characteristics of the battery or the operation of the battery protection circuit, and is not a malfunction. If this occurs, recharge the battery.
Screen Indication
The screen indication disappears about 8 seconds after button operation.
Unsuitable Environments for Viewing
Watching the monitor in a room that is too dark can damage your eyes. Keep the room properly lit.
Watching the monitor for long periods can also damage your eyes. Be sure to take occasional breaks.
The picture may appear distorted depending on the environment around the monitor. If it does, DO NOT use the monitor as it could damage your eyes.
![]() 12
12
