UX-V9MD specifications
The JVC UX-V9MD is a compact home audio system that combines advanced technology with user-friendly features, delivering an impressive sound experience in a small package. Launched in the late 1990s, this mini system quickly gained popularity due to its versatility and strong performance.One of the standout features of the UX-V9MD is its MD (MiniDisc) player, which was revolutionary at the time. This technology allowed users to record, erase, and re-record audio on MiniDiscs, providing a level of flexibility that cassette tapes could not offer. This player ensured excellent sound quality and fidelity, making it an appealing choice for audiophiles. Additionally, the system includes a CD player that supports various formats, giving users ample options for playback.
The UX-V9MD boasts a powerful amplifier that enhances the audio output, producing a rich and dynamic soundstage. With its 2-way speaker system, the unit delivers clear highs, balanced mids, and robust lows, creating an immersive listening experience. The speakers are designed to minimize distortion, allowing for crystal-clear music playback across a range of genres.
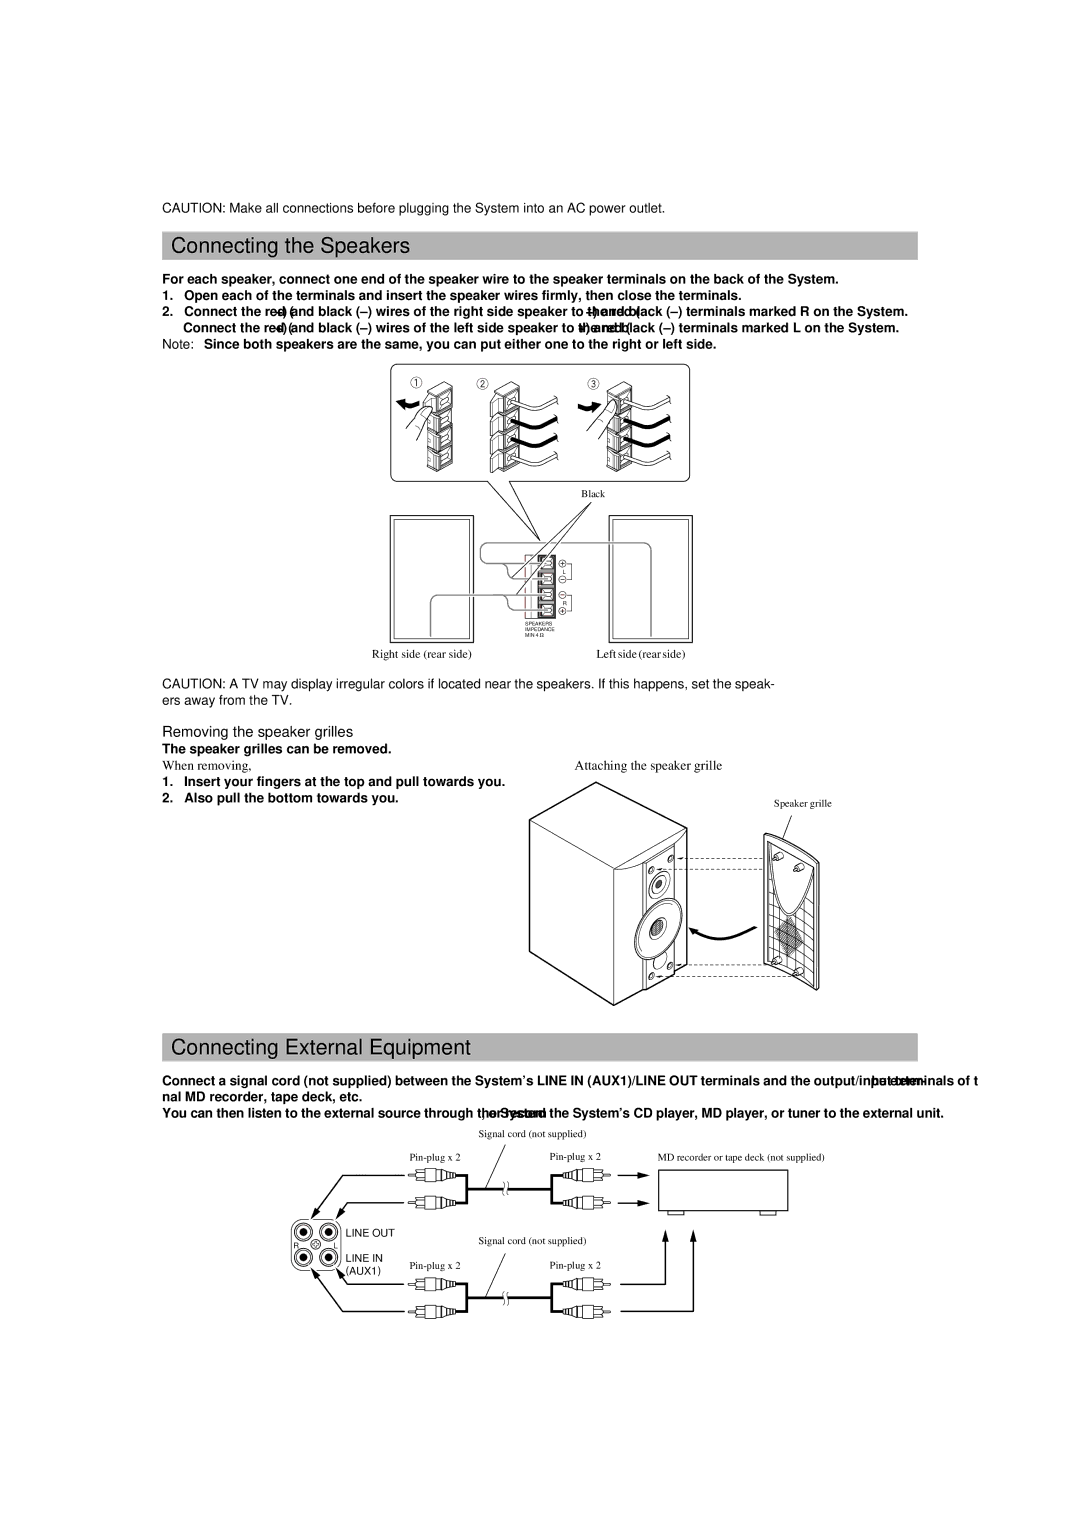
Flexibility is another hallmark of the JVC UX-V9MD. The system offers a variety of connectivity options, including inputs for external devices, allowing users to connect their CD players, cassette decks, or even computers. This feature broadens the system's usability and makes it a central hub for home entertainment.
The UX-V9MD also incorporates an FM/AM tuner, enabling users to enjoy their favorite radio stations with the same clarity as their recorded media. The digital tuning system makes it easy to find and save stations, delivering convenience and enjoyment in a compact format.
Furthermore, the system's design is both stylish and functional, featuring a sleek and modern look that complements any decor. The front-loading mechanism for CDs and MiniDiscs makes it easy to access your media, while the intuitive interface allows for straightforward operation.
In summary, the JVC UX-V9MD is a remarkable mini audio system that combines a MiniDisc player, CD capabilities, a powerful amplifier, and flexible connectivity options, all in a compact design. Its ability to deliver high-quality sound while offering various media playback choices makes it an excellent option for music lovers looking for a reliable and versatile home audio solution.

