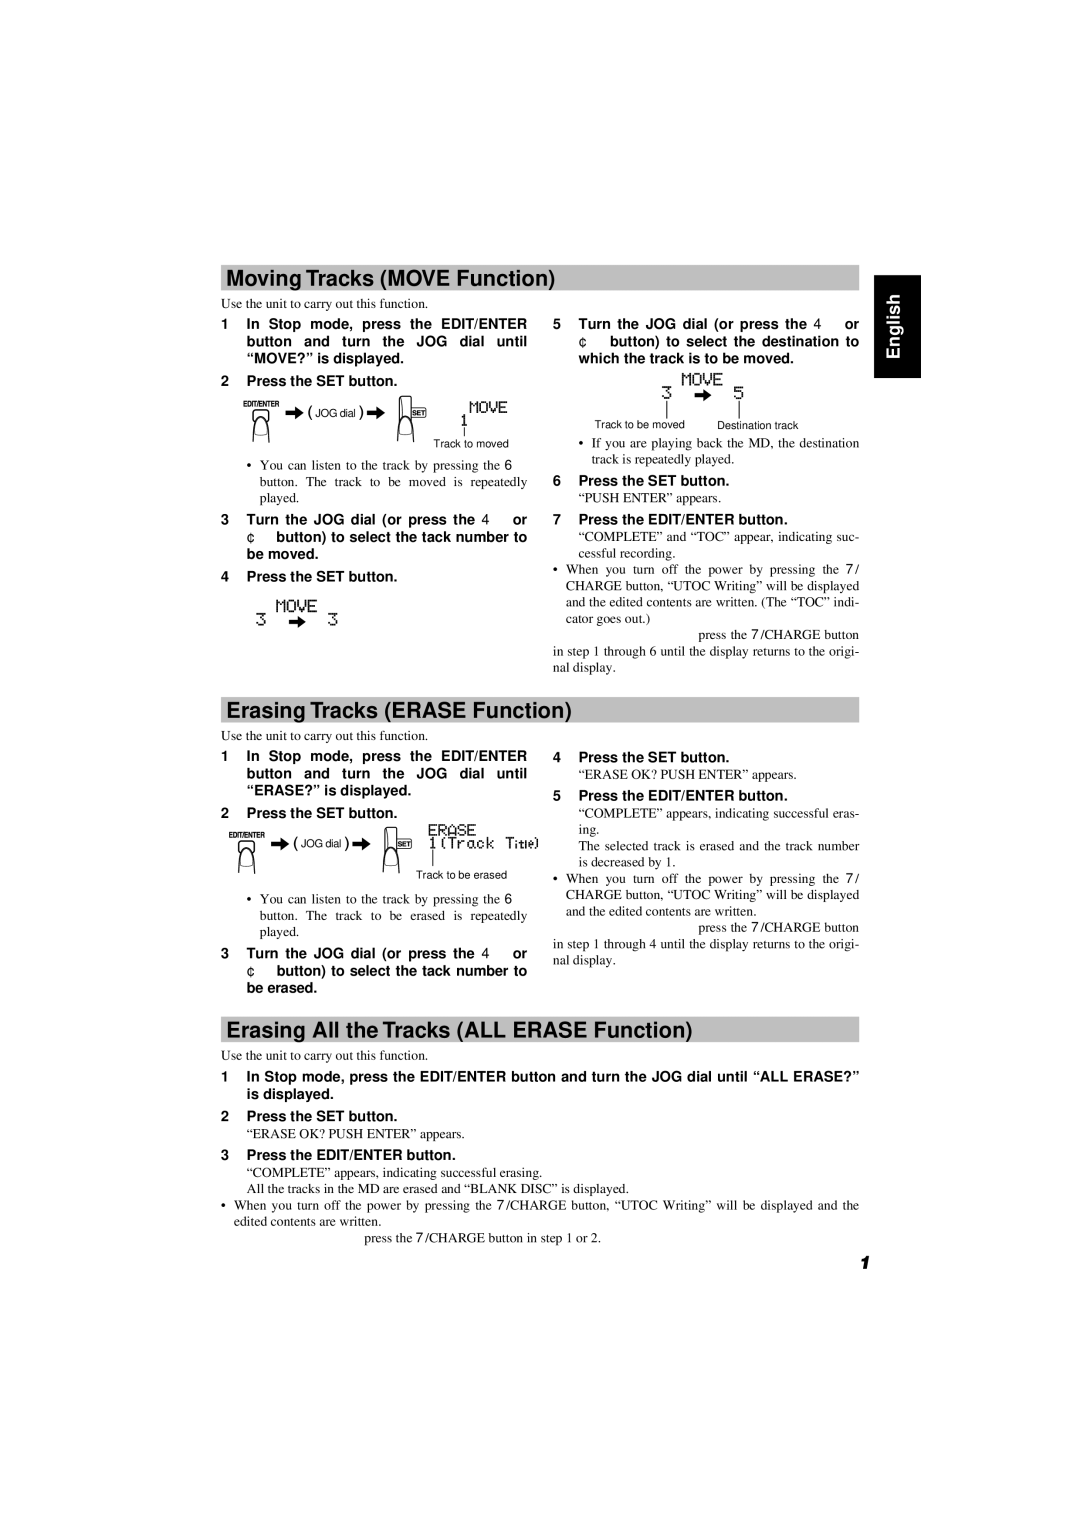
Moving Tracks (MOVE Function)

Use the unit to carry out this function.

1In Stop mode, press the EDIT/ENTER button and turn the JOG dial until “MOVE?” is displayed.

2Press the SET button.

JOG dial

Track to moved

You can listen to the track by pressing the 6 button. The track to be moved is repeatedly played.

3Turn the JOG dial (or press the 4 or ¢ button) to select the tack number to be moved.

4Press the SET button.

5Turn the JOG dial (or press the 4 or ¢ button) to select the destination to which the track is to be moved.

Track to be moved

Destination track

If you are playing back the MD, the destination track is repeatedly played.

6Press the SET button.

“PUSH ENTER” appears.

7Press the EDIT/ENTER button.

“COMPLETE” and “TOC” appear, indicating suc- cessful recording.

When you turn off the power by pressing the 7/ CHARGE button, “UTOC Writing” will be displayed and the edited contents are written. (The “TOC” indi- cator goes out.)

To cancel the operation, press the 7/CHARGE button in step 1 through 6 until the display returns to the origi- nal display.

English

Erasing Tracks (ERASE Function)

Use the unit to carry out this function.

1In Stop mode, press the EDIT/ENTER button and turn the JOG dial until “ERASE?” is displayed.

2Press the SET button.

JOG dial

Track to be erased

You can listen to the track by pressing the 6 button. The track to be erased is repeatedly played.

3Turn the JOG dial (or press the 4 or ¢ button) to select the tack number to be erased.

4Press the SET button.

“ERASE OK? PUSH ENTER” appears.

5Press the EDIT/ENTER button.

“COMPLETE” appears, indicating successful eras- ing.

The selected track is erased and the track number is decreased by 1.

When you turn off the power by pressing the 7/ CHARGE button, “UTOC Writing” will be displayed and the edited contents are written.

To cancel the operation, press the 7/CHARGE button in step 1 through 4 until the display returns to the origi- nal display.

Erasing All the Tracks (ALL ERASE Function)

Use the unit to carry out this function.

1In Stop mode, press the EDIT/ENTER button and turn the JOG dial until “ALL ERASE?” is displayed.

2Press the SET button.

“ERASE OK? PUSH ENTER” appears.

3Press the EDIT/ENTER button.

“COMPLETE” appears, indicating successful erasing.

All the tracks in the MD are erased and “BLANK DISC” is displayed.

When you turn off the power by pressing the 7/CHARGE button, “UTOC Writing” will be displayed and the edited contents are written.

To cancel the operation, press the 7/CHARGE button in step 1 or 2.

10

Page 13
Image 13
JVC XM-R70SL/BK Moving Tracks Move Function, Erasing Tracks Erase Function, Erasing All the Tracks ALL Erase Function

XM-R70SL/BK specifications

The JVC XM-R70SL/BK is a sophisticated and versatile digital media receiver that enhances your in-car audio experience. Designed with the modern driver in mind, this model integrates cutting-edge technology and user-friendly features to deliver exceptional sound quality and functionality.

One of the standout features of the XM-R70SL/BK is its compatibility with a wide range of audio sources. It supports various formats, including MP3, WMA, and AAC, ensuring that you can enjoy your favorite music without limitations. The receiver also includes Bluetooth connectivity, allowing for seamless wireless streaming from smartphones or tablets. This feature enables hands-free calling and audio playback, ensuring that you stay connected and entertained while on the go.

The JVC XM-R70SL/BK boasts a robust 4 x 50 watts peak power output, providing high-quality sound that can fill any car interior. The built-in MOSFET amplifier contributes to clear and powerful audio performance, making it a fantastic choice for music enthusiasts. Additionally, the receiver includes an equalizer with multiple presets, allowing users to tailor the sound profile to their preferences.

Another notable characteristic is the sleek, modern design of the XM-R70SL/BK. The illuminated front panel features a large, easy-to-read LCD display that provides clear visibility of track information, station names, and other settings, even in low-light conditions. The intuitive layout of buttons and controls ensures that users can easily navigate through their playlists and settings without distraction.

In terms of connectivity, the JVC XM-R70SL/BK is equipped with USB ports and an auxiliary input, making it easy to connect various devices. The USB port supports playback from thumb drives, while the auxiliary input allows for connecting external audio sources. Furthermore, this receiver is compatible with smartphone integration features such as Apple CarPlay and Android Auto, expanding its usability for modern drivers.

The XM-R70SL/BK also includes multiple preset stations for AM and FM radio, ensuring quick access to your favorite stations. Overall, the JVC XM-R70SL/BK stands out as a feature-rich, high-performance digital media receiver that marries style with functionality, making it an ideal choice for anyone looking to upgrade their in-car audio system.