6￿￿￿(1*￿ERRN￿￿3DJH￿￿￿￿￿:HGQHVGD\￿￿0D\￿￿￿￿￿￿￿￿￿￿￿￿￿￿￿30

Basic operations

In the following description, the buttons on the remote control unit are mainly used, however, you may use the corresponding buttons on the front panel of the unit if available.

English

Turning on/off the unit

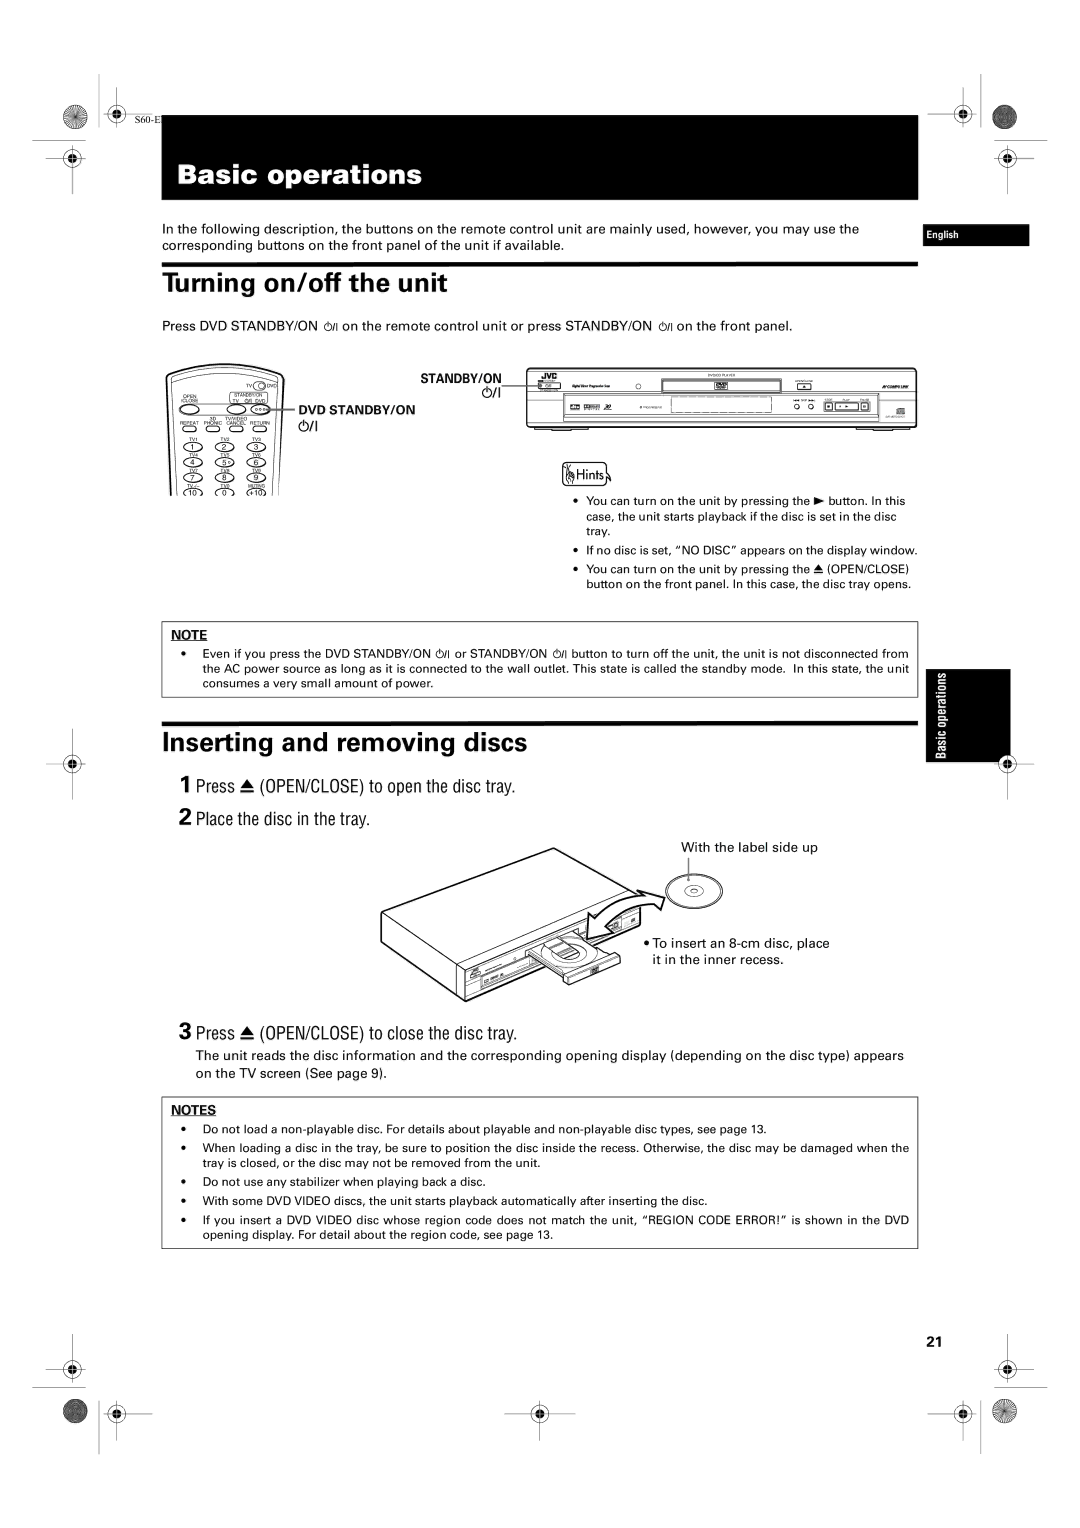
Press DVD STANDBY/ON on the remote control unit or press STANDBY/ON on the front panel.


TV

DVD

OPEN


STANDBY/ON


/CLOSE


TV

DVD


3D

TV/VIDEO


REPEAT

PHONIC

CANCEL

RETURN

TV1

TV2

TV3


STANDBY/ON

DVD STANDBY/ON

STANDBY

STANDBY/ON

DVD/CD PLAYER

OPEN/CLOSE


0


4 SKIP ¢

STOP

PLAY

PAUSE

PROGRESSIVE

7

3

8

DVD/VIDEO CD/CD

1

2

3

TV4

TV5

TV6

4

5

6

TV7

TV8

TV9

7

8

9

TV -/--

TV0

MUTING

10

0

+10

• You can turn on the unit by pressing the 3 button. In this case, the unit starts playback if the disc is set in the disc tray.

• If no disc is set, “NO DISC” appears on the display window.

• You can turn on the unit by pressing the 0 (OPEN/CLOSE) button on the front panel. In this case, the disc tray opens.

NOTE

Even if you press the DVD STANDBY/ON or STANDBY/ON button to turn off the unit, the unit is not disconnected from the AC power source as long as it is connected to the wall outlet. This state is called the standby mode. In this state, the unit consumes a very small amount of power.

Inserting and removing discs

1 Press￿0 (OPEN/CLOSE) to open the disc tray. 2 Place the disc in the tray.

With the label side up

Basic operations


ER


D PLAY


VD/C

0

D

XV-S3


8

0

3

¢7

4

To insert an 8-cm disc, place it in the inner recess.

3 Press 0 (OPEN/CLOSE) to close the disc tray.

The unit reads the disc information and the corresponding opening display (depending on the disc type) appears on the TV screen (See page 9).

NOTES

Do not load a non-playable disc. For details about playable and non-playable disc types, see page 13.

When loading a disc in the tray, be sure to position the disc inside the recess. Otherwise, the disc may be damaged when the tray is closed, or the disc may not be removed from the unit.

Do not use any stabilizer when playing back a disc.

With some DVD VIDEO discs, the unit starts playback automatically after inserting the disc.

If you insert a DVD VIDEO disc whose region code does not match the unit, “REGION CODE ERROR!” is shown in the DVD opening display. For detail about the region code, see page 13.

21

Page 23
Image 23
JVC XV-S62SL, XV-S65GD manual Basic operations, Turning on/off the unit, Inserting and removing discs

XV-S62SL, XV-S65GD specifications

The JVC XV-S65GD and XV-S62SL are notable players in the realm of DVD technologies, both representing JVC's commitment to quality and innovation. These two models cater to a variety of home entertainment needs, offering features that enhance the user experience while ensuring compatibility with various media formats.

The JVC XV-S65GD stands out with its sleek design and robust build quality. One of its main features is the progressive scan technology, which enhances the picture quality significantly by delivering sharper and clearer images without motion blur. This makes it an excellent choice for watching movies and playing video games, where clarity and detail are paramount. The player also supports multiple disc formats, including DVD-R/RW and CD-R/RW, providing versatility for users who have diverse media collections.

On the other hand, the JVC XV-S62SL is designed with a slightly more budget-friendly approach without compromising on core functionalities. It boasts a compact design, which makes it an ideal fit for smaller entertainment setups. One of its key features is its compatibility with various audio formats, including Dolby Digital and DTS, enhancing the audio experience for users. Furthermore, the XV-S62SL supports JPEG playback, allowing users to view their photo collections directly on their television screens, adding another layer of functionality to this model.

Both players feature advanced audio-visual technologies that deliver a cinematic experience at home. They are equipped with digital outputs, including coaxial and optical audio outputs, ensuring seamless connectivity with modern amplifiers and sound systems. This allows users to fully immerse themselves in high-quality sound while enjoying their favorite films or music tracks.

Connectivity is a strong point for both models, with multiple outputs allowing for easy integration into existing home theater systems. They also include features like on-screen display for easy navigation, as well as parental controls, giving users the ability to manage viewing options for younger audiences.

In summary, the JVC XV-S65GD and XV-S62SL are designed to cater to different segments of the market while maintaining the core values of performance and versatility. Their advanced features, combined with robust audio-visual technology, make them reliable choices for anyone looking to enhance their home entertainment experience.