HOME DVD PLAYER | V10M10_IM_EN_12212007 |
GETTING STARTED
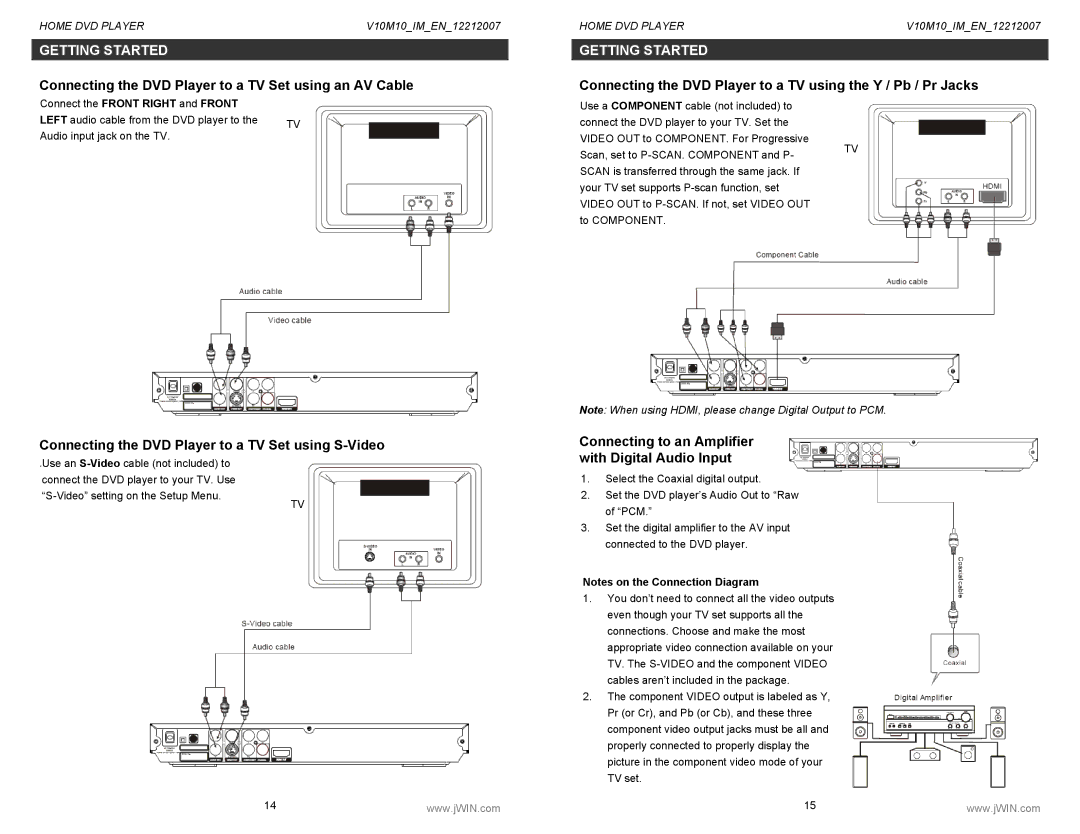
Connecting the DVD Player to a TV Set using an AV Cable
Connect the FRONT RIGHT and FRONT |
|
LEFT audio cable from the DVD player to the | TV |
Audio input jack on the TV. |
|
Connecting the DVD Player to a TV Set using S-Video
.Use an
TV
14 | www.jWIN.com |
HOME DVD PLAYER | V10M10_IM_EN_12212007 |
GETTING STARTED
Connecting the DVD Player to a TV using the Y / Pb / Pr Jacks
Use a COMPONENT cable (not included) to connect the DVD player to your TV. Set the VIDEO OUT to COMPONENT. For Progressive
Scan, set to
your TV set supports
Note: When using HDMI, please change Digital Output to PCM.
Connecting to an Amplifier with Digital Audio Input
1.Select the Coaxial digital output.
2.Set the DVD player’s Audio Out to “Raw of “PCM.”
3.Set the digital amplifier to the AV input connected to the DVD player.
Notes on the Connection Diagram
1.You don’t need to connect all the video outputs even though your TV set supports all the connections. Choose and make the most appropriate video connection available on your TV. The
2.The component VIDEO output is labeled as Y, Pr (or Cr), and Pb (or Cb), and these three component video output jacks must be all and properly connected to properly display the picture in the component video mode of your TV set.
15 | www.jWIN.com |