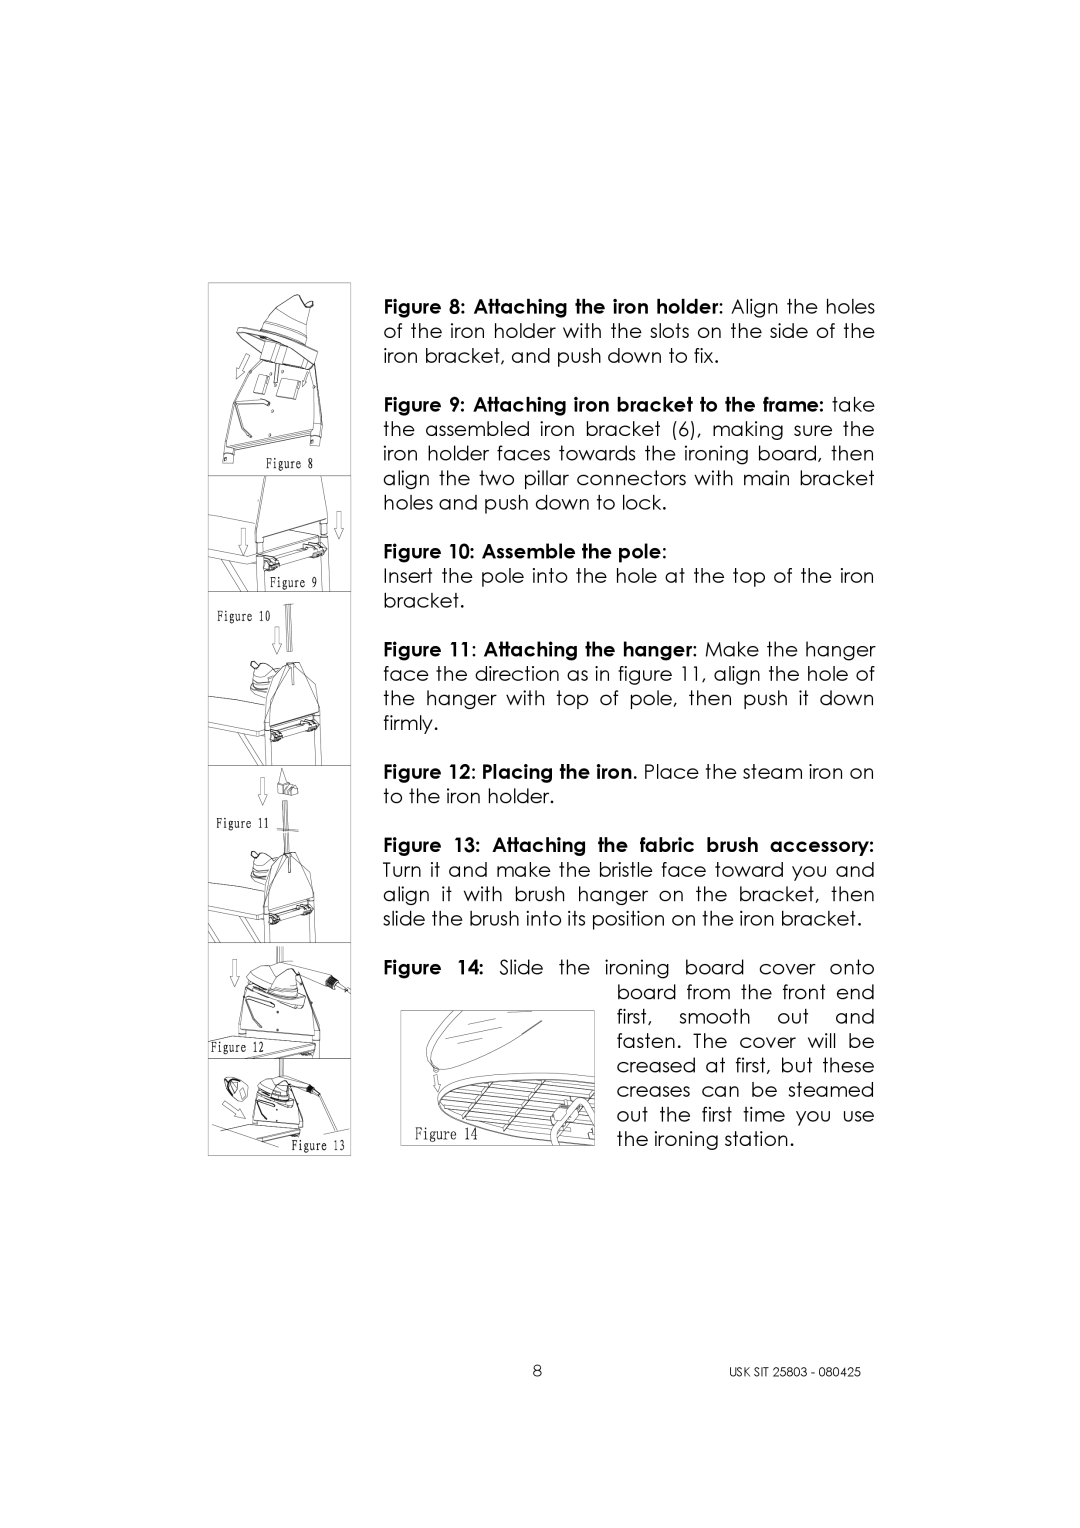
Figure 8: Attaching the iron holder: Align the holes of the iron holder with the slots on the side of the iron bracket, and push down to fix.
Figure 9: Attaching iron bracket to the frame: take the assembled iron bracket (6), making sure the iron holder faces towards the ironing board, then align the two pillar connectors with main bracket holes and push down to lock.
Figure 10: Assemble the pole:
Insert the pole into the hole at the top of the iron bracket.
Figure 11: Attaching the hanger: Make the hanger face the direction as in figure 11, align the hole of the hanger with top of pole, then push it down firmly.
Figure 12: Placing the iron. Place the steam iron on to the iron holder.
Figure 13: Attaching the fabric brush accessory: Turn it and make the bristle face toward you and align it with brush hanger on the bracket, then slide the brush into its position on the iron bracket.
Figure 14: Slide the ironing board cover onto board from the front end  first, smooth out and
  fasten. The cover will be
  creased at first, but these
creases can be steamed
out the first time you use the ironing station.
8 | USK SIT 25803 - 080425 |
