ASSEMBLY INSTRUCTIONS
Assembling
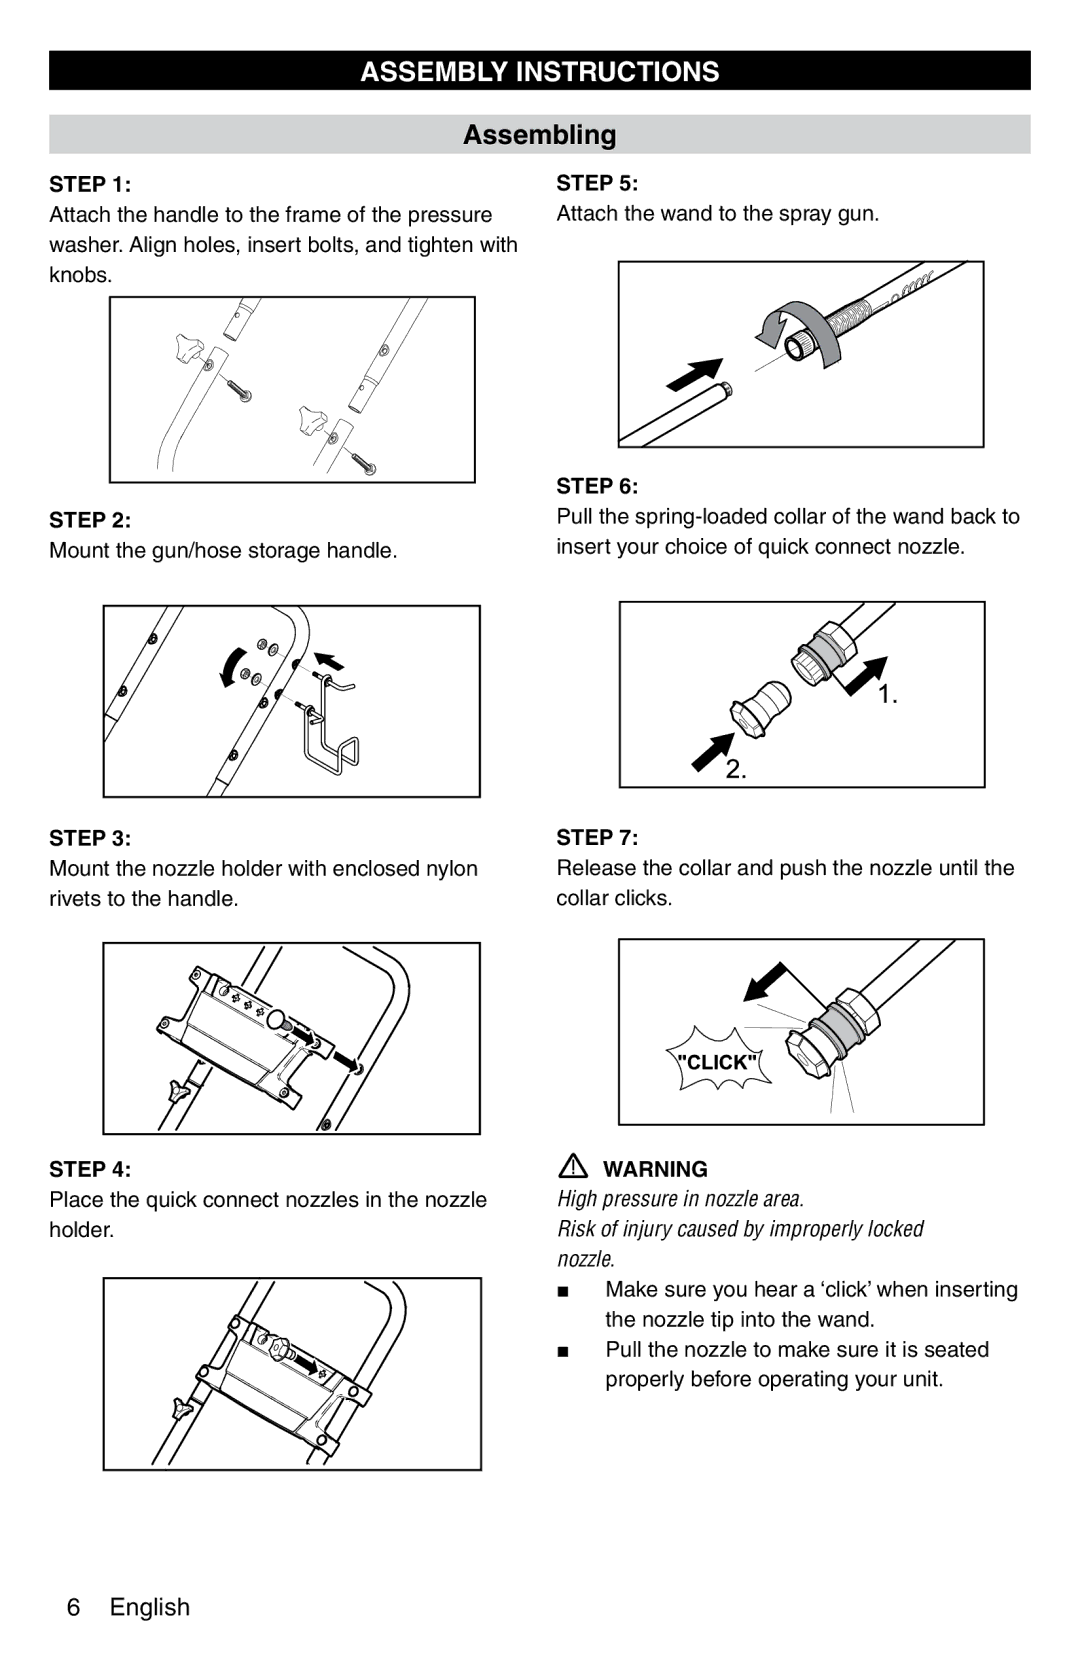
STEP 1:
Attach the handle to the frame of the pressure washer. Align holes, insert bolts, and tighten with knobs.
STEP 2:
Mount the gun/hose storage handle.
STEP 3:
Mount the nozzle holder with enclosed nylon rivets to the handle.
STEP 4:
Place the quick connect nozzles in the nozzle holder.
STEP 5:
Attach the wand to the spray gun.
STEP 6:
Pull the
STEP 7:
Release the collar and push the nozzle until the collar clicks.
WARNING
High pressure in nozzle area.
Risk of injury caused by improperly locked nozzle.
■Make sure you hear a ‘click’ when inserting the nozzle tip into the wand.
■Pull the nozzle to make sure it is seated properly before operating your unit.
6English