Page
34
2) ASSEMBLY INSTRUCTIONS
![]() Caution y Ensure that this section is read thoroughly before attempting to assemble the CN22 digital piano, and that two or more people work on unit assembly.
Caution y Ensure that this section is read thoroughly before attempting to assemble the CN22 digital piano, and that two or more people work on unit assembly.
yWhen moving the CN22 digital piano, ensure that hands are not caught in the unit, and that the piano is not dropped on an individual’s feet.
Before attempting to assemble the CN22 digital piano, ensure that all parts are included.
A
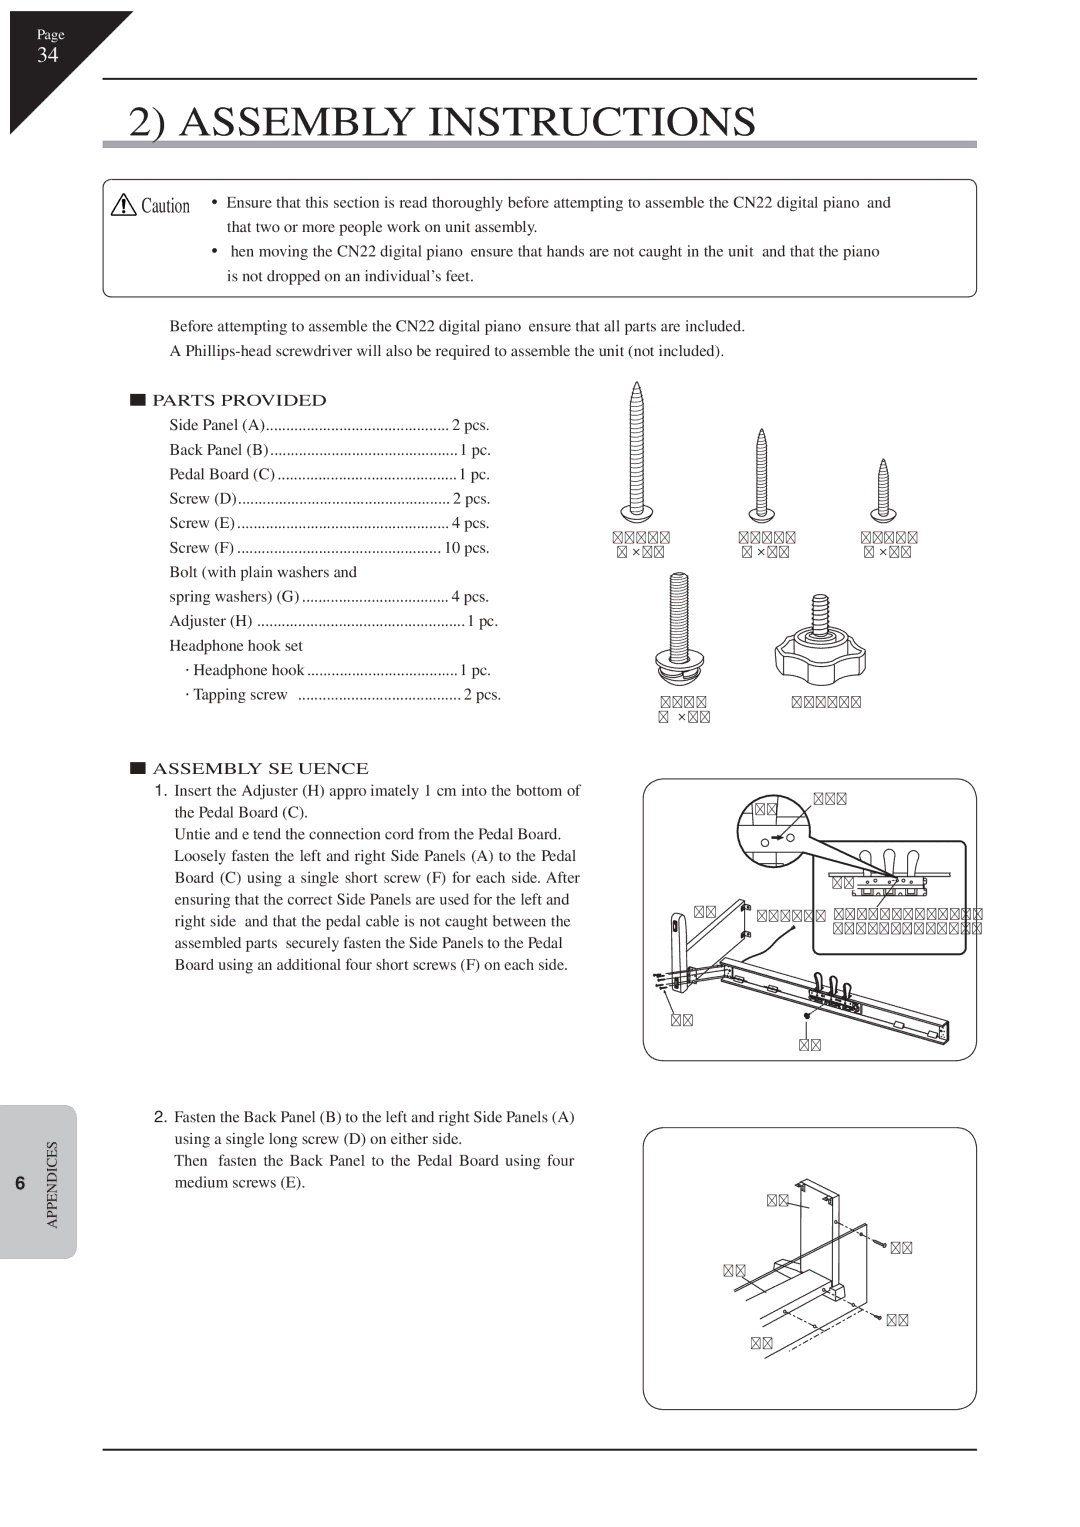
PARTS PROVIDED |
|
Side Panel (A) | 2 pcs. |
Back Panel (B) | 1 pc. |
Pedal Board (C) | 1 pc. |
Screw (D) | 2 pcs. |
Screw (E) | 4 pcs. |
Screw (F) | 10 pcs. |
Bolt (with plain washers and |
|
spring washers) (G) | 4 pcs. |
Adjuster (H) | 1 pc. |
Headphone hook set |
|
x Headphone hook | 1 pc. |
x Tapping screw | 2 pcs. |
Screw (D) | Screw (E) | Screw (F) |
ø4 ° 30 | ø4 ° 20 | ø4 ° 14 |
Bolt (G) | Adjuster (H) |
M6 ° 25 |
|
ASSEMBLY SEQUENCE
1.Insert the Adjuster (H) approximately 1 cm into the bottom of the Pedal Board (C).
Untie and extend the connection cord from the Pedal Board. Loosely fasten the left and right Side Panels (A) to the Pedal Board (C) using a single short screw (F) for each side. After ensuring that the correct Side Panels are used for the left and right side, and that the pedal cable is not caught between the assembled parts, securely fasten the Side Panels to the Pedal Board using an additional four short screws (F) on each side.
Arrow
(F’)
(C) ![]()
(A) | Pedal cable | Pedal support insert hole |
|
| (back of the pedal board) |
(F)
(H)
6 | APPENDICES |
|
2.Fasten the Back Panel (B) to the left and right Side Panels (A) using a single long screw (D) on either side.
Then, fasten the Back Panel to the Pedal Board using four medium screws (E).
(A)
![]() (D)
(D)
(C)
(E)
(B)