ASSEMBLE WELDING HELMET:
1.Position the headgear inside the helmet. Assemble the helmet by inserting the stud screw through the headgear and helmet into the tension nut. DO NOT tighten the tension nut at this time.
2. Position the adjustment arms on both sides of the helmet. Place the small pins through the helmet and into one of the small holes on the adjustment arms. This controls the fit of the helmet when lowered over the face and can be easily repositioned if necessary.
LOAD / REPLACE FLUX CORE WELDING WIRE
![]()
![]()
![]()
![]()
![]()
![]()
![]() Ensure the welder is “off” before attempt-
Ensure the welder is “off” before attempt- ![]() ing to load the
ing to load the
Do not touch anything with the torch head as it may ignite.
LOADING THE FLUX-CORE WIRE
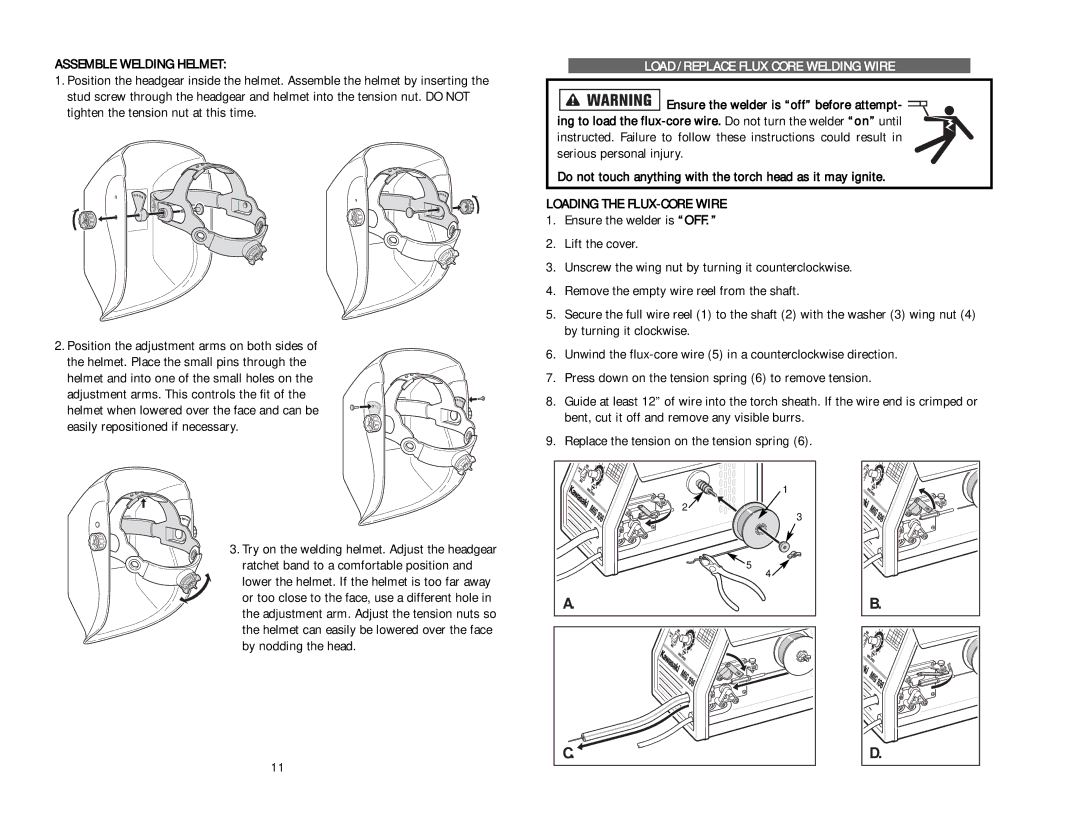
1.Ensure the welder is “OFF. ”
2.Lift the cover.
3.Unscrew the wing nut by turning it counterclockwise.
4.Remove the empty wire reel from the shaft.
5.Secure the full wire reel (1) to the shaft (2) with the washer (3) wing nut (4) by turning it clockwise.
6.Unwind the
7.Press down on the tension spring (6) to remove tension.
8.Guide at least 12” of wire into the torch sheath. If the wire end is crimped or bent, cut it off and remove any visible burrs.
9.Replace the tension on the tension spring (6).
3. Try on the welding helmet. Adjust the headgear ratchet band to a comfortable position and lower the helmet. If the helmet is too far away or too close to the face, use a different hole in the adjustment arm. Adjust the tension nuts so the helmet can easily be lowered over the face by nodding the head.
11
1 |
2 |
3 |
5 |
4 |
A. |
C. |
B. |
D. |