The dryer rack was shipped in the dryer drum.
Use the dryer rack for items that you do not want to tumble dry, such as sweaters.
Use Timed Dry to select the desired time.
NOTE: Do not use Auto Dry Cycles with the dryer rack.
To use the dryer rack:
Do not remove the lint screen.
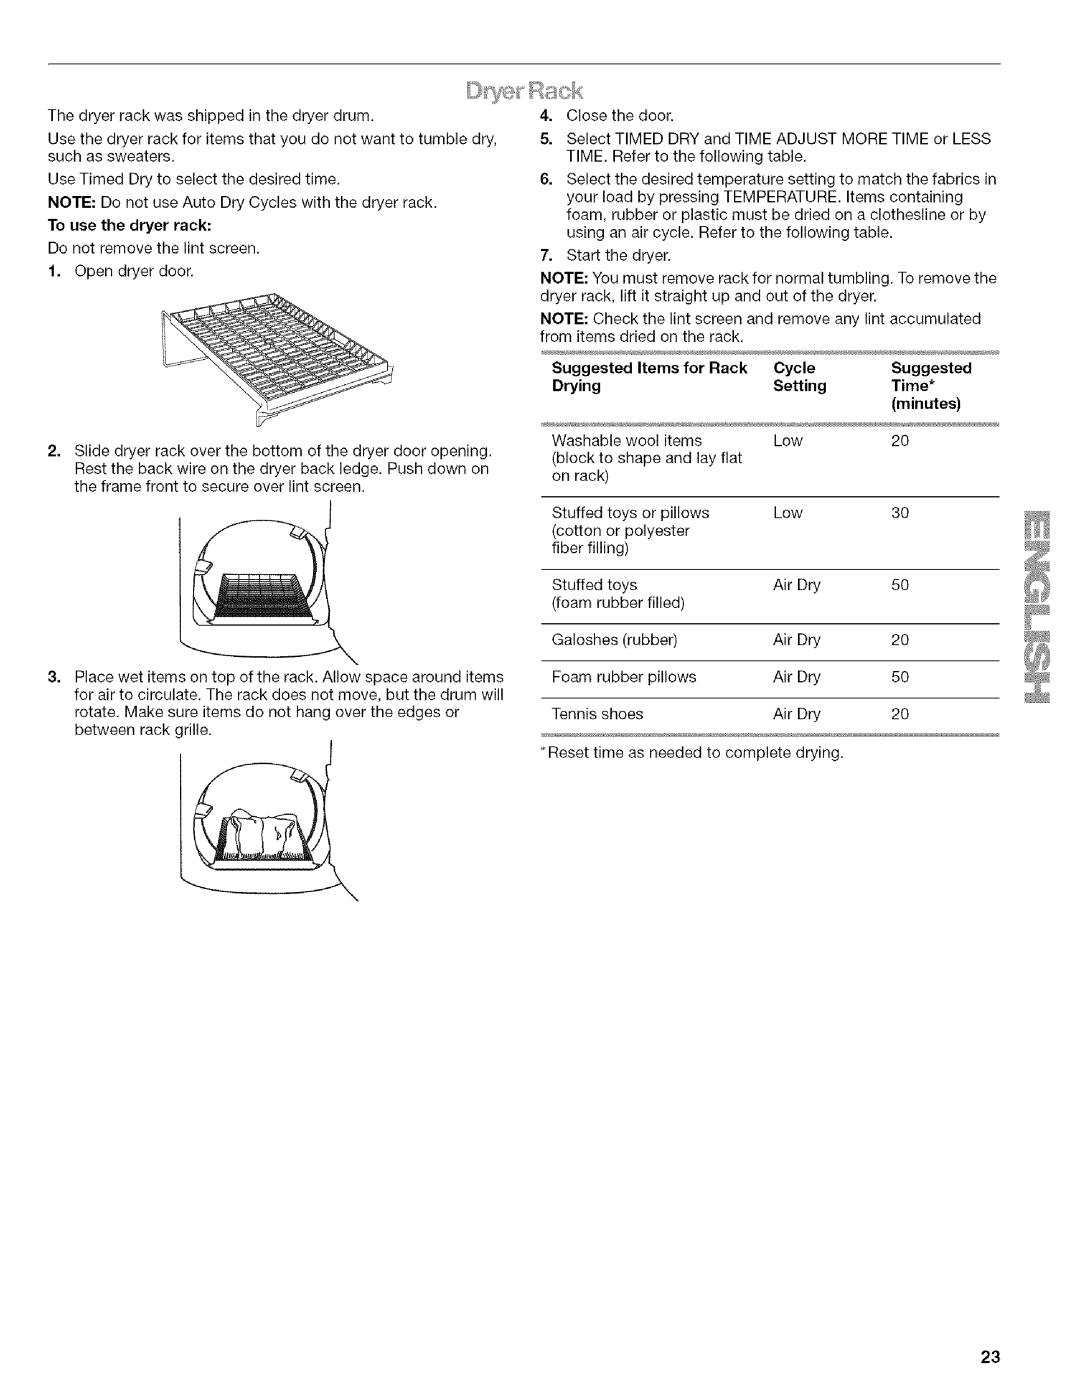
1.Open dryer door.
2.Slide dryer rack over the bottom of the dryer door opening. Rest the back wire on the dryer back ledge. Push clown on the frame front to secure over lint screen.
3= Place wet items on top of the rack. Allow space around items for air to circulate. The rack does not move, but the drum will rotate. Make sure items do not hang over the edges or between rack grille.
4.Close the door.
5.Select TIMED DRY and TIME ADJUST MORE TIME or LESS TIME. Refer to the following table.
6.Select the desired temperature setting to match the fabrics in your load by pressing TEMPERATURE. Items containing foam, rubber or plastic must be dried on a clothesline or by using an air cycle. Refer to the following table.
7.Start the dryer.
NOTE: You must remove rack for normal tumbling. To remove the dryer rack, lift it straight up and out of the dryer.
NOTE: Check the lint screen and remove any lint accumulated from items dried on the rack.
Suggested | Items for Rack | Cycle | Suggested | ||
Drying |
|
|
| Setting | Time* |
|
|
|
|
| (minutes) |
Washable | wool items | Low | 20 | ||
(block to shape and lay flat |
|
| |||
on rack) |
|
|
|
| |
Stuffed | toys | or pillows | Low | 30 | |
(cotton | or polyester |
|
| ||
fiber filling) |
|
|
|
| |
Stuffed | toys |
| Air Dry | 50 | |
(foam rubber | filled) |
|
| ||
Galoshes (rubber) | Air Dry | 20 | |||
Foam rubber | pillows | Air Dry | 50 | ||
Tennis shoes |
| Air Dry | 20 | ||
*Reset time as needed to complete drying.
23