Determine vent path

Select the route that will provide the straightest and most direct path outdoors.

Plan the installation to use the fewest number of elbows and turns.

When using elbows or making turns, allow as much room as possible.

Bend vent gradually to avoid kinking.

Use the fewest 90 ° turns possible.

Determine vent length and elbows needed for best drying performance

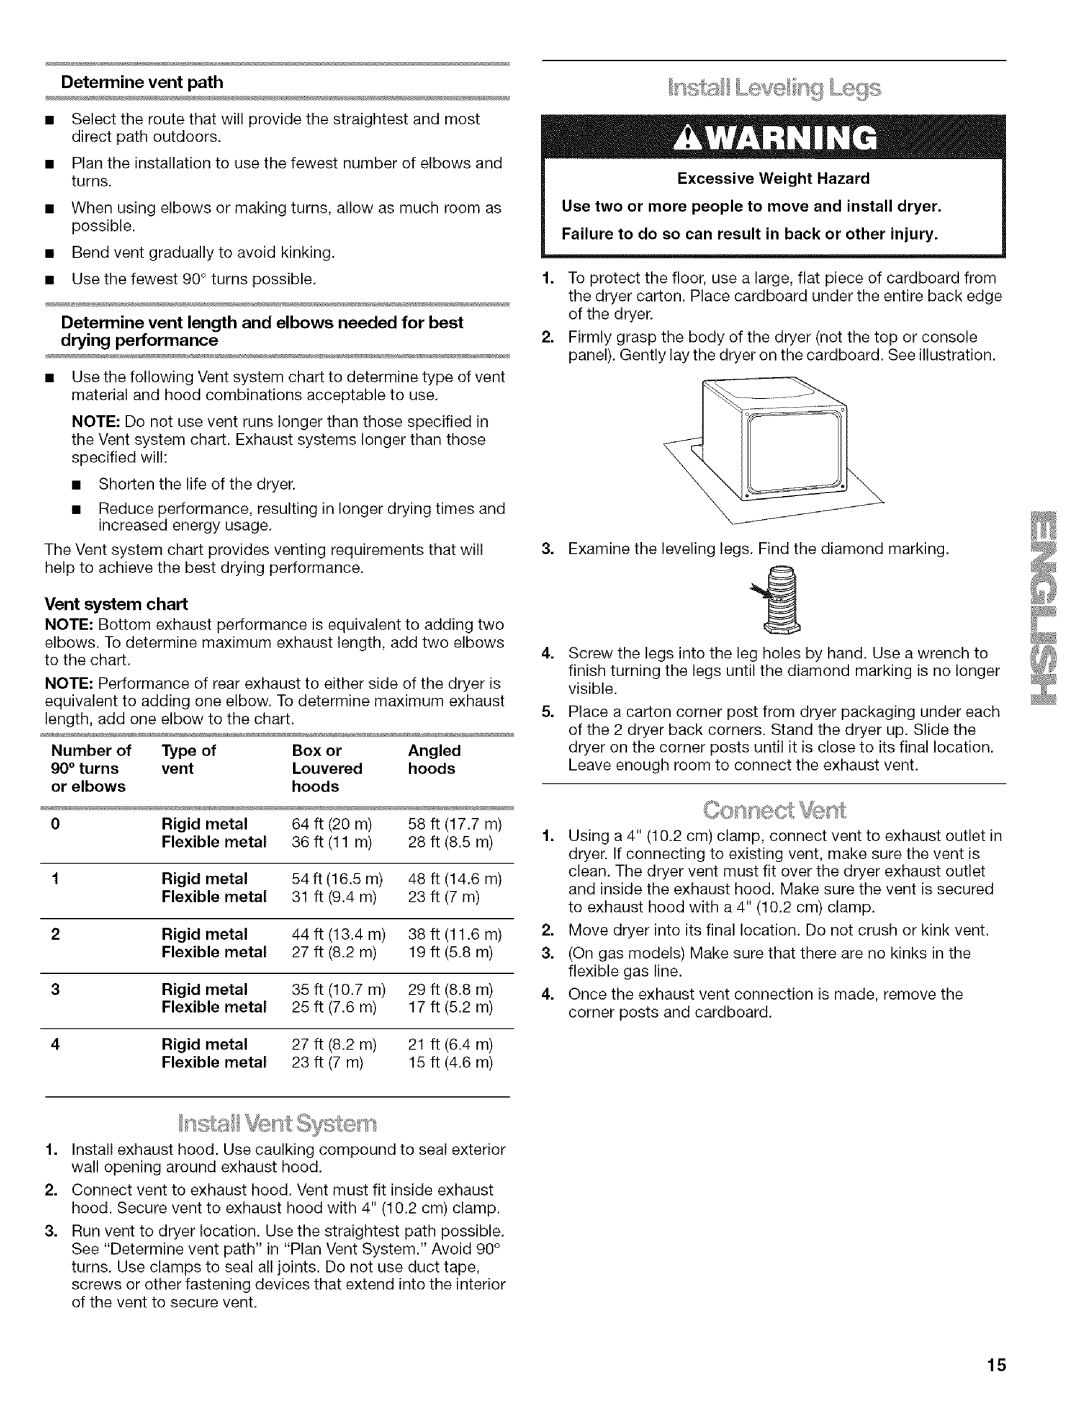
Use the following Vent system chart to determine type of vent material and hood combinations acceptable to use.

NOTE: Do not use vent runs longer than those specified in the Vent system chart. Exhaust systems longer than those specified will:

Shorten the life of the dryer.

Reduce performance, resulting in longer drying times and increased energy usage.

The Vent system chart provides venting requirements that will help to achieve the best drying performance.

Vent system chart

NOTE: Bottom exhaust performance is equivalent to adding two

elbows. To determine maximum exhaust length, add two elbows to the chart.

NOTE: Performance of rear exhaust to either side of the dryer is equivalent to adding one elbow. To determine maximum exhaust length, add one elbow to the chart.

Number of

Type

of


Box

or


Angled


g0 ° turns

vent


Louvered


hoods


or elbows


hoods


0

Rigid

metal

64

ft

(20 m)

58

ft (17.7

m)


Flexible

metal

36

ft

(11 m)

28

ft (8.5

m)

1

Rigid metal

54 ft (16.5 m)

48

ft (14.6

m)


Flexible

metal

31 ft

(9.4

m)

23

ft (7 m)


2

Rigid

metal

44

ft

(13.4 m)

38

ft (11.6

m)


Flexible

metal

27

ft

(8.2

m)

19

ft (5.8

m)

3

Rigid

metal

35

ft

(10.7 m)

29

ft (8.8

m)


Flexible

metal

25

ft

(7.6

m)

17

ft (5.2

m)

4

Rigid

metal

27

ft

(8.2

m)

21

ft (6.4

m)


Flexible

metal

23

ft

(7 m)

15

ft (4.6

m)

1.Install exhaust hood. Use caulking compound to seal exterior wall opening around exhaust hood.

2.Connect vent to exhaust hood. Vent must fit inside exhaust hood. Secure vent to exhaust hood with 4" (10.2 cm) clamp.

3.Run vent to dryer location. Use the straightest path possible. See "Determine vent path" in "Plan Vent System." Avoid 90 ° turns. Use clamps to seal all joints. Do not use duct tape, screws or other fastening devices that extend into the interior of the vent to secure vent.

Excessive Weight Hazard

Use two or more people to move and install dryer. Failure to do so can result in back or other injury.

1.To protect the floor, use a large, flat piece of cardboard from the dryer carton. Place cardboard under the entire back edge of the dryer.

2.Firmly grasp the body of the dryer (not the top or console panel). Gently lay the dryer on the cardboard. See illustration.

Examine the leveling legs. Find the diamond marking.

4.Screw the legs into the leg holes by hand. Use a wrench to finish turning the legs until the diamond marking is no longer visible.

5.Place a carton corner post from dryer packaging under each

of the 2 dryer back corners. Stand the dryer up. Slide the dryer on the corner posts until it is close to its final location. Leave enough room to connect the exhaust vent.

1.Using a 4" (10.2 cm) clamp, connect vent to exhaust outlet in dryer. If connecting to existing vent, make sure the vent is clean. The dryer vent must fit over the dryer exhaust outlet and inside the exhaust hood. Make sure the vent is secured to exhaust hood with a 4" (10.2 cm) clamp.

2.Move dryer into its final location. Do not crush or kink vent.

3.(On gas models) Make sure that there are no kinks in the flexible gas line.

4.Once the exhaust vent connection is made, remove the corner posts and cardboard.

15

Page 15
Image 15
Kenmore 110.6707, 110.6706, 110.6705 manual Determine vent path, Vent system chart, Rigid metal, Flexible

110.6705, 110.6707, 110.6706 specifications

The Kenmore 110.6706, 110.6707, and 110.6705 washers are part of a highly regarded line of laundry appliances known for their durability, efficiency, and advanced features. These models blend functionality with modern technology, providing users with a reliable solution for their laundry needs.

One of the standout features of these Kenmore washing machines is their large capacity. With the ability to handle substantial loads, these models are ideal for families or individuals who frequently wash bulky items like bedding and towels. The spacious interior allows for efficient cleaning without compromising on performance.

In terms of technology, the Kenmore 110 series is equipped with state-of-the-art sensors that adjust water levels based on the size of the load. This water-saving feature ensures optimal resource usage while maintaining cleanliness. The machines also boast multiple wash cycles, allowing users to select the perfect setting for various fabrics and levels of soil.

Another notable characteristic is the impact of energy efficiency. These models are designed to consume less electricity and water compared to older counterparts, aligning with modern sustainability goals. They often carry Energy Star certification, reassuring users of their environmentally friendly performance.

The Kenmore 110.6706, 110.6707, and 110.6705 models also include advanced agitation technology. This feature ensures that clothes are thoroughly cleaned without excessive wear and tear. The efficient agitator moves clothes in a way that penetrates fibers deeply, tackling even the toughest stains.

For ease of use, these washers typically come with a straightforward control panel, allowing users to navigate through settings effortlessly. Many models also feature a delay start option, enabling users to set the machine to run at a more convenient time, thus maximizing flexibility.

In addition to their performance capabilities, these Kenmore washers are designed with durability in mind. Made with high-quality materials, they are built to withstand regular use, which gives consumers peace of mind regarding their investment.

Overall, the Kenmore 110.6706, 110.6707, and 110.6705 washing machines exemplify a perfect blend of capacity, efficiency, and user-friendly design. Their advanced features help streamline laundry tasks, making them a popular choice for those seeking reliable machines that deliver excellent cleaning results while minimizing resource consumption.