_%::%::%:::::::_'::__:::i:_:;_iii_iiii!!i_::i:;:iiii:i:i:i:!:i:!i:i:i: ::::ii:i:i:i:i:_: ::!:i:.i::::__:i:%i:i:.:i:i_i:i:i_i_::i:i:i:!:i:!:;:':: i_:i,i:::i:':%,::i:::i::%:iiiii!i:i:' iiiiiiiiiii_iii:i:!:i:!:!::!i ; ;:, ,,,
I iii_i;i__,:iiii!i_,i!iii,_,iiiiiiiii!ii: '!ii!,iiii'iiii'!!i!;ii:!;i;?.I!_ii;iiiii !ii il;_'iii!i'l.iii.ill'liii iiiJii_iii__._!_
Electrical Shock Hazard
DO NOT plug into electrical supply until assembly is complete. Failure to do so could result in electrical
shock or injury.
Before assembling vacuum, check the PACKING LIST on the cover of the separate Repair Parts List. Use this list to verify that you have received all the components of your new Kenmore vacuum.
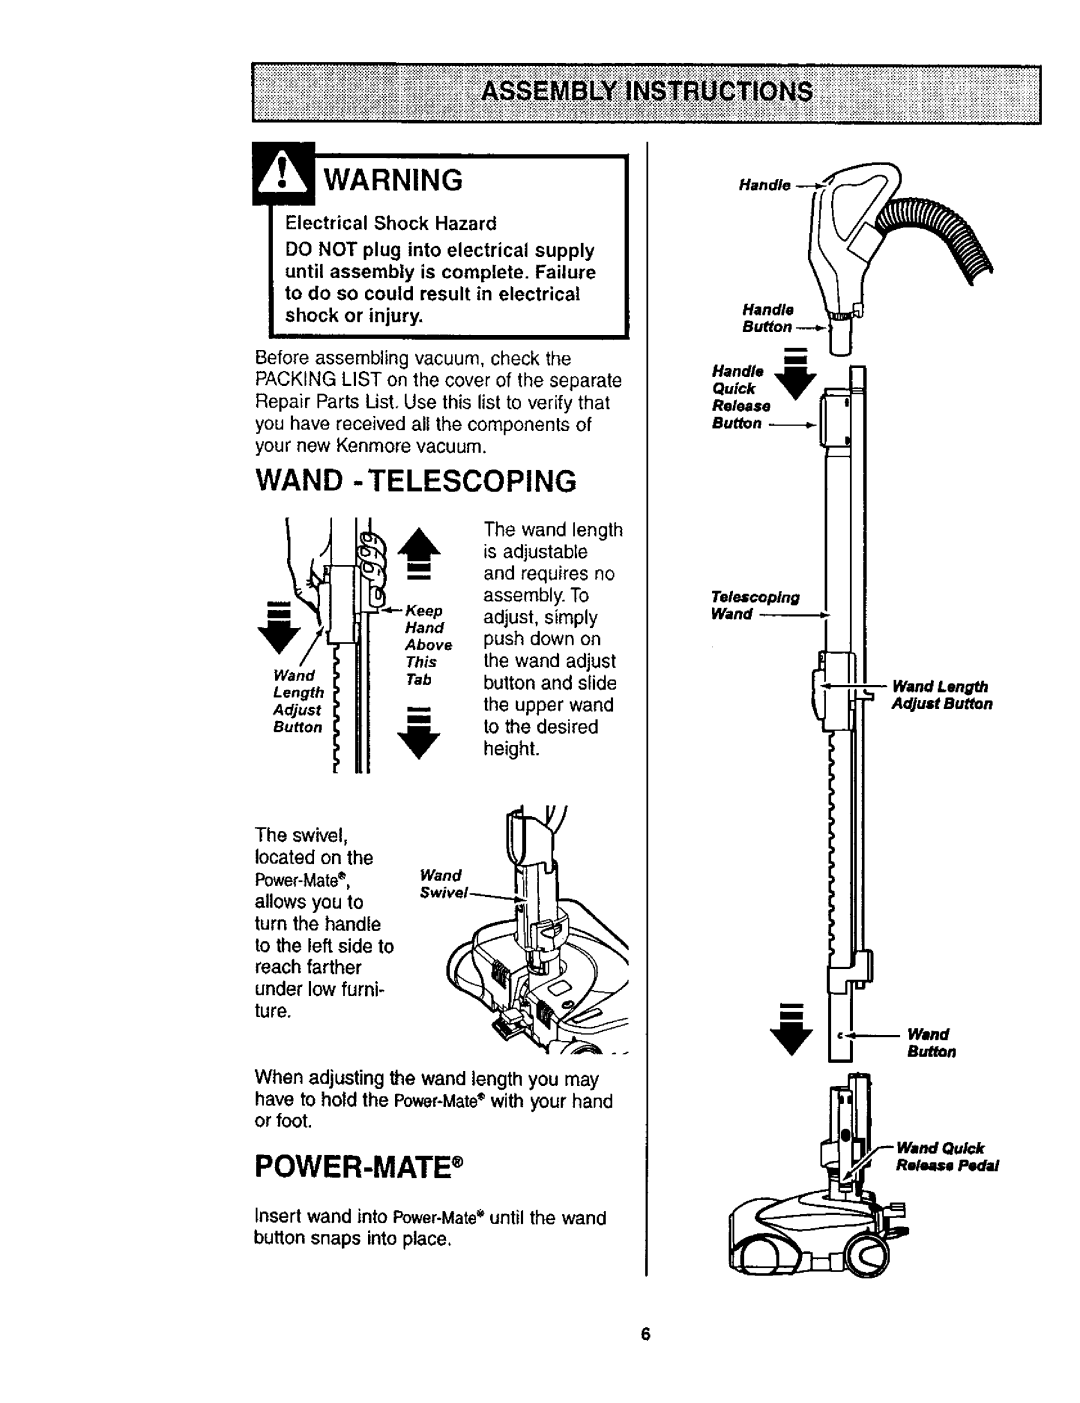
WAND -TELESCOPING
|
| is adjustable | ||
| _._ | and requires no | ||
| he wand | length | ||
|
| assembly. | To | |
| Keep | adjust, simply | ||
| Hand | push down | on | |
| Above | |||
Wand | This | the wand adjust | ||
Tab | button and | slide | ||
| ||||
Length
Adjust | the upper wand |
Bu_on |
|
| to the desired |
| height. |
The swivel,
located on the Wand
allows you to turn the handle to the left side to reach farther under low furni-
ture.Sws_
When adjusting the wand length you may
have to hold the
POWER-MATE®
Insert wand into
button snaps into place.
Handle
Butto_
Handle
Qu_k
R_ease
Button
T_escop_g Wand_
I
_F Wand Quick
elease Pedal
6
