15. Electronic Ignition Battery Installation
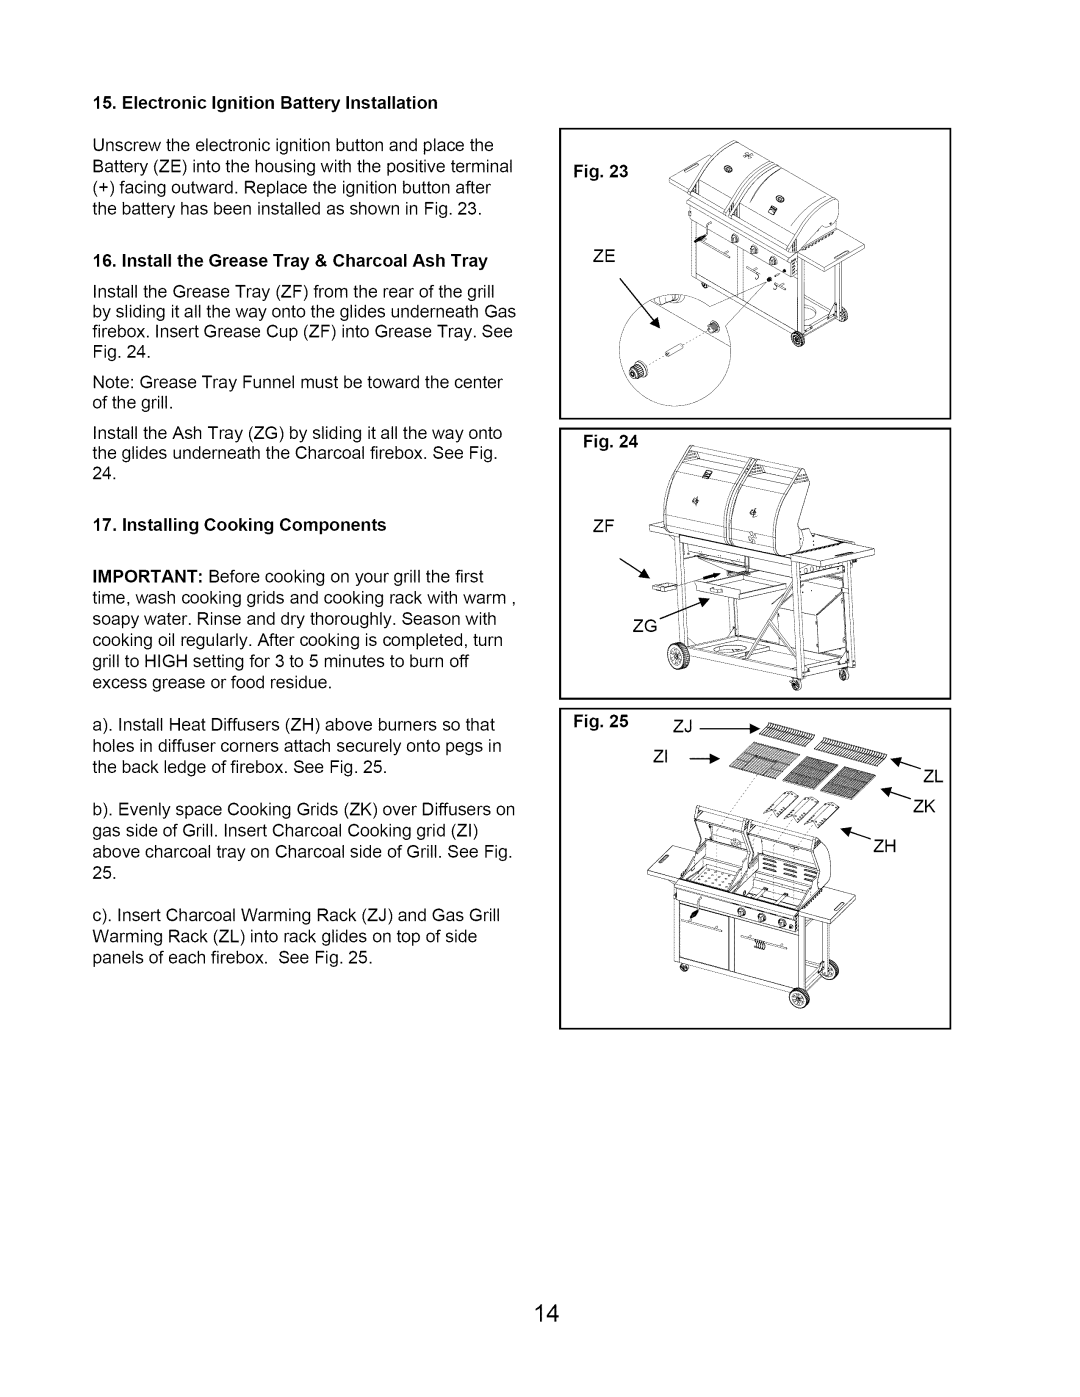
Unscrew the electronic ignition button and place the Battery (ZE) into the housing with the positive terminal
(+)facing outward. Replace the ignition button after the battery has been installed as shown in Fig. 23.
16. Install the Grease Tray & Charcoal Ash Tray
Install the Grease Tray (ZF) from the rear of the grill by sliding it all the way onto the glides underneath Gas firebox. Insert Grease Cup (ZF) into Grease Tray. See Fig. 24.
Note: Grease Tray Funnel must be toward the center of the grill.
Install the Ash Tray (ZG) by sliding it all the way onto the glides underneath the Charcoal firebox. See Fig. 24.
17. Installing Cooking Components
IMPORTANT: Before cooking on your grill the first time, wash cooking grids and cooking rack with warm, soapy water. Rinse and dry thoroughly. Season with cooking oil regularly. After cooking is completed, turn grill to HIGH setting for 3 to 5 minutes to burn off excess grease or food residue.
a). Install Heat Diffusers (ZH) above burners so that holes in diffuser corners attach securely onto pegs in the back ledge of firebox. See Fig. 25.
b). Evenly space Cooking Grids (ZK) over Diffusers on gas side of Grill. Insert Charcoal Cooking grid (ZI) above charcoal tray on Charcoal side of Grill. See Fig. 25.
c). Insert Charcoal Warming Rack (ZJ) and Gas Grill Warming Rack (ZL) into rack glides on top of side panels of each firebox. See Fig. 25.
Fig. 23
ZE
/
Fig. 24
ZF
ZG
Fig. 25
ZL
/
/
ZK
14