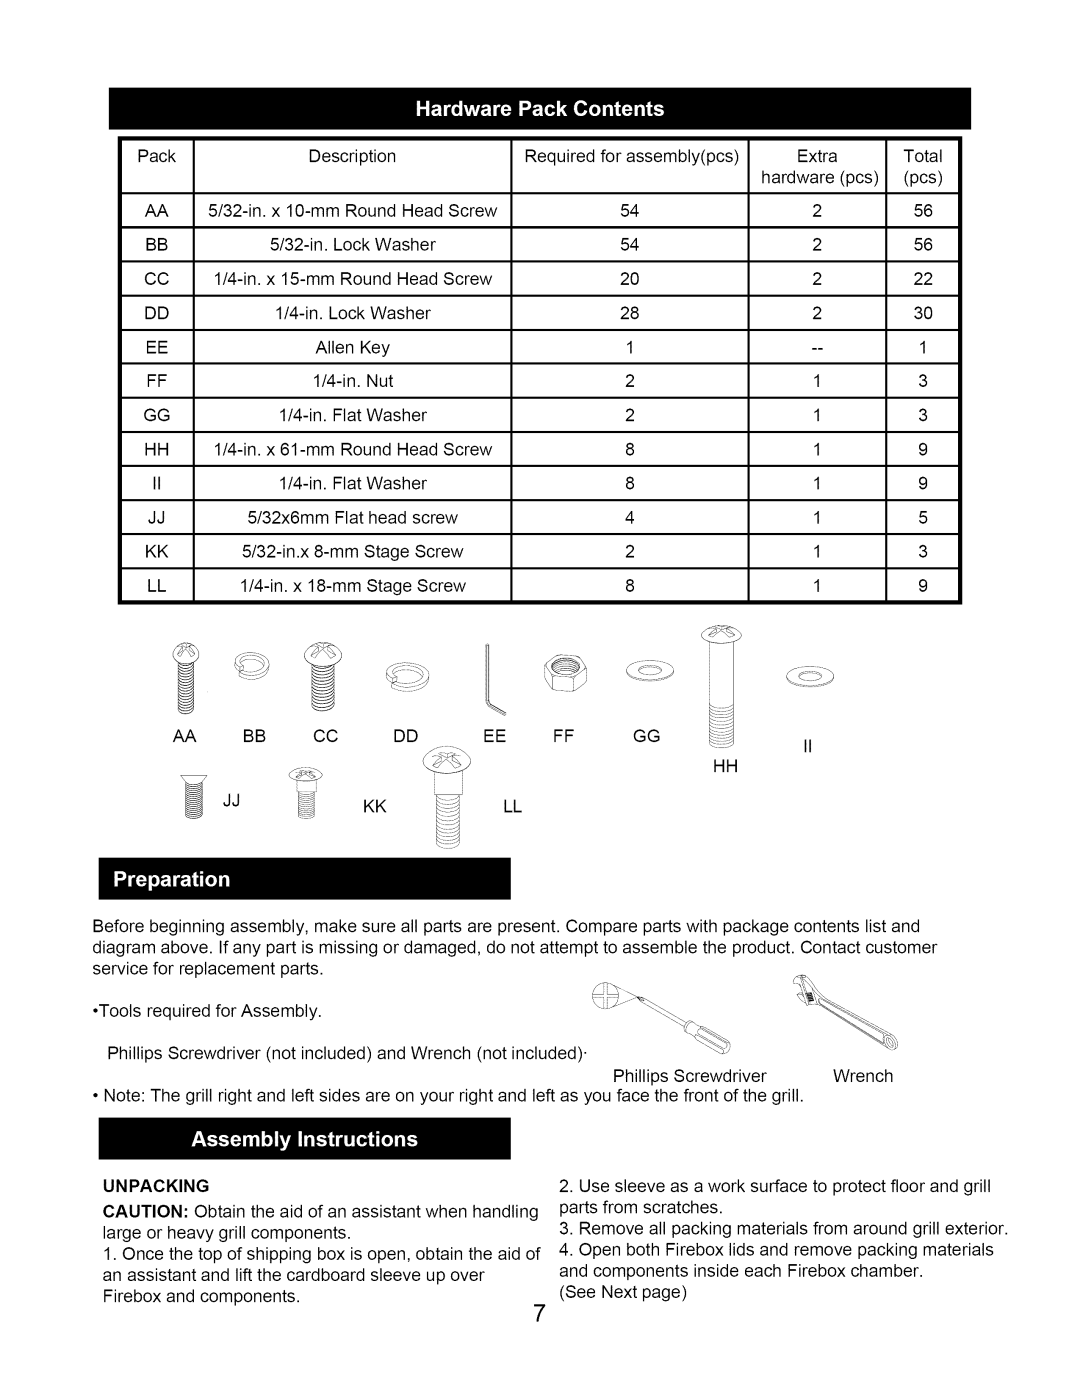
Pack | Description | Requiredforassembly(pcs) | Extra | Total | |
|
|
| hardware(pcs) | (pcs) | |
AA | 54 | 2 | 56 | ||
BB | 54 | 2 | 56 | ||
CC | Round Head Screw | 20 | 2 | 22 | |
DD | 28 | 2 | 30 | ||
EE | Allen Key | 1 | 1 | ||
FF | 2 | 1 | 3 | ||
GG | 2 | 1 | 3 | ||
HH | Round Head Screw | 8 | 1 | 9 | |
II | Flat Washer | 8 | 1 | 9 | |
JJ | 5/32x6mm | Flat head screw | 4 | 1 | 5 |
KK | 2 | 1 | 3 | ||
LL | 8 | 1 | 9 | ||
AA BB CC DD EE FF GG
HH
JJ | _ | KK | LL |
|
|
| L;j |
Before beginning assembly, make sure all parts are present. Compare parts with package contents list and diagram above. If any part is missing or damaged, do not attempt to assemble the product. Contact customer service for replacement parts.
• Tools required for Assembly. |
|
Phillips Screwdriver (not included) and Wrench (not included). |
|
Phillips Screwdriver | Wrench |
• Note: The grill right and left sides are on your right and left as you face the front of the grill. |
|
UNPACKING
CAUTION: Obtain the aid of an assistant when handling large or heavy grill components.
1.Once the top of shipping box is open, obtain the aid of an assistant and lift the cardboard sleeve up over Firebox and components.
2.Use sleeve as a work surface to protect floor and grill parts from scratches.
3.Remove all packing materials from around grill exterior.
4.Open both Firebox lids and remove packing materials and components inside each Firebox chamber.
(See Next page)
7
