Beforeassemblingthe patioheater,usethe parts
list to checkthat all necessarypartshave been included.Inspectpatioheaterfor damageas you
proceed.Donot assembleor operatethe patio heaterif it appearsdamaged.If you haveques- tions duringtheassemblyprocess,call
7642,8am - 8pmCST, MondaythroughFriday.
CAUTION:
While it is possiblefor one personto assemble this patioheater,we recommendyou haveassis- tancewhenattachingthe Reflector,heaterHead AssemblyandthreadingthestainlessFuel Hose.
Removeall partsand hardwarefrom carton.Refer to the partslist andhardwarepackillustrations and assemblethepatio heateron a protective worksurfaceto avoidscratchingheatersurfaces.
1.
Looselyinstallthe twoLegswith Hooksonto WeightedBaseby using2 of the 3/8" Spring Washersandthe
Looselyinstallthe third Legusinga 3/8" SpringWasherandthe
2.Hangthe SafetyChainon the Hooksof both Legs.
3.Attachthe LowerPost(withbracket)ontothe top of Legsby using5 of the 3/8"x3/4"Hex HeadScrews,10 of the 3/8" SpringWashers and 5 of the 3/8" Cap Nutsin sequenceas shownin Fig. 2. Useadjustablewrenchto tightenthe Nuts.
4.SecureHoseHolderA to the right Leg using 1 of the 3/8"x3/4"Hex HeadScrew,2 of the 3/8" SpringWashersand 1 of the 3/8" Cap Nut.See Fig. 2. Useadjustablewrenchto tightenthe Nut.
5.Tightenthe looselyattachedscrewsfrom Steps 1, 3 and 4.
•Protective gloves
•Eye protection
•One #2 Phillips Head Screwdriver
•Two Adjustable Wrenches
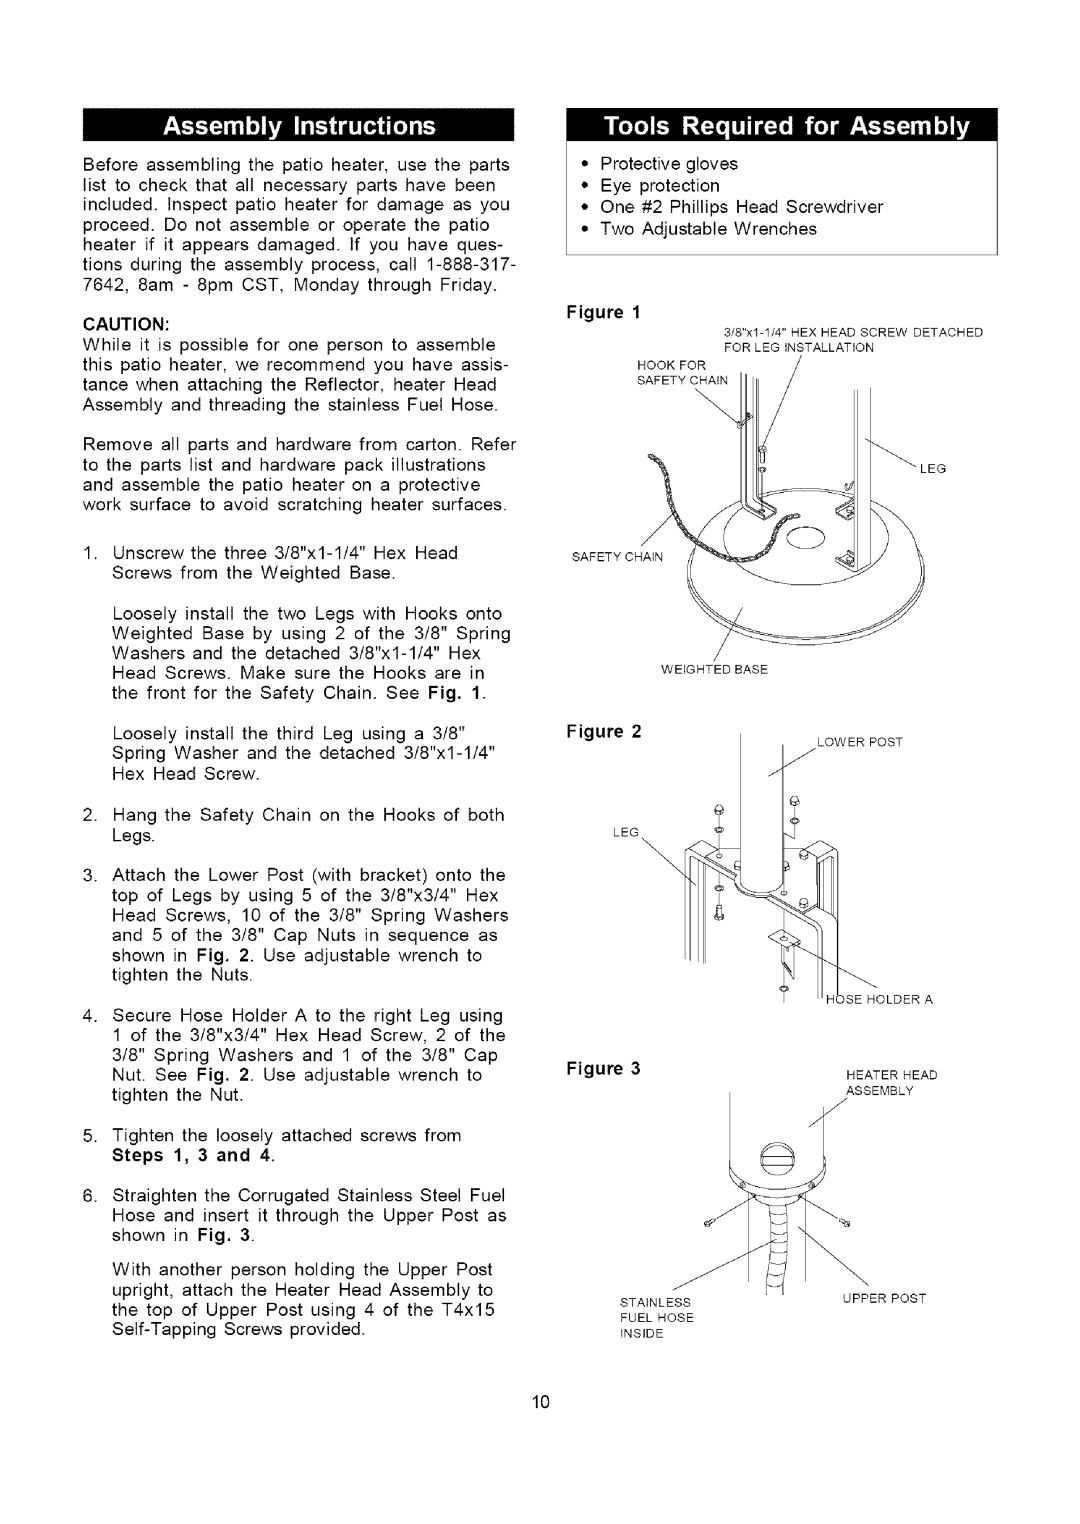
Figure 1
HOOK FOR
SAFETY CHAIN
LEG
SAFETY CHAIN
WEIGHTED BASE
Figure 2
LOWER POST
J
J
LEGoP
| LDER A |
Figure 3 | HEATER HEAD |
© fASSEMBLY
6. Straightenthe CorrugatedStainlessSteelFuel |
Hoseand insertit throughthe UpperPostas |
shownin Fig. 3. |
Withanotherpersonholdingthe UpperPost |
upright,attachthe HeaterHeadAssemblyto |
the top of UpperPostusing4 of the T4x15 |
STAINLESS
UPPER POST
FUEL HOSE
INSIDE
10