Remove Door
1.Unplug ice maker or disconnect power.
2.Remove the handle screws and handle (on some models). Keep the parts together and set them aside.
3.Remove the hinge pin from the top hinge.
4.Remove the door from the hinges and screw the top hinge pin back into the top hinge.
5.Reverse the door end caps as follows:
•Remove both the screws and end caps (top and bottom).
•Move the top end cap diagonally to the opposite side's bottom corner, keeping the straight side of the end cap facing the front of the ice maker.
•Move the bottom end cap diagonally to the opposite side's top corner, keeping the straight side of the end cap facing the front of the ice maker.
6.Set the door aside.
Reverse Hinges
1.Unscrew and remove the top hinge. Replace the screws in the empty hinge holes.
2.Remove the screws from the bottom of the opposite side of
the ice maker cabinet. Turn the top hinge upside down so that the hinge pin points up. Place the hinge on the bottom opposite side of the ice maker and tighten screws.
3.Remove the plastic hinge pin sleeve from the "old" bottom hinge and replace it on the new bottom hinge pin.
4.Remove the "old" bottom hinge screws and hinge. Replace the screws in the empty hinge holes.
5.Remove the screws from the top of the opposite side of the ice maker cabinet. Turn the hinge upside down so that the hinge pin points down. Place the hinge on the top opposite side of the ice maker and tighten the screws.
6.Remove the top hinge pin.
Replace Door
1.Place plastic hinge pin sleeve in the top hinge hole on the door. Align the door with the top hinge hole and replace the top hinge pin.
2.Replace the handle and handle screws.
Top Hinge
............................... A
A. Hinge pin | C. Hinge |
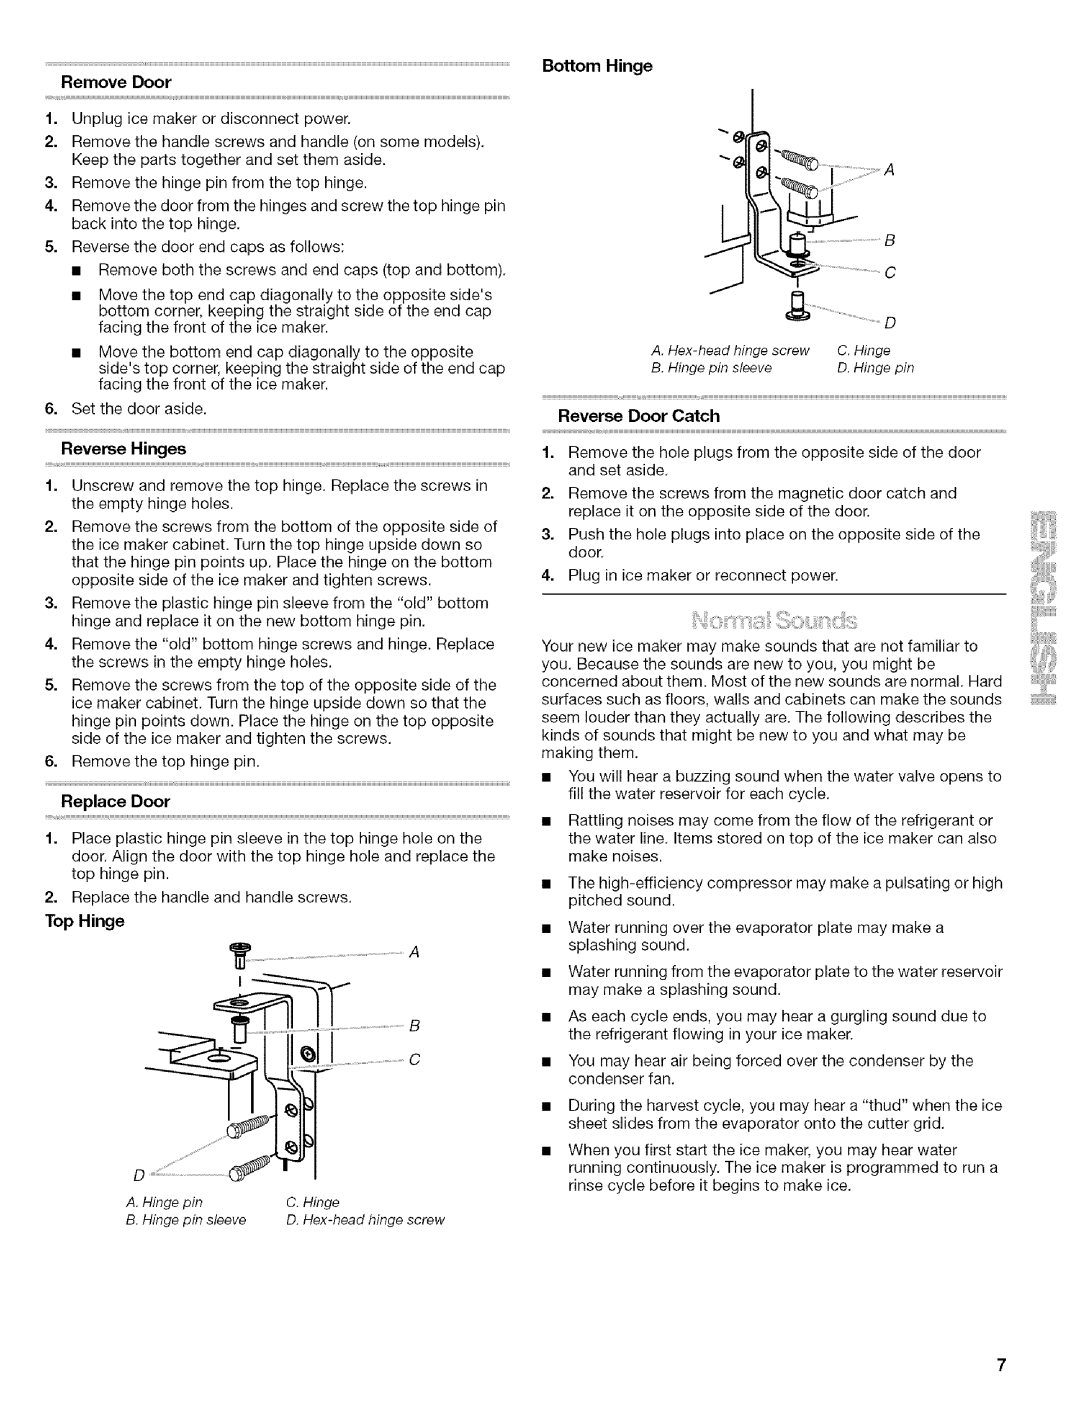
Bottom Hinge
"" _A
L ;
A. | hinge screw | C. Hinge |
| |
B. | Hinge pin | sleeve | D. Hinge | pin |
Reverse Door Catch
1.Remove the hole plugs from the opposite side of the door and set aside.
2.Remove the screws from the magnetic door catch and replace it on the opposite side of the door.
3.Push the hole plugs into place on the opposite side of the door.
4.Plug in ice maker or reconnect power.
Your new ice maker may make sounds that are not familiar to
you. Because the sounds are new to you, you might be concerned about them. Most of the new sounds are normal. Hard
surfaces such as floors, walls and cabinets can make the sounds seem louder than they actually are. The following describes the kinds of sounds that might be new to you and what may be making them.
•You will hear a buzzing sound when the water valve opens to fill the water reservoir for each cycle.
•Rattling noises may come from the flow of the refrigerant or
the water line. Items stored on top of the ice maker can also make noises.
•The
•Water running over the evaporator plate may make a splashing sound.
•Water running from the evaporator plate to the water reservoir may make a splashing sound.
•As each cycle ends, you may hear a gurgling sound due to the refrigerant flowing in your ice maker.
•You may hear air being forced over the condenser by the condenser fan.
•During the harvest cycle, you may hear a "thud" when the ice sheet slides from the evaporator onto the cutter grid.
•When you first start the ice maker, you may hear water running continuously. The ice maker is programmed to run a
rinse cycle before it begins to make ice.
B. Hinge pin sleeve | D. |