Style 1: Behind the base grille filter
1.Remove the base grille (see "Removing the base grille" section). Rotate the cartridge counterclockwise to a vertical position and pull the filter cartridge out.
NOTE: There will be water in the cartridge. Some spilling may
Occur.
2, Take the new cartridge out of its packaging and remove protective cover from
3.Push the new filter cartridge into the base until it stops. Rotate the cartridge clockwise to a horizontal position. Flush the water system (see "Flushing the Water System After Replacing Filter" later in this section).
Flushing the Water System After Replacing Filter
Use a sturdy container to depress the water dispenser bar until the water begins to flow. Flush the water system by dispensing and discarding 2 to 3 gal. (8 to 12 L) of water. Cleaning the system will take approximately 6 to 7 minutes and will help clear air from the line. Additional flushing may be required in some households.
NOTE: As air is cleared from the system, water may spurt out of the dispenser.
Using the dispenser without the water filter
You can run the dispenser without a water filter cartridge. Your water will not be filtered.
1.Remove the base grille water filter cartridge. For Style 1, replace the base grille after removing the filter.
2.For Style 2, slide the cartridge cap off the end of the filter cartridge. DO NOT DISCARD THE CAP. With the cartridge cap in the vertical position, insert the cap into the base grille until it stops.
Style 2: Through the base grille filter
1.Locate the water filter cartridge cap in the front base grille. Rotate the cap counterclockwise to a vertical position and pull the cap and filter cartridge out through the base grille.
NOTE: There will be water in the cartridge. Some spilling may
Occur.
2, Remove the cartridge cap by sliding it off the end of the old
cartridge. The cap will slide to the left or right. DO NOT DISCARD THE CAP.
3.Take the new cartridge out of its packaging and remove protective cover from
4.Slide the cartridge cap onto the new cartridge. See illustration in Step 2.
5.With cartridge cap in the vertical position, push the new filter cartridge into the base grille until it stops. Rotate the cartridge cap clockwise to a horizontal position. Flush the water system (see "Flushing the Water System After Replacing Filter" later in this section).
3, Rotate the cartridge cap to a horizontal position. The cartridge cap might not be even with the base grille.
......Msk÷ a// d on!sge B n/Bucket:
(o_'some models ._Acc(,_,_so_
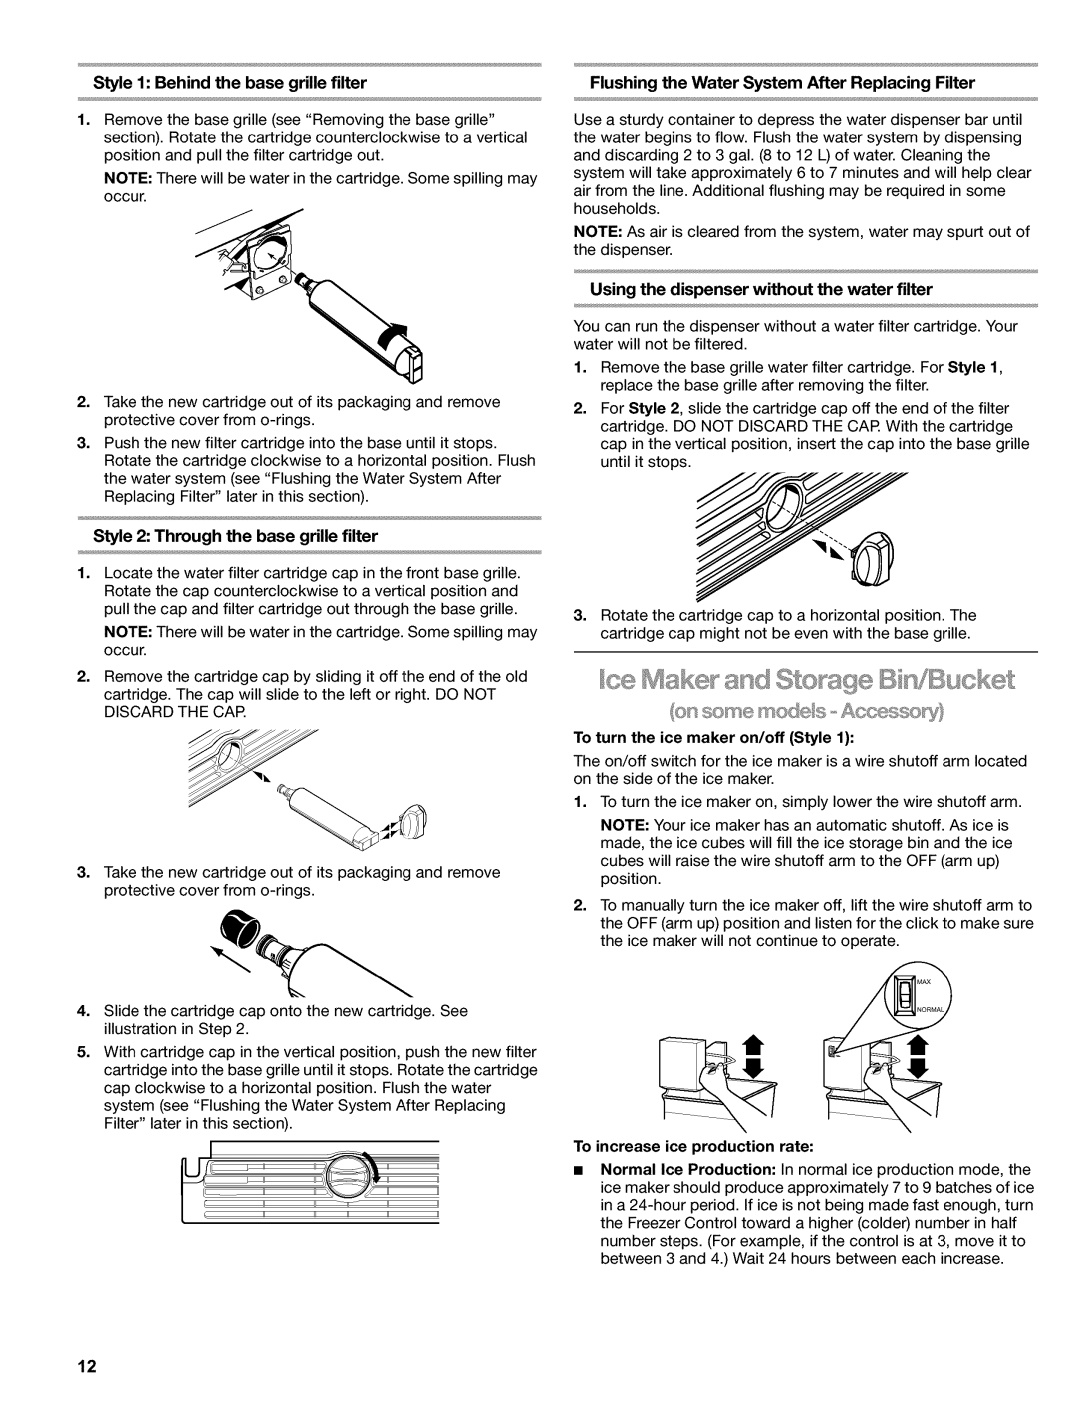
To turn the ice maker on/off (Style 1):
The on/off switch for the ice maker is a wire shutoff arm located on the side of the ice maker.
1.To turn the ice maker on, simply lower the wire shutoff arm. NOTE: Your ice maker has an automatic shutoff. As ice is made, the ice cubes will fill the ice storage bin and the ice cubes will raise the wire shutoff arm to the OFF (arm up) position.
2.To manually turn the ice maker off, lift the wire shutoff arm to the OFF (arm up) position and listen for the click to make sure the ice maker will not continue to operate.
To increase ice production rate:
Normal Ice Production: In normal ice production mode, the ice maker should produce approximately 7 to 9 batches of ice in a
12