
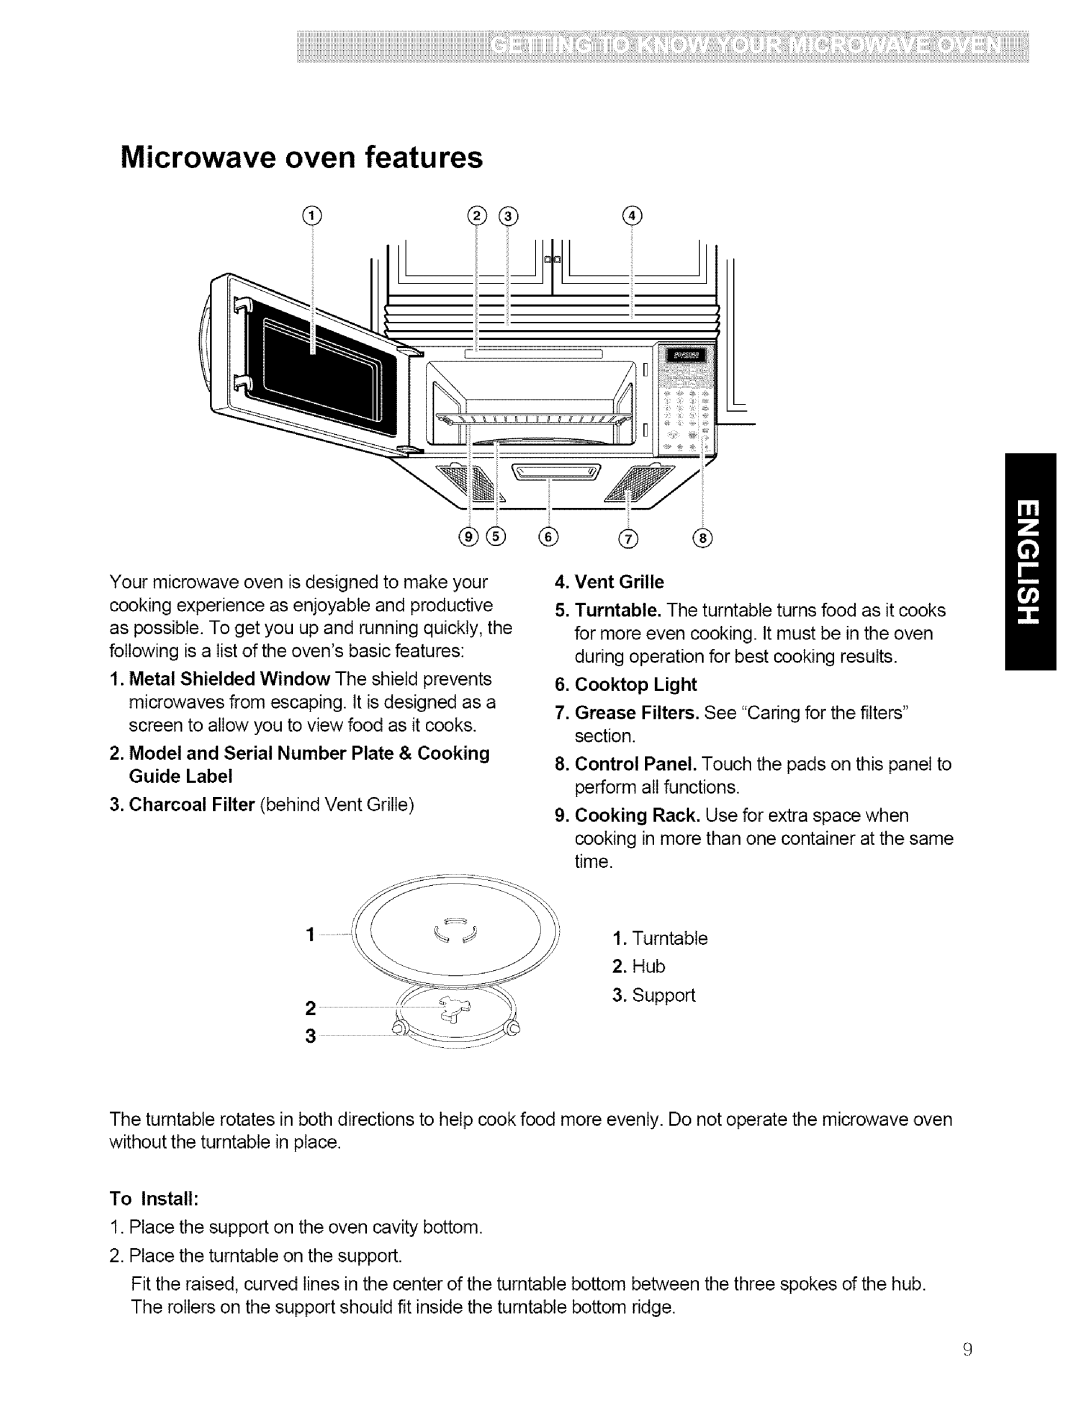
721.80414, 721.80412, 721.80413, 721.80419, 721.80592 specifications
The Kenmore 721 series of appliances, including models 721.80599, 721.80594, 721.80593, 721.80592, and 721.80419, showcases advanced technologies and features that cater to the needs of modern kitchens. Known for their reliability and performance, these microwaves come equipped with a variety of functionalities designed to enhance the cooking experience.One of the standout features across the Kenmore 721 series is the powerful cooking performance. With high wattage, these models ensure quick and even heating, significantly reducing cooking times. This efficiency is complemented by their smart cooking controls, allowing users to select various cooking functions with ease. Each model includes pre-programmed settings for common food items, such as popcorn, pizza, and baked potatoes, ensuring optimal results every time.
The Kenmore 721 series also emphasizes user convenience with its intuitive controls. A digital display provides clear visibility, while easy-to-navigate buttons make operation simple, even for the less tech-savvy. Additionally, many models in this series are equipped with a sensor cooking feature that automatically adjusts cooking time and power level based on the moisture released by the food, allowing for perfectly cooked meals without constant monitoring.
In terms of design, the Kenmore 721 microwaves boast a sleek and modern appearance, blending seamlessly into various kitchen decors. They often include a spacious interior with a turntable, providing ample room to accommodate larger dishes while ensuring even cooking. Furthermore, the durable construction of these microwaves ensures longevity and resistance to daily wear and tear.
Safety features are also a critical aspect of these models. The Kenmore 721 microwaves include a child lock function, preventing unintended use and providing peace of mind for families with young children. Additional safety mechanisms like overheat protection ensure that the appliance operates efficiently without risk of damage.
In conclusion, the Kenmore 721.80599, 721.80594, 721.80593, 721.80592, and 721.80419 models stand out in their category, offering a compelling mix of efficiency, user-friendly technology, and safety features. Whether reheating leftovers, defrosting ingredients, or cooking a full meal, these microwaves deliver consistent and reliable performance. Their innovative design and advanced capabilities make them a valuable addition to any modern kitchen.