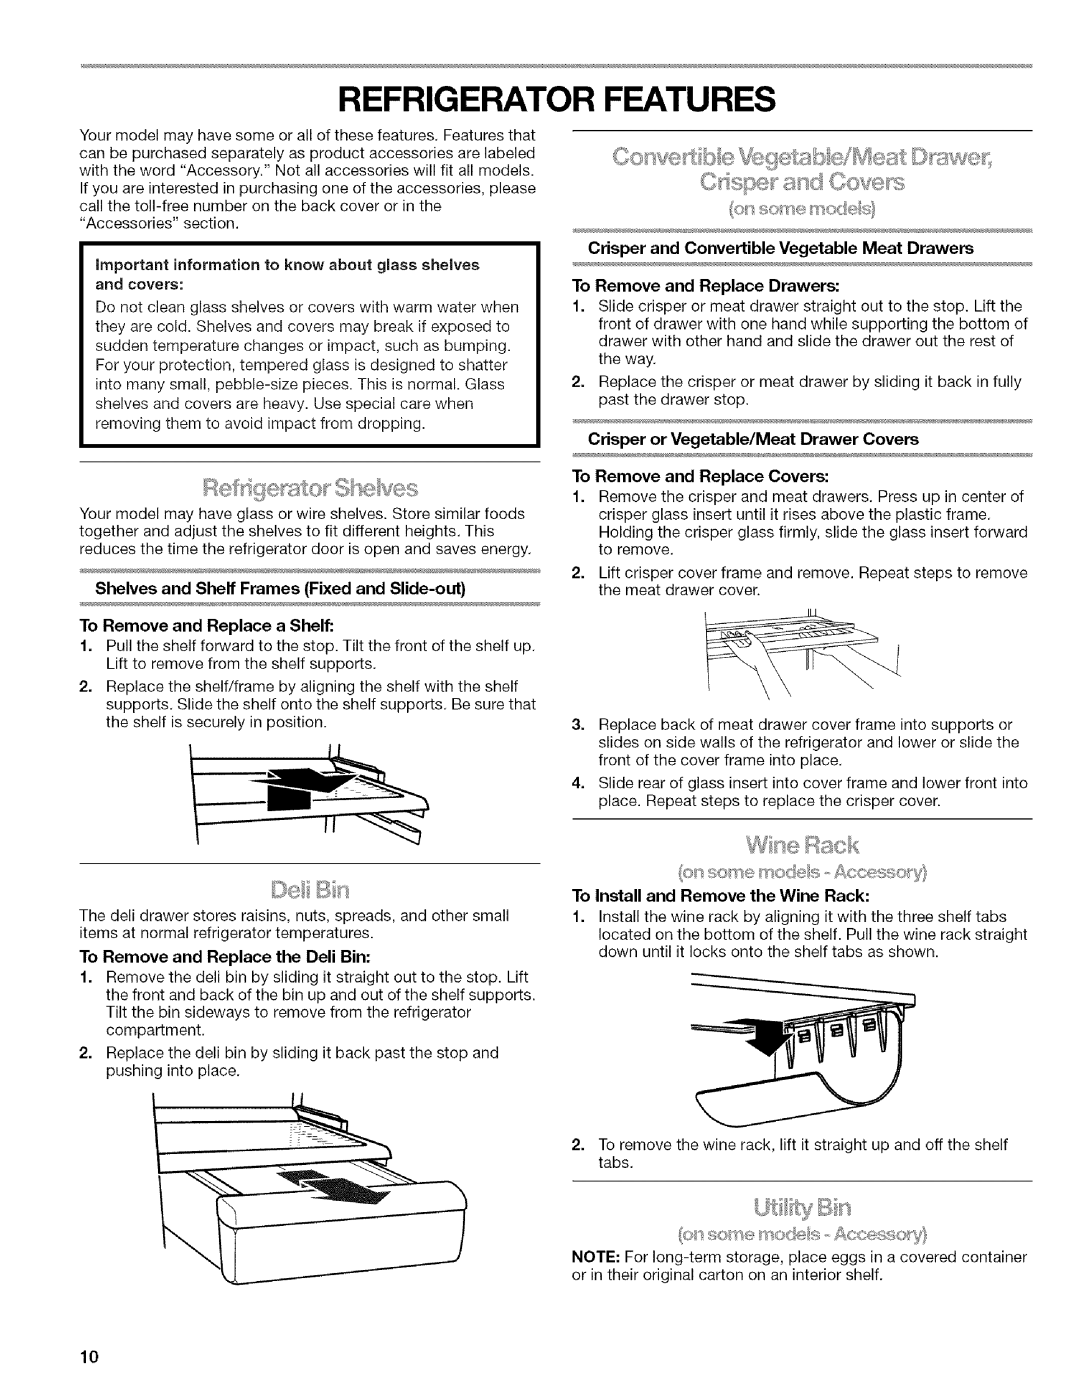
REFRIGERATOR FEATURES

Your model may have some or all of these features. Features that can be purchased separately as product accessories are labeled with the word "Accessory." Not all accessories will fit all models. If you are interested in purchasing one of the accessories, please call the toll-free number on the back cover or in the "Accessories" section.

important information to know about glass shelves

and covers:

Do not clean glass shelves or covers with warm water when they are cold. Shelves and covers may break if exposed to sudden temperature changes or impact, such as bumping.

For your protection, tempered glass is designed to shatter into many small, pebble-size pieces. This is normal. Glass shelves and covers are heavy. Use special care when removing them to avoid impact from dropping.

Your model may have glass or wire shelves. Store similar foods together and adjust the shelves to fit different heights. This reduces the time the refrigerator door is open and saves energy.

Shelves and Shelf Frames (Fixed and Slide-out)

To Remove and Replace a Shelf:

1.Pull the shelf forward to the stop. Tilt the front of the shelf up. Lift to remove from the shelf supports.

2.Replace the shelf/frame by aligning the shelf with the shelf supports. Slide the shelf onto the shelf supports. Be sure that the shelf is securely in position.

¢'_.<_%_}_"!}'_¢_%h:_"_£_ '__/_@_ _D_we

,< , .........

Crisper and Convertible Vegetable Meat Drawers

To Remove and Replace Drawers:

1.Slide crisper or meat drawer straight out to the stop. Lift the

front of drawer with one hand while supporting the bottom of drawer with other hand and slide the drawer out the rest of

the way.

2.Replace the crisper or meat drawer by sliding it back in fully past the drawer stop.

Crisper or Vegetable/Meat Drawer Covers

To Remove and Replace Covers:

1.Remove the crisper and meat drawers. Press up in center of crisper glass insert until it rises above the plastic frame. Holding the crisper glass firmly, slide the glass insert forward to remove.

2.Lift crisper cover frame and remove. Repeat steps to remove the meat drawer cover.

3.Replace back of meat drawer cover frame into supports or slides on side walls of the refrigerator and lower or slide the front of the cover frame into place.

4.Slide rear of glass insert into cover frame and lower front into place. Repeat steps to replace the crisper cover.

The den drawer stores raisins, nuts, spreads, and other small items at normal refrigerator temperatures.

To Remove and Replace the Dell Bin:

1.Remove the den bin by sliding it straight out to the stop. Lift the front and back of the bin up and out of the shelf supports. Tilt the bin sideways to remove from the refrigerator compartment.

2.Replace the den bin by sliding it back past the stop and pushing into place.

W :}e %ack

(eV/so_}_e modes - Ac_cesso/'y!

To Install and Remove the Wine Rack:

1.Install the wine rack by aligning it with the three shelf tabs located on the bottom of the shelf. Pull the wine rack straight down until it locks onto the shelf tabs as shown.

2.To remove the wine rack, lift it straight up and off the shelf tabs.

NOTE: For long-term storage, place eggs in a covered container or in their original carton on an interior shelf.

10

Page 10
Image 10
Kenmore w10144349A manual Refrigerator Features, To Remove and Replace the Dell Bin, To Install and Remove the Wine Rack

w10144349A specifications

The Kenmore W10144349A is an innovative appliance that has been designed to enhance the functionality and efficiency of home laundry. As one of the notable models in the Kenmore range, it encapsulates various technologies and features that cater to the diverse needs of modern households.

One of the standout features of the Kenmore W10144349A is its advanced washing capabilities. The machine boasts a large capacity drum, allowing users to wash larger loads, which saves both time and energy. This feature is particularly beneficial for families or individuals who prefer to do laundry less frequently while ensuring that their garments are cleaned thoroughly.

The appliance comes equipped with an array of wash cycles and options, including delicate, heavy-duty, and eco-friendly settings, catering to various fabric types and levels of dirt. The inclusion of an energy-efficient mode helps in minimizing water and electricity consumption, aligning with the current push for sustainable living.

Another key characteristic of the Kenmore W10144349A is its user-friendly interface. The intuitive control panel allows for easy selection of wash settings, while a digital display provides important information about the wash cycle progress. Additionally, the appliance features a delay start option, allowing users to set their laundry schedule according to their convenience.

The Kenmore W10144349A also integrates various technologies to enhance performance. The direct drive motor offers quieter operation and improved durability, reducing noise levels and vibrations during the wash cycle. The washer's advanced cleaning technology ensures effective removal of stains and odors, thus prolonging the life of garments.

Another impressive feature is the self-cleaning cycle, which maintains optimal hygiene by eliminating residues that can build up in the drum. The model also includes a risk mitigation feature, designed to prevent overloading, which helps to avoid mechanical issues.

On the design front, the Kenmore W10144349A showcases a sleek and modern aesthetic, making it an attractive addition to any laundry room. Its sturdy construction ensures longevity and reliability, essential for any hardworking appliance.

In summary, the Kenmore W10144349A stands out with its combination of capacity, technology, and user-centric features, making it a reliable choice for anyone looking to improve their laundry experience. With its focus on efficiency and performance, this appliance meets the needs of today's consumers while promoting a more sustainable lifestyle.