3.Align and replace the top left hinge as shown. See Graphic 3. Tighten screws.

4.Replace left hinge cover.

5.Replace the refrigerator door by carefully lifting the door onto the bottom right hinge.

6.Align and replace the top right hinge as shown. See Graphic 5. Tighten screws.

7.Replace hinge cover.

8.Plug into a grounded 3 prong outlet.

Adiust :he ©corn

Door Closing

Your refrigerator has two front adjustable rollers -- one on the right and one on the left. If your refrigerator seems unsteady or if you want the doors to close more easily, adjust the refrigerator's tilt using the instructions below:

1.Move the refrigerator into its final location.

2.The two leveling screws are part of the front roller assemblies which are at the base of the refrigerator on either side. See Graphic 7.

3.Use a hex-head wrench to adjust the leveling screws. Turn the leveling screw to the right to raise that side of the refrigerator or turn the leveling screw to the left to lower that side. It may take several turns of the leveling screws to adjust the tilt of the refrigerator. See Graphic 7.

NOTE: Having someone push against the top of the refrigerator takes some weight off the leveling screws and rollers. This makes it easier to adjust the screws.

4.Open both doors again and check to make sure that they close as easily as you like. If not, tilt the refrigerator slightly more to the rear by turning both leveling screws to the right. It may take several more turns, and you should turn both leveling screws the same amount.

5.Replace the base grille.

NOTE: Be sure to refasten the Tech Sheet behind the base grille.

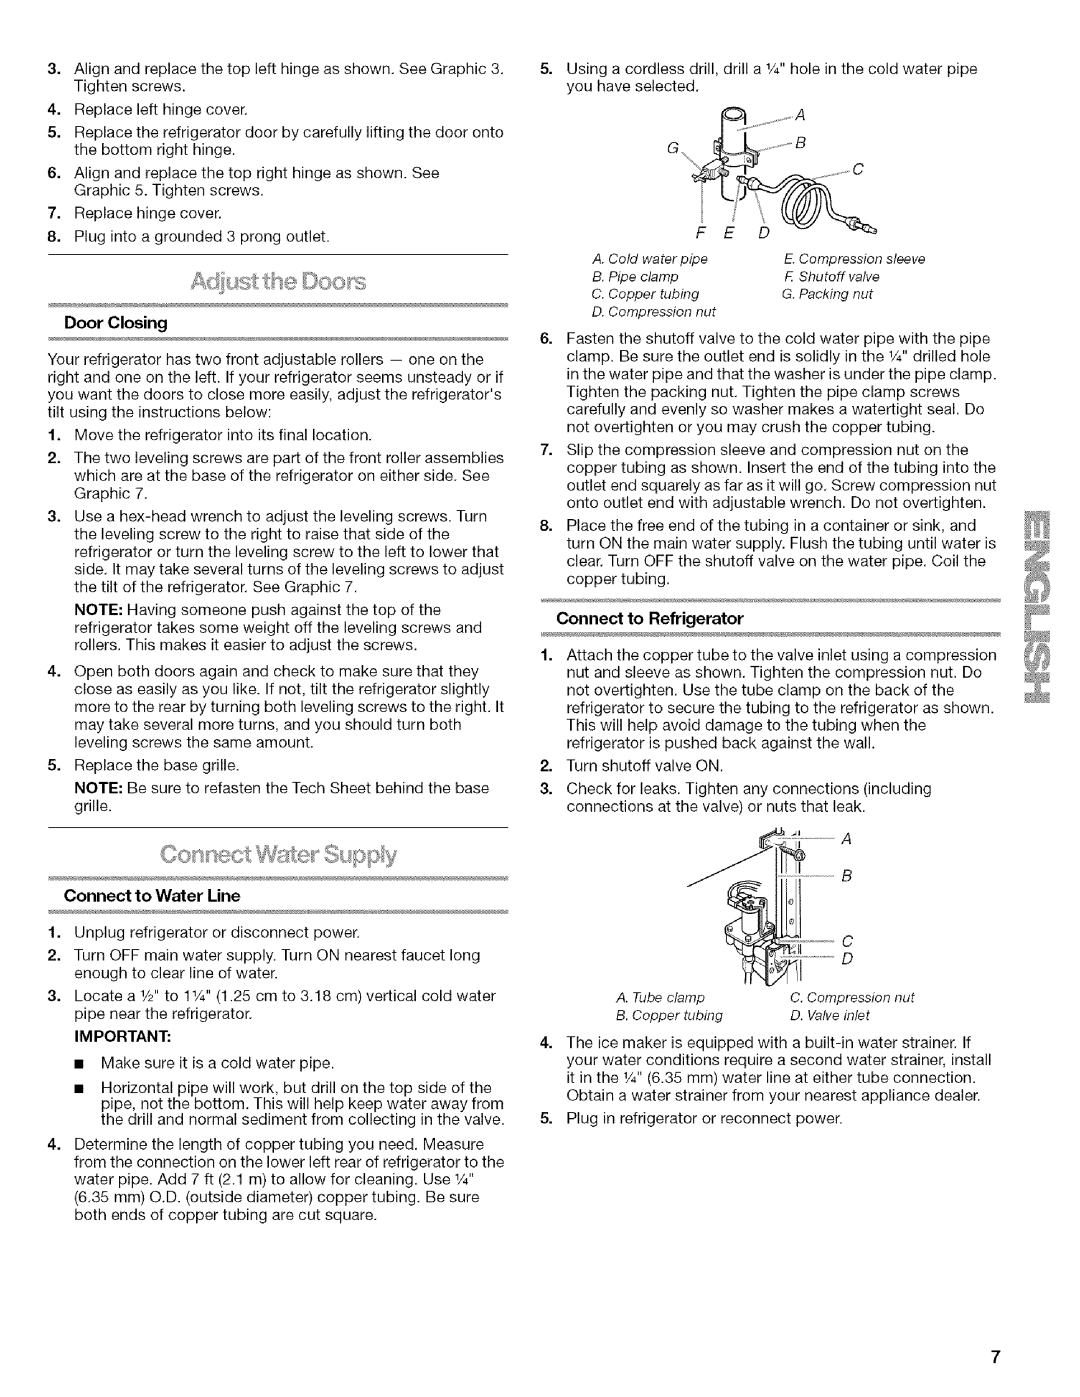
5= Using a cordless drill, drill a 1/4"hole in the cold water pipe you have selected.

G%

.......... A ........... C


F E

D

v


A. Cold

waterpipe


E. Compression sleeve

B. Pipe

clamp


F. Shutoff

valve

C. Copper tubing


G. Packing

nut

D. Compression nut


6.Fasten the shutoff valve to the cold water pipe with the pipe clamp. Be sure the outlet end is solidly in the 1/4"drilled hole in the water pipe and that the washer is under the pipe clamp. Tighten the packing nut. Tighten the pipe clamp screws carefully and evenly so washer makes a watertight seal. Do not overtighten or you may crush the copper tubing.

7.Slip the compression sleeve and compression nut on the copper tubing as shown. Insert the end of the tubing into the outlet end squarely as far as it will go. Screw compression nut onto outlet end with adjustable wrench. Do not overtighten.

8.Place the free end of the tubing in a container or sink, and turn ON the main water supply. Flush the tubing until water is clear. Turn OFF the shutoff valve on the water pipe. Coil the copper tubing.

Connect to Refrigerator

1.Attach the copper tube to the valve inlet using a compression nut and sleeve as shown. Tighten the compression nut. Do not overtighten. Use the tube clamp on the back of the

refrigerator to secure the tubing to the refrigerator as shown. This will help avoid damage to the tubing when the refrigerator is pushed back against the wall.

2.Turn shutoff valve ON.

3.Check for leaks. Tighten any connections (including connections at the valve) or nuts that leak.

A

Connect to Water Line

1.Unplug refrigerator or disconnect power.

2.Turn OFF main water supply. Turn ON nearest faucet long enough to clear line of water.

3.Locate a 1/2"to 11/4''(1.25 cm to 3.18 cm) vertical cold water pipe near the refrigerator.

IMPORTANT:

Make sure it is a cold water pipe.

Horizontal pipe will work, but drill on the top side of the pipe, not the bottom. This will help keep water away from the drill and normal sediment from collecting in the valve.

4= Determine the length of copper tubing you need. Measure from the connection on the lower left rear of refrigerator to the water pipe. Add 7 ft (2.1 m) to allow for cleaning. Use 1/4" (6.35 mm) O.D. (outside diameter) copper tubing. Be sure both ends of copper tubing are cut square.

A. Tube clamp

C. Compression nut

B. Copper tubing

D. Valve inlet


4.The ice maker is equipped with a built-in water strainer. If your water conditions require a second water strainer, install it in the 1/4"(6.35 mm) water line at either tube connection. Obtain a water strainer from your nearest appliance dealer.

5.Plug in refrigerator or reconnect power.

Page 7
Image 7
Kenmore w10144349A manual Adiust he corn, Connect to Water Line, Door Closing, Connect to Refrigerator

w10144349A specifications

The Kenmore W10144349A is an innovative appliance that has been designed to enhance the functionality and efficiency of home laundry. As one of the notable models in the Kenmore range, it encapsulates various technologies and features that cater to the diverse needs of modern households.

One of the standout features of the Kenmore W10144349A is its advanced washing capabilities. The machine boasts a large capacity drum, allowing users to wash larger loads, which saves both time and energy. This feature is particularly beneficial for families or individuals who prefer to do laundry less frequently while ensuring that their garments are cleaned thoroughly.

The appliance comes equipped with an array of wash cycles and options, including delicate, heavy-duty, and eco-friendly settings, catering to various fabric types and levels of dirt. The inclusion of an energy-efficient mode helps in minimizing water and electricity consumption, aligning with the current push for sustainable living.

Another key characteristic of the Kenmore W10144349A is its user-friendly interface. The intuitive control panel allows for easy selection of wash settings, while a digital display provides important information about the wash cycle progress. Additionally, the appliance features a delay start option, allowing users to set their laundry schedule according to their convenience.

The Kenmore W10144349A also integrates various technologies to enhance performance. The direct drive motor offers quieter operation and improved durability, reducing noise levels and vibrations during the wash cycle. The washer's advanced cleaning technology ensures effective removal of stains and odors, thus prolonging the life of garments.

Another impressive feature is the self-cleaning cycle, which maintains optimal hygiene by eliminating residues that can build up in the drum. The model also includes a risk mitigation feature, designed to prevent overloading, which helps to avoid mechanical issues.

On the design front, the Kenmore W10144349A showcases a sleek and modern aesthetic, making it an attractive addition to any laundry room. Its sturdy construction ensures longevity and reliability, essential for any hardworking appliance.

In summary, the Kenmore W10144349A stands out with its combination of capacity, technology, and user-centric features, making it a reliable choice for anyone looking to improve their laundry experience. With its focus on efficiency and performance, this appliance meets the needs of today's consumers while promoting a more sustainable lifestyle.