SECTION 2
Controls & Indicators (LED Control Center)
Programming Auto Off Timer Feature
Set the brewer to turn off two hours after the last brew.
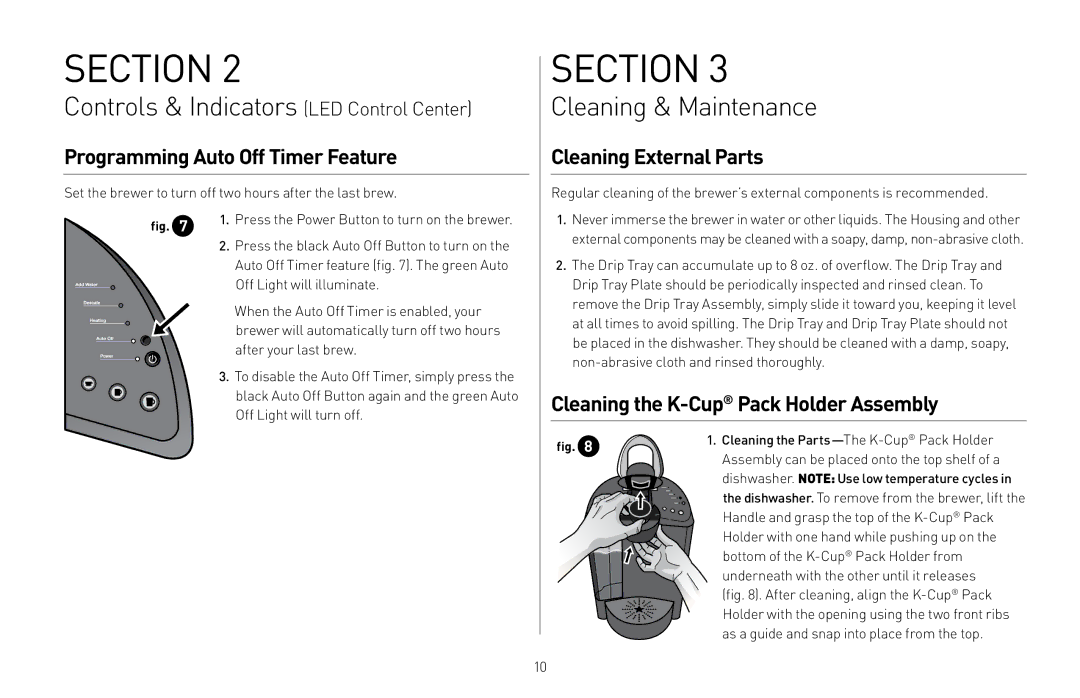
fig. 7 | 1. Press the Power Button to turn on the brewer. |
|
2.Press the black Auto Off Button to turn on the Auto Off Timer feature (fig. 7). The green Auto
Off Light will illuminate.
When the Auto Off Timer is enabled, your brewer will automatically turn off two hours after your last brew.
3.To disable the Auto Off Timer, simply press the
black Auto Off Button again and the green Auto Off Light will turn off.
SECTION 3
Cleaning & Maintenance
Cleaning External Parts
Regular cleaning of the brewer’s external components is recommended.
1.Never immerse the brewer in water or other liquids. The Housing and other external components may be cleaned with a soapy, damp,
2.The Drip Tray can accumulate up to 8 oz. of overflow. The Drip Tray and Drip Tray Plate should be periodically inspected and rinsed clean. To remove the Drip Tray Assembly, simply slide it toward you, keeping it level at all times to avoid spilling. The Drip Tray and Drip Tray Plate should not be placed in the dishwasher. They should be cleaned with a damp, soapy,
Cleaning the K-Cup® Pack Holder Assembly
fig. 8 | 1. Cleaning the | |
Assembly can be placed onto the top shelf of a | ||
| ||
| dishwasher. NOTE: Use low temperature cycles in | |
| the dishwasher. To remove from the brewer, lift the | |
| Handle and grasp the top of the | |
| Holder with one hand while pushing up on the | |
| bottom of the | |
| underneath with the other until it releases | |
| (fig. 8). After cleaning, align the | |
| Holder with the opening using the two front ribs | |
| as a guide and snap into place from the top. |
10
