
SS-700BK, SS-700 specifications
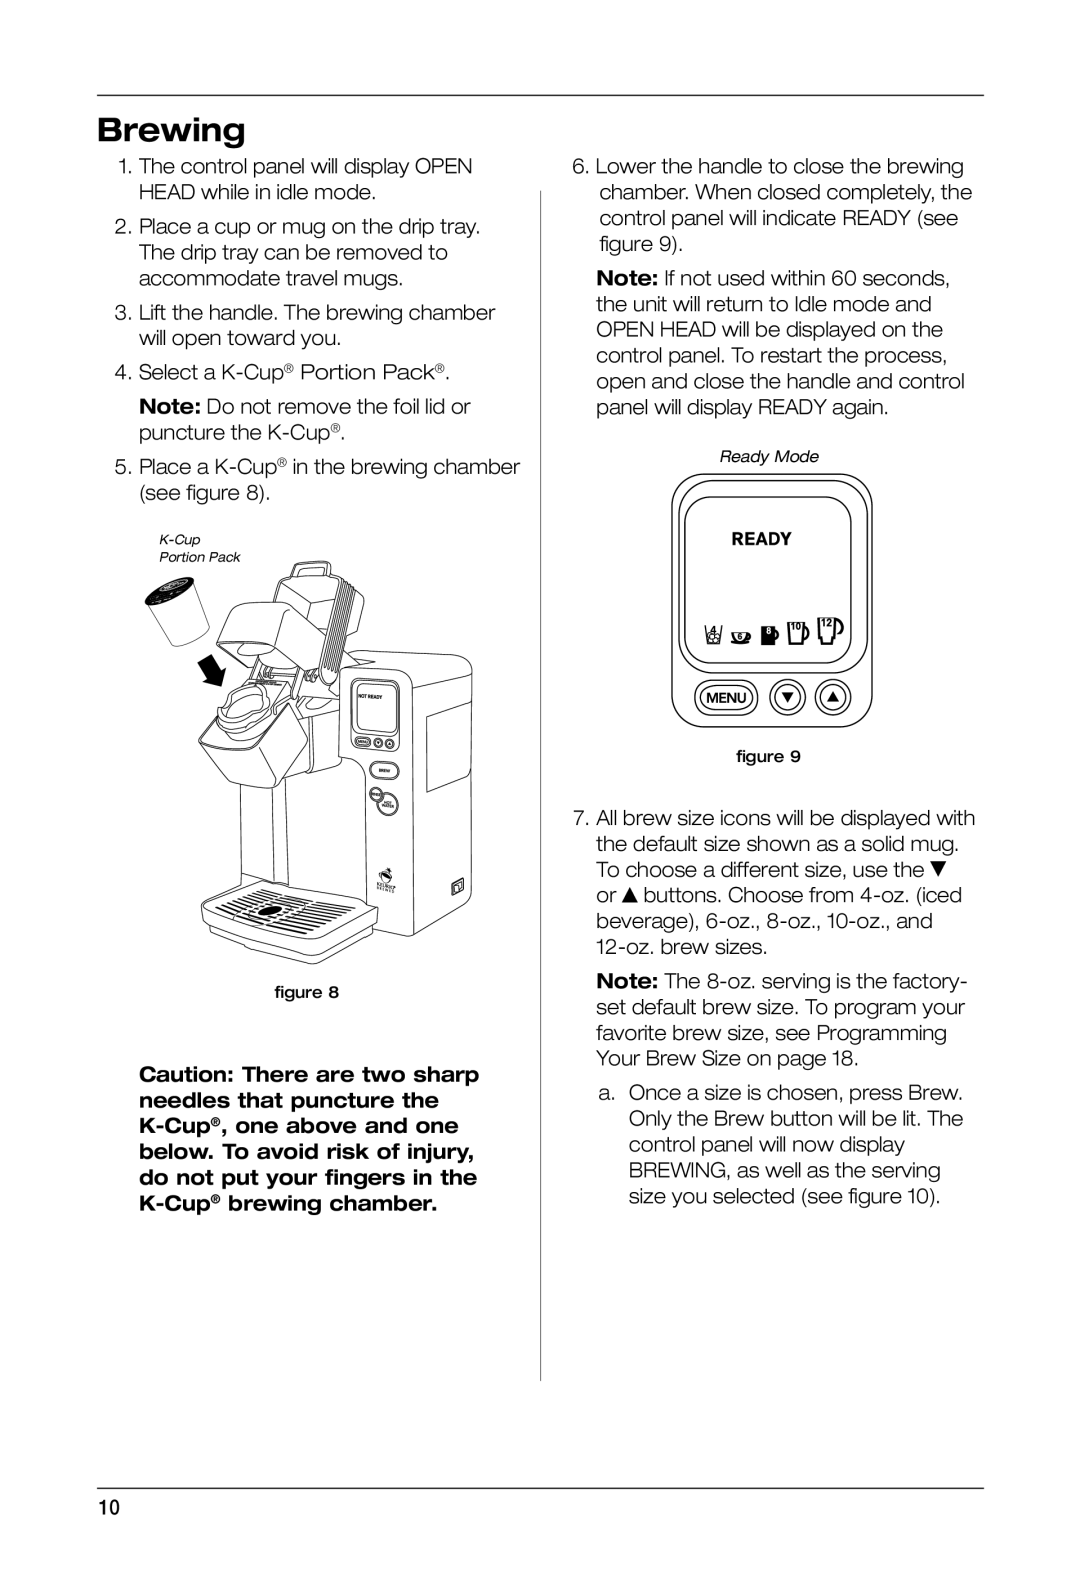
The Keurig SS-700 and SS-700BK are standout single-serve coffee brewing systems that bring convenience and sophistication to your kitchen or office. Designed with the modern coffee drinker in mind, these machines allow you to brew your favorite coffee with just the touch of a button, making them ideal for busy lifestyles.One of the main features of the SS-700 series is its ability to brew various cup sizes. With options ranging from 6 to 10 ounces, users can select the perfect amount of coffee for their needs. This versatility caters to both casual drinkers and those who prefer a more robust cup, ensuring that everyone can enjoy their coffee just how they like it.
The SS-700 is equipped with a large 60-ounce water reservoir, allowing for multiple brews without the need for constant refilling. This feature is particularly beneficial for those who entertain guests or for office settings where many individuals may wish to enjoy fresh coffee throughout the day. The reservoir is easily removable, making it simple to refill and clean.
Another impressive characteristic of the SS-700 is its advanced brewing technology. The machine employs a patented K-Cup brewing system, which uses specially designed coffee pods to deliver consistent flavor and aroma with each cup. This technology also prevents cross-contamination of flavors, ensuring that every brew is as fresh as the last.
The SS-700 models come with a fully programmable interface, allowing users to customize their brewing experience. They feature an LCD touchscreen that provides easy navigation through settings and options, including brew temperature adjustments and brew strength control. This level of customization appeals to coffee aficionados seeking to enhance their brewing experience.
Included with the Brewer is a reusable filter accessory, promoting the use of your favorite ground coffee while reducing waste from disposable K-Cups. This sustainable option aligns well with eco-conscious consumers looking to minimize their environmental impact.
In terms of design, the SS-700 and SS-700BK boast a sleek and modern aesthetic, making them an attractive addition to any countertop. Their compact size ensures they fit seamlessly into your kitchen or workspace, while the black finish gives them a professional yet stylish appearance.
In summary, the Keurig SS-700 and SS-700BK offer a blend of convenience, versatility, and customization in at-home brewing. With its advanced features, large water reservoir, and an eco-friendly reusable filter, this coffee maker caters to a variety of tastes and needs, making it a popular choice among coffee lovers everywhere.