Start with the bottom counter. Hold it in one hand, and put the next counter on top of the 1st, the same way around. Align the stacking connectors and when the stacking connectors are partly mated engage the front “P” shaped clip (BNC end) on the 2nd counter into the “P” shaped slot on the 1st counter.
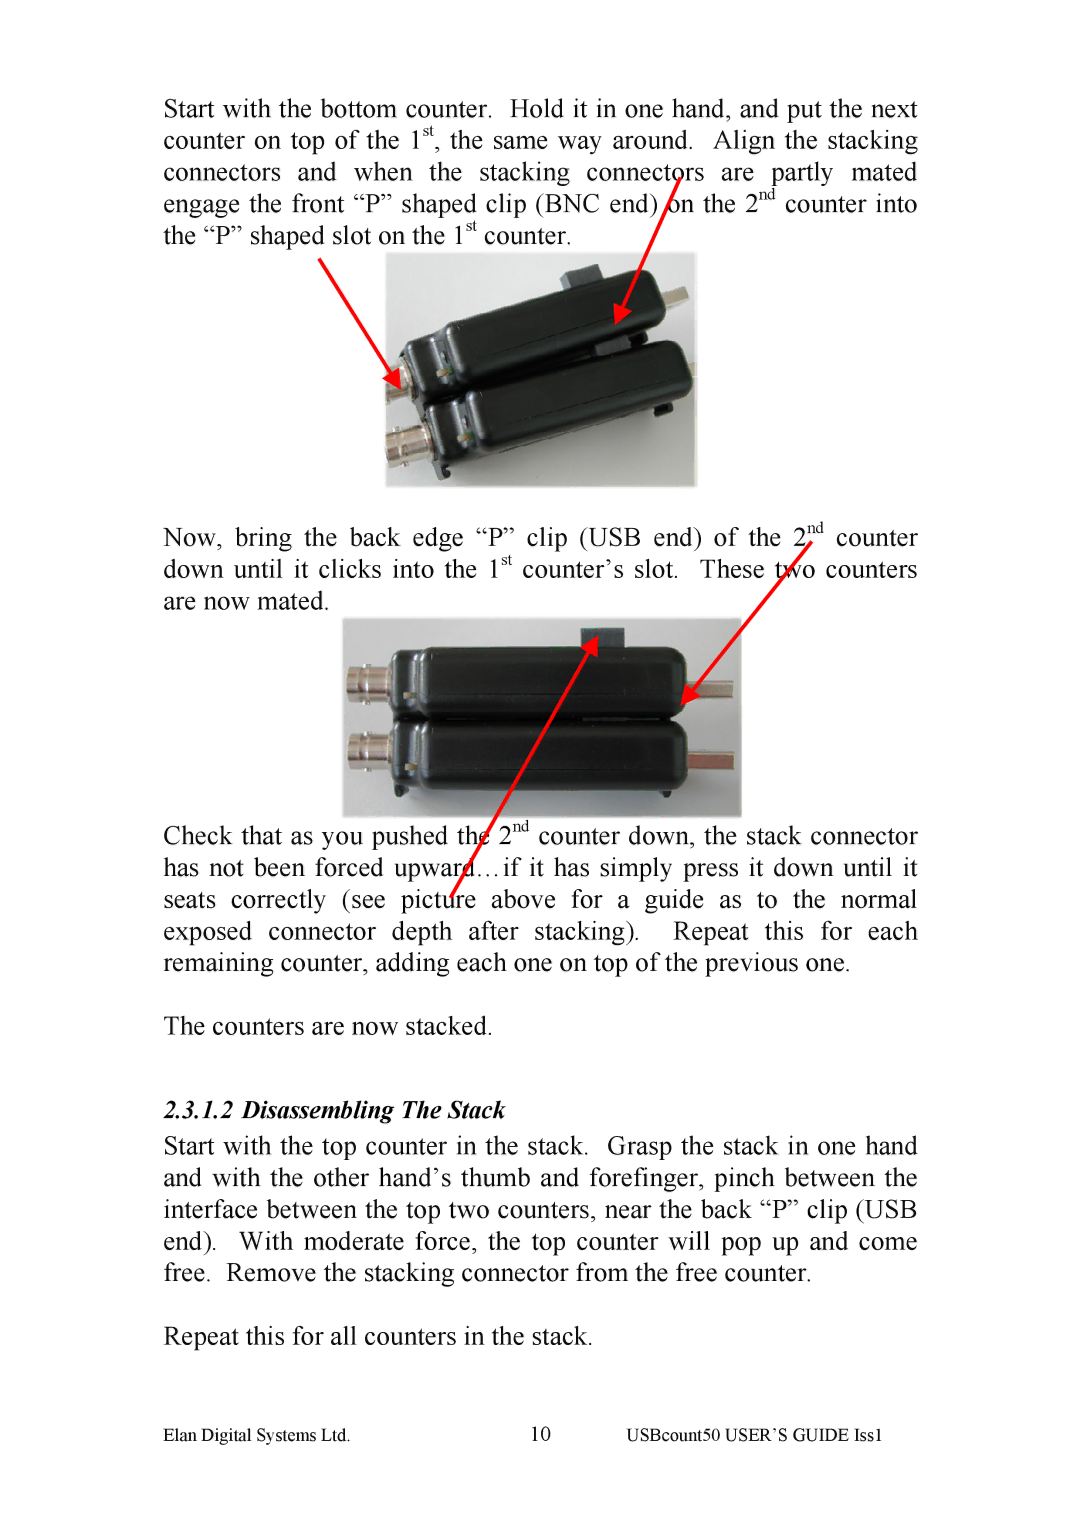
Now, bring the back edge “P” clip (USB end) of the 2nd counter down until it clicks into the 1st counter’s slot. These two counters are now mated.
Check that as you pushed the 2nd counter down, the stack connector has not been forced upward…if it has simply press it down until it seats correctly (see picture above for a guide as to the normal exposed connector depth after stacking). Repeat this for each remaining counter, adding each one on top of the previous one.
The counters are now stacked.
2.3.1.2 Disassembling The Stack
Start with the top counter in the stack. Grasp the stack in one hand and with the other hand’s thumb and forefinger, pinch between the interface between the top two counters, near the back “P” clip (USB end). With moderate force, the top counter will pop up and come free. Remove the stacking connector from the free counter.
Repeat this for all counters in the stack.
Elan Digital Systems Ltd. | 10 | USBcount50 USER’S GUIDE Iss1 |