Assembly
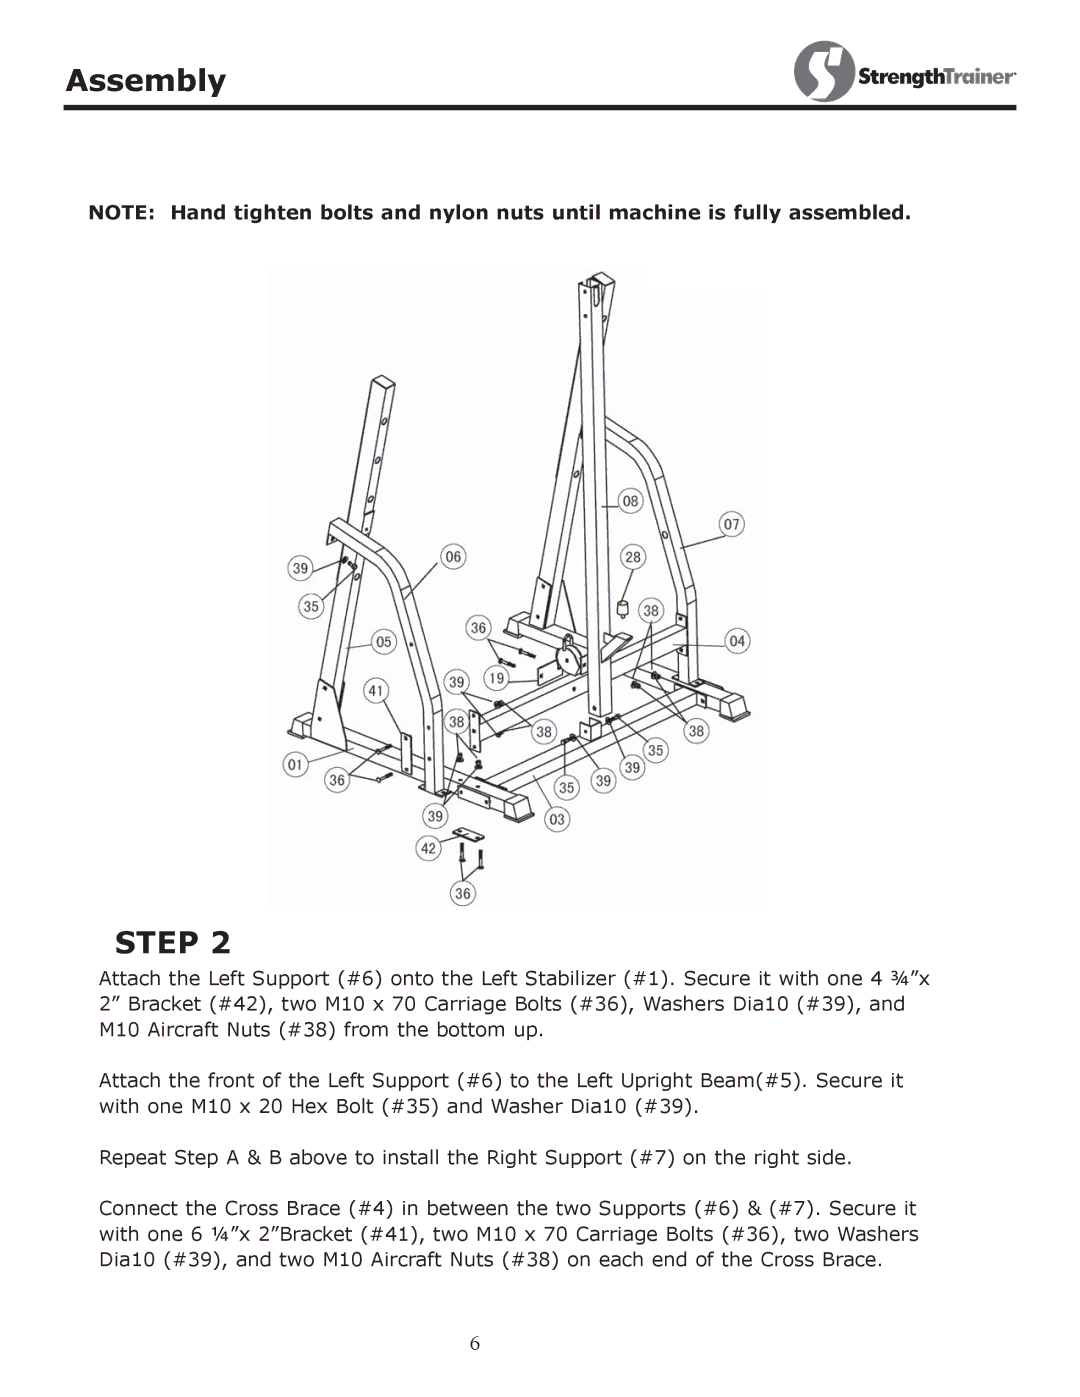
NOTE: Hand tighten bolts and nylon nuts until machine is fully assembled.
STEP 2
Attach the Left Support (#6) onto the Left Stabilizer (#1). Secure it with one 4 ¾”x 2” Bracket (#42), two M10 x 70 Carriage Bolts (#36), Washers Dia10 (#39), and M10 Aircraft Nuts (#38) from the bottom up.
Attach the front of the Left Support (#6) to the Left Upright Beam(#5). Secure it with one M10 x 20 Hex Bolt (#35) and Washer Dia10 (#39).
Repeat Step A & B above to install the Right Support (#7) on the right side.
Connect the Cross Brace (#4) in between the two Supports (#6) & (#7). Secure it with one 6 ¼”x 2”Bracket (#41), two M10 x 70 Carriage Bolts (#36), two Washers Dia10 (#39), and two M10 Aircraft Nuts (#38) on each end of the Cross Brace.
6