Installation
For a
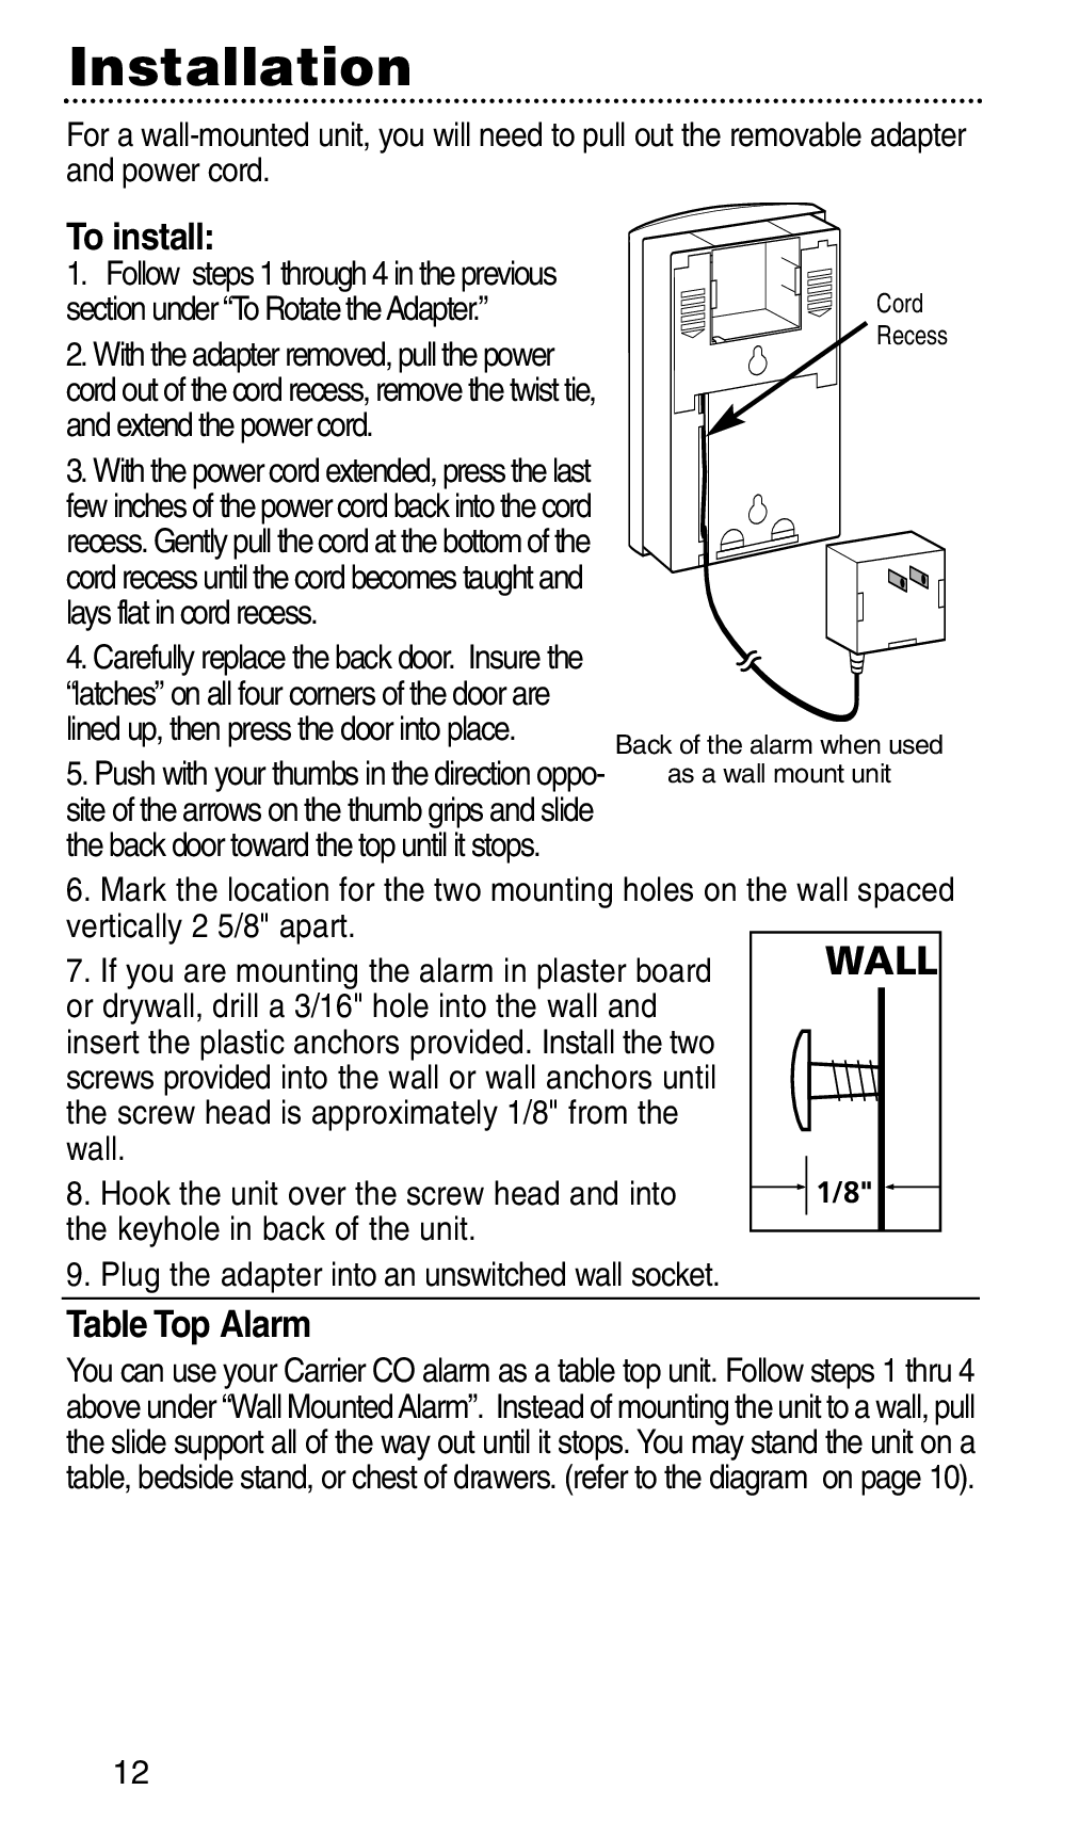
To install:
1.Follow steps 1 through 4 in the previous section under “To Rotate theAdapter.”
2.With the adapter removed, pull the power cord out of the cord recess, remove the twist tie, and extend the power cord.
3.With the power cord extended, press the last few inches of the power cord back into the cord recess. Gently pull the cord at the bottom of the cord recess until the cord becomes taught and lays flat in cord recess.
4.Carefully replace the back door. Insure the “latches” on all four corners of the door are lined up, then press the door into place.
5.Push with your thumbs in the direction oppo- site of the arrows on the thumb grips and slide the back door toward the top until it stops.
Cord
Recess
Back of the alarm when used
as a wall mount unit
6.Mark the location for the two mounting holes on the wall spaced vertically 2 5/8" apart.
7. If you are mounting the alarm in plaster board | ALLW | ||
or drywall, drill a 3/16" hole into the wall and |
|
|
|
insert the plastic anchors provided. Install the two |
|
|
|
screws provided into the wall or wall anchors until |
|
|
|
the screw head is approximately 1/8" from the |
|
|
|
wall. |
|
|
|
8. Hook the unit over the screw head and into |
| 1/8" |
|
| |||
the keyhole in back of the unit. |
|
|
|
|
|
| |
9.Plug the adapter into an unswitched wall socket.
Table Top Alarm
You can use your Carrier CO alarm as a table top unit. Follow steps 1 thru 4 above under “Wall MountedAlarm”. Instead of mounting the unit to a wall, pull the slide support all of the way out until it stops. You may stand the unit on a table, bedside stand, or chest of drawers. (refer to the diagram on page 10).
12