22 | 17 | STEP 11. |
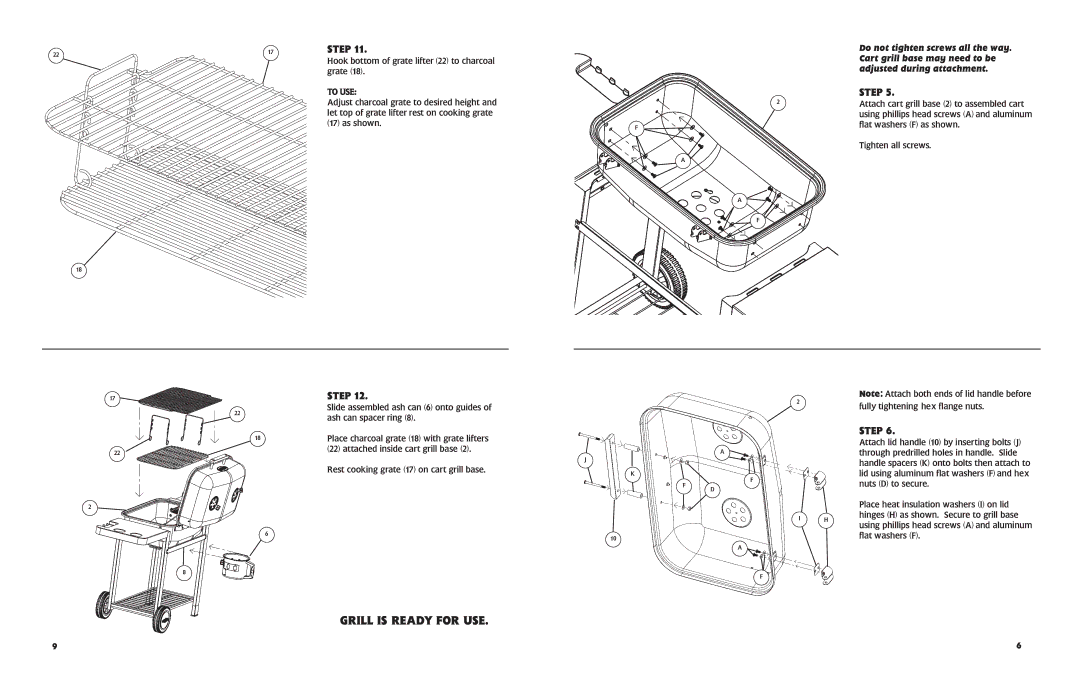
Hook bottom of grate lifter (22) to charcoal grate (18).
TO USE:
Adjust charcoal grate to desired height and let top of grate lifter rest on cooking grate (17) as shown.
18
| Do not tighten screws all the way. |
| Cart grill base may need to be |
| adjusted during attachment. |
2 | STEP 5. |
Attach cart grill base (2) to assembled cart | |
| using phillips head screws (A) and aluminum |
F | flat washers (F) as shown. |
| Tighten all screws. |
A |
|
A![]()
F
17
22
18
22
2
6
STEP 12.
2
Slide assembled ash can (6) onto guides of ash can spacer ring (8).
Place charcoal grate (18) with grate lifters |
|
|
(22) attached inside cart grill base (2). |
| A |
| J |
|
Rest cooking grate (17) on cart grill base. | K |
|
| F | |
| F | |
| D | |
|
|
I H
10
A
Note: Attach both ends of lid handle before fully tightening hex flange nuts.
STEP 6.
Attach lid handle (10) by inserting bolts (J) through predrilled holes in handle. Slide handle spacers (K) onto bolts then attach to lid using aluminum flat washers (F) and hex nuts (D) to secure.
Place heat insulation washers (I) on lid hinges (H) as shown. Secure to grill base using phillips head screws (A) and aluminum flat washers (F).
8
F
GRILL IS READY FOR USE.
9 | 6 |