Assembling Your Pouring Shield*
English
![]()
![]()
![]()
![]() Pouring
Pouring
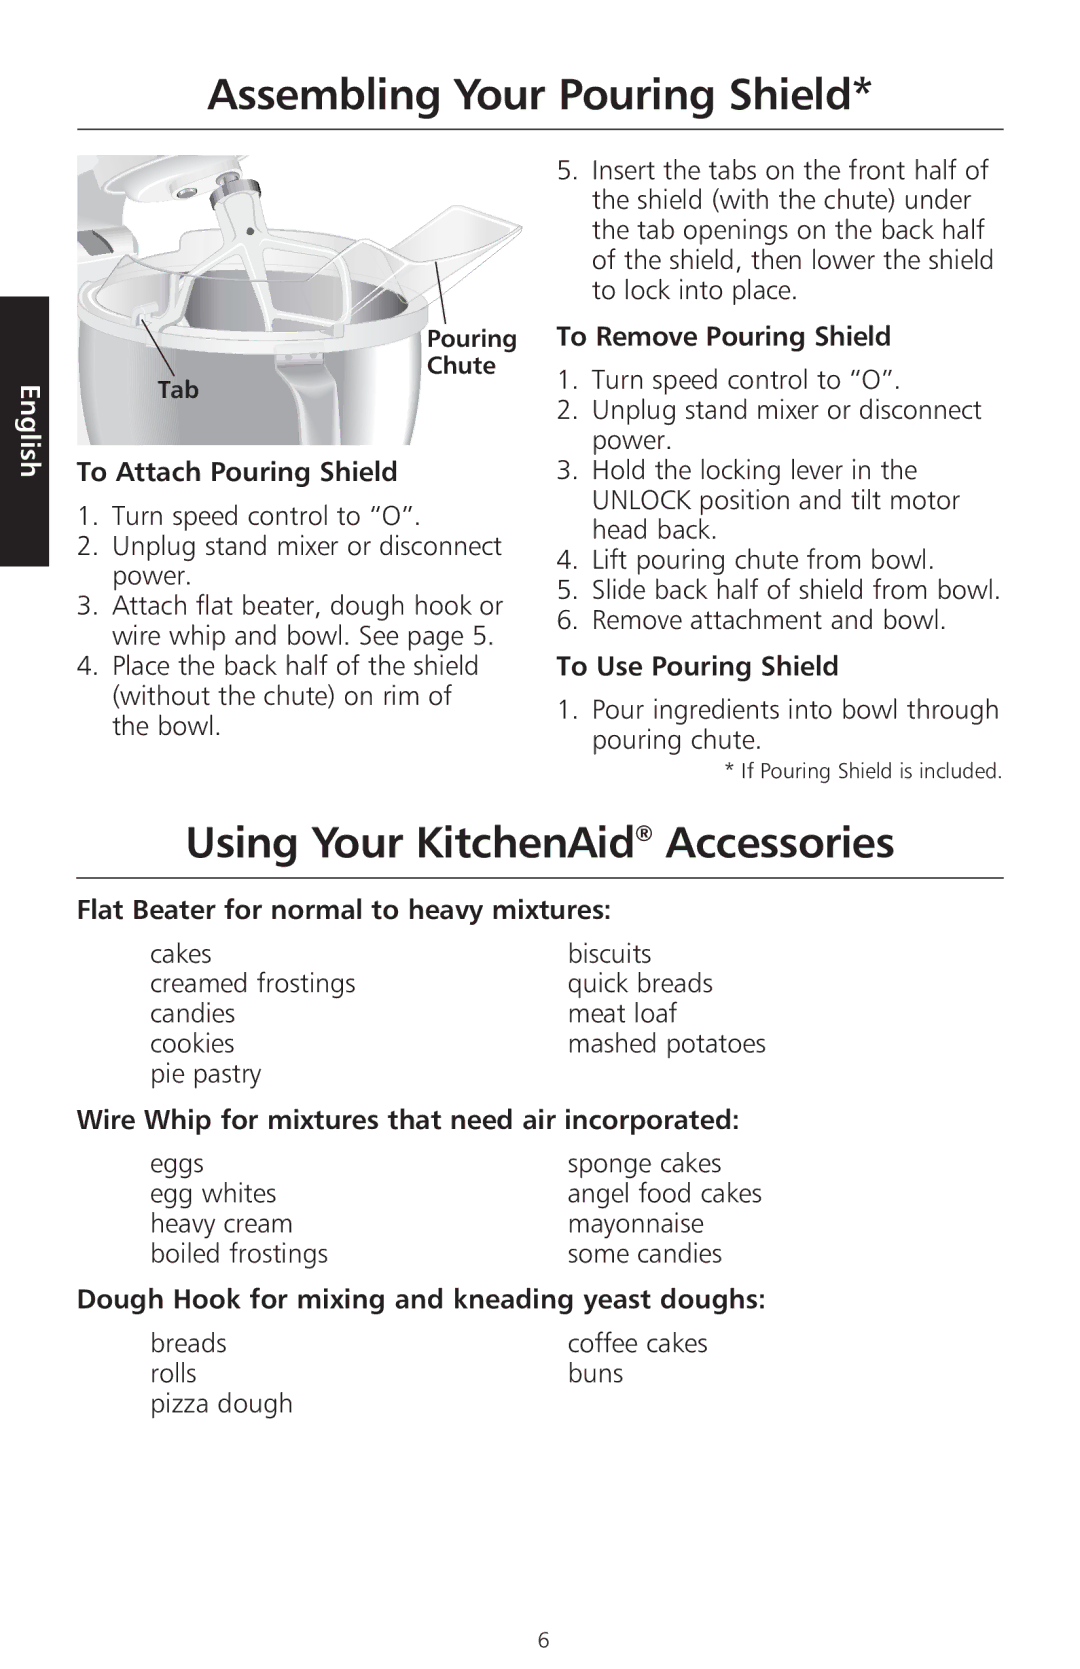
Chute
Tab
To Attach Pouring Shield
1.Turn speed control to “O”.
2.Unplug stand mixer or disconnect power.
3.Attach flat beater, dough hook or wire whip and bowl. See page 5.
4.Place the back half of the shield (without the chute) on rim of the bowl.
5.Insert the tabs on the front half of the shield (with the chute) under the tab openings on the back half of the shield, then lower the shield to lock into place.
To Remove Pouring Shield
1.Turn speed control to “O”.
2.Unplug stand mixer or disconnect power.
3.Hold the locking lever in the UNLOCK position and tilt motor head back.
4.Lift pouring chute from bowl.
5.Slide back half of shield from bowl.
6.Remove attachment and bowl.
To Use Pouring Shield
1.Pour ingredients into bowl through pouring chute.
*If Pouring Shield is included.
Using Your KitchenAid® Accessories
Flat Beater for normal to heavy mixtures:
cakes | biscuits |
creamed frostings | quick breads |
candies | meat loaf |
cookies | mashed potatoes |
pie pastry |
|
Wire Whip for mixtures that need air incorporated:
eggs | sponge cakes |
egg whites | angel food cakes |
heavy cream | mayonnaise |
boiled frostings | some candies |
Dough Hook for mixing and kneading yeast doughs:
breads | coffee cakes |
rolls | buns |
pizza dough |
|
6