n
‘+, Latch dishwasher door shut. Grasp dishwasher door frame and slide dishwasher off of shipping base or cardboard and into cabinet opening. Do Not push on dishwasher door panels or console. Center dishwasher in opening. Check that front leveling legs are firmly against floor.
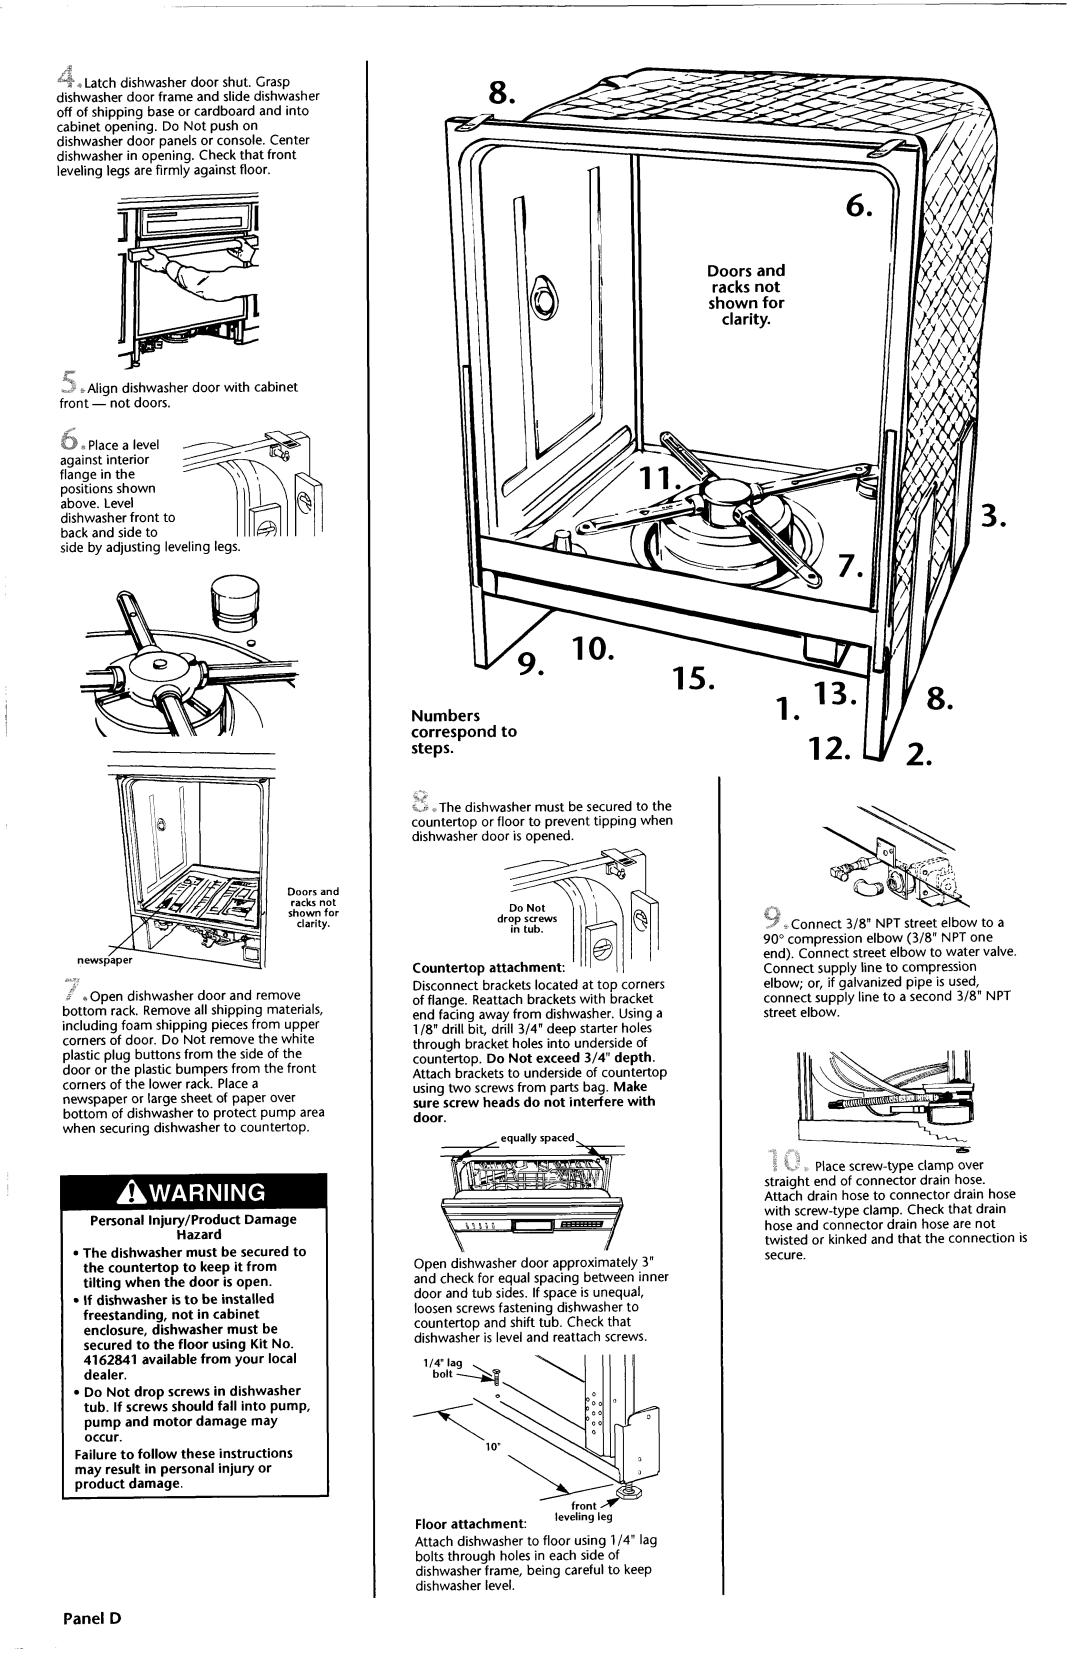
Doors and racks not shown for clarity.
1Place a level against interior flanqe in the posi‘iions shown above. Level dishwasher front to back and side to
side by adjusting leveling legs.
Doors and racks not shown for clarity.
newspm
“
2” +Open dishwasher door and remove bottom rack. Remove all shipping materials, including foam shipping pieces from upper corners of door. Do Not remove the white plastic plug buttons from the side of the door or the plastic bumpers from the front corners of the lower rack. Place a newspaper or large sheet of paper over bottom of dishwasher to protect pump area when securing dishwasher to countertop.
Personal Injury/Product Damage
Hazard
l The dishwasher must be secured to the countertop to keep it from tilting when the door is open.
l If dishwasher is to be installed freestanding, not in cabinet enclosure, dishwasher must be secured to the floor using Kit No. 4162841 available from your local dealer.
l Do Not drop screws in dishwasher tub. If screws should fall into pump, pump and motor damage may occur.
Failure to follow these instructions may result in personal injury or product damage.
Numbers correspond to steps.
3~ BThe dishwasher must be secured to the countertop or floor to prevent tipping when dishwasher door is opened.
Countertop | attachment: | ’ ’ ’ 1 |
Disconnect brackets located at top corners of flange. Reattach brackets with bracket end facing away from dishwasher. Using a l/8” drill bit, drill 3/4” deep starter holes through bracket holes into underside of countertop. Do Not exceed 3/4” depth. Attach brackets to underside of countertop using two screws from parts bag. Make sure screw heads do not interfere with door.
equally spaced
Open dishwasher door approximately 3” and check for equal spacing between inner door and tub sides. If space is unequal, loosen screws fastening dishwasher to countertop and shift tub. Check that dishwasher is level and reattach screws.
8 .
LConnect 3/8” NPT street elbow to a 90” compression elbow (3/8” NPT one end). Connect street elbow to water valve. Connect supply line to compression elbow; or, if galvanized pipe is used, connect supply line to a second 3/8” NPT street elbow.
%&2 I Place
Floor attachment:
leveling leg
Attach dishwasher to floor using l/4” lag bolts through holes in each side of dishwasher frame, being careful to keep dishwasher level.