Factory Trim Kit

(on some models)

There may be an occasion when you will need to remove the factory-installed trim kit, such as moving the refrigerator to a new home or installing custom-made decorator panels. Please read all instructions carefully before removing the trim kit and decorator panels.

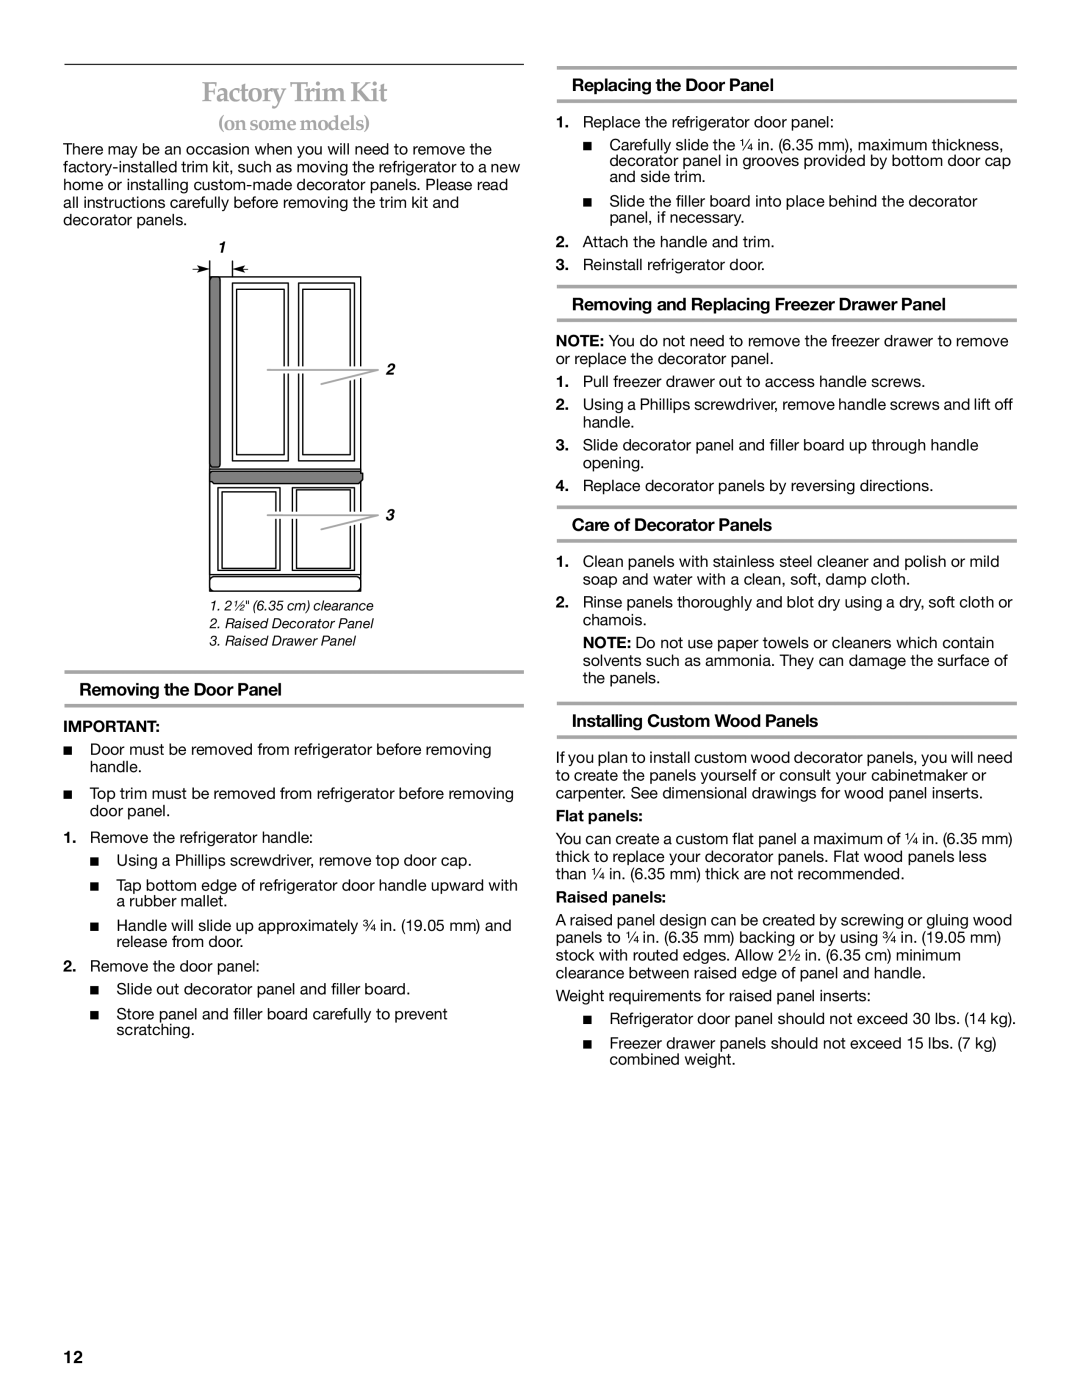
1

2

3

1. 2¹⁄₂" (6.35 cm) clearance

2.Raised Decorator Panel

3.Raised Drawer Panel

Removing the Door Panel

IMPORTANT:

Door must be removed from refrigerator before removing handle.

Top trim must be removed from refrigerator before removing door panel.

1.Remove the refrigerator handle:

Using a Phillips screwdriver, remove top door cap.

Tap bottom edge of refrigerator door handle upward with a rubber mallet.

Handle will slide up approximately ³⁄₄ in. (19.05 mm) and release from door.

2.Remove the door panel:

Slide out decorator panel and filler board.

Store panel and filler board carefully to prevent scratching.

Replacing the Door Panel

1.Replace the refrigerator door panel:

Carefully slide the ¹⁄₄ in. (6.35 mm), maximum thickness, decorator panel in grooves provided by bottom door cap and side trim.

Slide the filler board into place behind the decorator panel, if necessary.

2.Attach the handle and trim.

3.Reinstall refrigerator door.

Removing and Replacing Freezer Drawer Panel

NOTE: You do not need to remove the freezer drawer to remove or replace the decorator panel.

1.Pull freezer drawer out to access handle screws.

2.Using a Phillips screwdriver, remove handle screws and lift off handle.

3.Slide decorator panel and filler board up through handle opening.

4.Replace decorator panels by reversing directions.

Care of Decorator Panels

1.Clean panels with stainless steel cleaner and polish or mild soap and water with a clean, soft, damp cloth.

2.Rinse panels thoroughly and blot dry using a dry, soft cloth or chamois.

NOTE: Do not use paper towels or cleaners which contain solvents such as ammonia. They can damage the surface of the panels.

Installing Custom Wood Panels

If you plan to install custom wood decorator panels, you will need to create the panels yourself or consult your cabinetmaker or carpenter. See dimensional drawings for wood panel inserts.

Flat panels:

You can create a custom flat panel a maximum of ¹⁄₄ in. (6.35 mm) thick to replace your decorator panels. Flat wood panels less than ¹⁄₄ in. (6.35 mm) thick are not recommended.

Raised panels:

A raised panel design can be created by screwing or gluing wood panels to ¹⁄₄ in. (6.35 mm) backing or by using ³⁄₄ in. (19.05 mm) stock with routed edges. Allow 2¹⁄₂ in. (6.35 cm) minimum clearance between raised edge of panel and handle.

Weight requirements for raised panel inserts:

Refrigerator door panel should not exceed 30 lbs. (14 kg).

Freezer drawer panels should not exceed 15 lbs. (7 kg) combined weight.

12

Page 12
Image 12
KitchenAid KBRA20ELSS0, KBLA20ELSS0, KBRA20ELWH0, KBRA20EMSS, KBRA20ELBT0, KBRA20ELBL0 manual Factory Trim Kit

KBRA20ELBL0, KBRA20EMSS, KBLA20ELSS0, KBRA20ELSS0, KBRA20ELWH0 specifications

The KitchenAid KBRA20ELBT0, along with its variants KBRA20ELWH0, KBRA20ELSS0, and KBLA20ELSS0, represents the epitome of modern refrigeration technology in bottom-mount refrigerator design. Combining style, functionality, and innovative features, these models are designed to meet the demands of contemporary kitchens while preserving food freshness and accessibility.

One of the standout features is the spacious interior layout which maximizes storage capacity. The bottom-mount design places the refrigerator section at eye level, allowing for easy access to frequently used items while the freezer section is located beneath. This configuration minimizes bending and stretching, thus enhancing convenience in day-to-day use.

Equipped with the Advanced Cooling System, the KBRA20EL series maintains optimal temperature and humidity levels. The system utilizes a combination of precise cooling technology and active temperature management to ensure that food stays fresher for longer. This technology monitors conditions within the refrigerator to minimize temperature fluctuations, which is critical for preserving perishables.

The installation of the FreshChill Temperature Management System further enhances usability by allowing users to customize the temperature settings for different compartments. Additionally, the Produce Preserver feature helps to extend the life of fruits and vegetables by absorbing ethylene gas, which can hasten spoilage.

These models feature a sleek, stainless steel exterior that not only enhances aesthetic appeal but also provides ease of cleaning. The fingerprint-resistant finish ensures that the surface remains smudge-free, which is particularly important in high-traffic kitchens.

Another valuable characteristic is the LED lighting embedded within the refrigerator compartments. This energy-efficient lighting provides bright and clear visibility, making it easy to locate items even in the back of the shelves.

Additionally, the KBRA20EL series includes multiple adjustable shelves and door bins, allowing for flexible storage solutions. The clear shelves make it easy to spot items, reducing the likelihood of food items being lost in the back of the fridge.

In essence, KitchenAid’s KBRA20ELBT0 and its counterparts showcase a sophisticated blend of advanced technology, user-friendly design, and increased storage capabilities. These bottom-mount refrigerators are an ideal choice for homeowners looking to elevate their kitchen experience while ensuring their food stays fresh and accessible. Whether it's the stylish finishes, innovative cooling technology, or versatile storage options, this series is crafted to meet the modern kitchen's needs and demands.