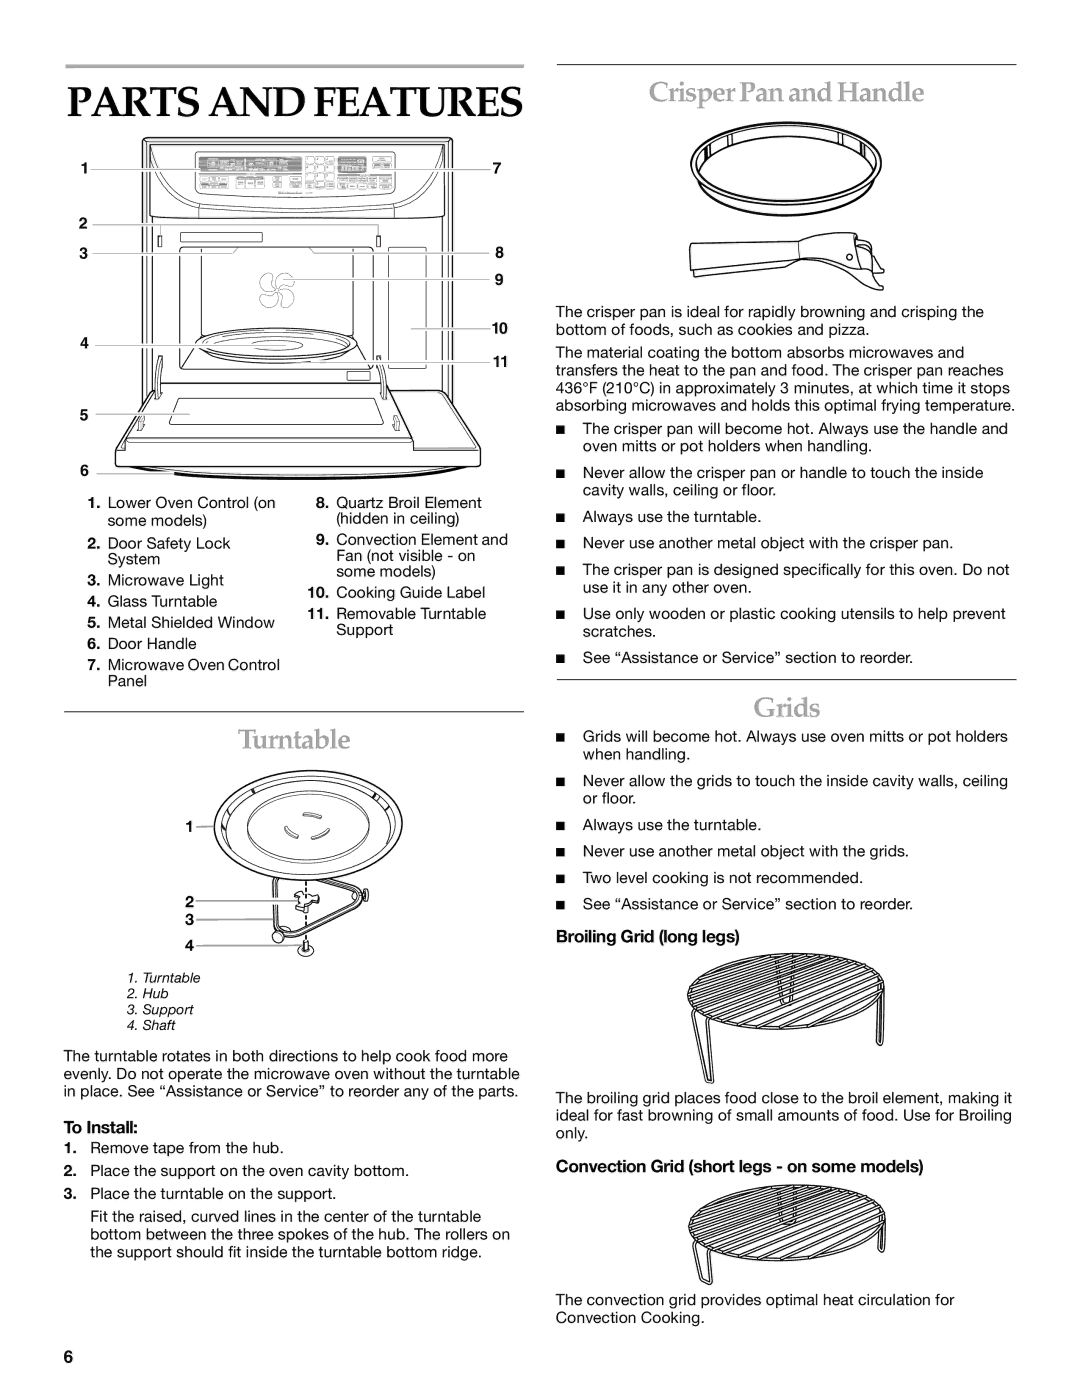
KBMC140, KBMC147, KEMC308, KEMC378, KEMC307, KEMC377, YKEMC307, YKEMC308 specifications
KitchenAid offers a stellar lineup of built-in microwaves that combine functionality and modern design, making them an essential addition to any contemporary kitchen. Among the diverse models, the KBMC140, KBMC147, KEMC308, KEMC378, KEMC307, KEMC377, YKEMC307, and YKEMC308 stand out for their innovative features and high performance.The KBMC140 and KBMC147 are compact yet powerful, designed to fit seamlessly into any kitchen. These models are equipped with sensor cooking technology, allowing for precise cooking times by automatically adjusting based on moisture released during the cooking process. This ensures perfectly cooked meals every time. Their sleek stainless steel finishes enhance their visual appeal, making them not only functional but also stylish.
Moving on to the KEMC308 and KEMC378 models, both bring a hefty 1.9 cubic feet of capacity, which is ideal for accommodating larger dishes. The KEMC378 also features an upper oven that can be used in conjunction with the microwave, providing unmatched versatility. These models boast convection cooking, where heated air circulates throughout the cavity, allowing for faster and more even cooking. The inclusion of a high/low venting system in these two models helps in maintaining a clear cooking environment by effectively ventilating smoke and odors.
The KEMC307 and KEMC377 models further elevate the KitchenAid microwave experience with features like a built-in grilling element and auto-bake options. These functionalities enable users to achieve crispy textures for their dishes, elevating the quality of meals from casual to gourmet. Both models come equipped with the intuitive electronic controls, simplifying the cooking process.
Finally, the YKEMC307 and YKEMC308 variations offer the same robust features as their K-series counterparts but with additional color options and design enhancements tailored for specific aesthetic preferences. These microwaves are not just appliances; they are integrated components of a sophisticated kitchen.
Whether you’re reheating leftovers, preparing a full meal, or experimenting with gourmet recipes, the KitchenAid microwaves deliver on performance while complementing your kitchen’s aesthetics. These models bring together powerful cooking methods, user-friendly controls, and stylish designs, making them standout choices for any culinary enthusiast.

