INSTALLATION INSTRUCTIONS
Prepare Location
■It is recommended that the vent system be installed before range hood is installed.
■Before making cutouts, make sure there is proper clearance within the ceiling or wall for exhaust vent.
■Range hood is to be installed 24" (61.0 cm) min. for electric cooking surfaces, 30" (76.2 cm) min. for gas cooking surfaces, to a suggested maximum of 36" (91.4 cm) above the cooking surface.
■Check your ceiling height and the range hood height maximum before you select your range hood.
1.Disconnect power.
2.Determine which venting method to use: roof or wall.
3.Select a flat surface for assembling the range hood. Place covering over that surface.
![]() WARNING
WARNING
Excessive Weight Hazard
Use two or more people to move and install range hood.
Failure to do so can result in back or other injury.
4.Using 2 or more people, lift range hood onto covered surface.
Range Hood Mounting Screws Installation
1.Determine and mark the centerline on the wall where the range hood will be installed.
2.Based on the ceiling or soffit height, determine the distance “X” (24" [61.0 cm] min. from electric cooking surface or 30" [76.2 cm] min. to gas cooking surface, suggested
36" [91.4 cm] max.) needed between the cooking surface and the bottom of the range hood. To this distance, add
17¹⁄₈" (43.5 cm) and draw a horizontal line (A) about
24" (61.0 cm) long centered on the vertical centerline (B) at this distance.
A
|
|
| D |
B |
| ||
X + 1 | 7¹⁄₈ | " (43.5 cm) | |
|
|
|
|
C
A. Horizontal line
B. Vertical centerline C. Cooking surface
D. Distance “X” (24" [61.0 cm] min. from electric cooking surface, 30" [76.2 cm] min. from gas cooking surface, suggested 36" [91.4 cm] max.) +17¹⁄₈" (43.5 cm)
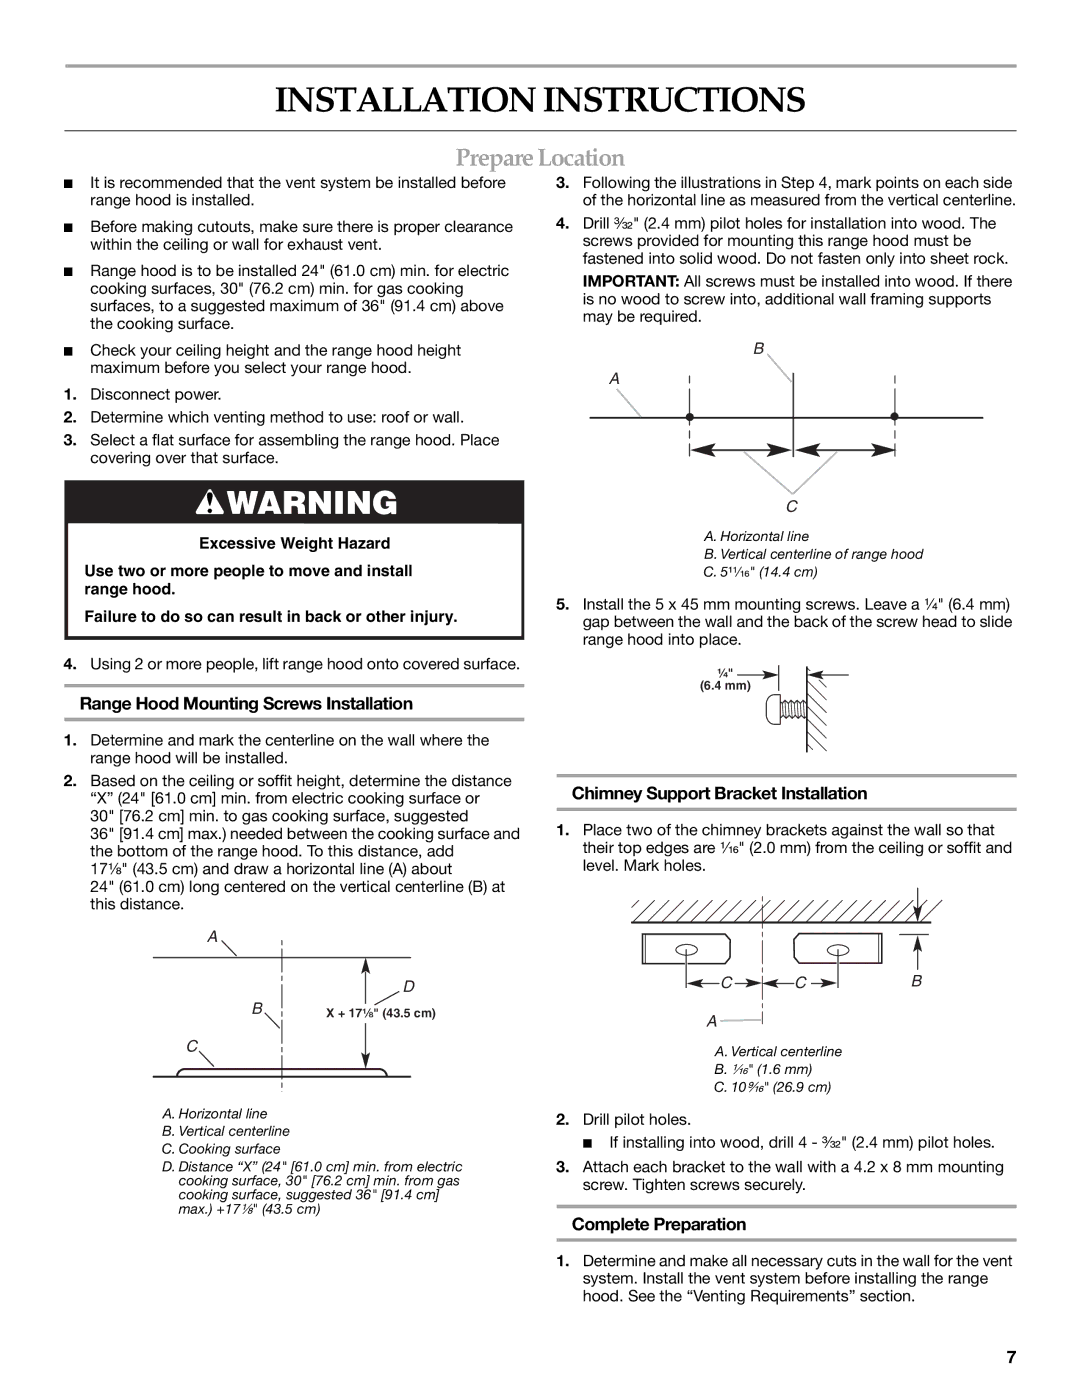
3.Following the illustrations in Step 4, mark points on each side of the horizontal line as measured from the vertical centerline.
4.Drill ³⁄₃₂" (2.4 mm) pilot holes for installation into wood. The screws provided for mounting this range hood must be fastened into solid wood. Do not fasten only into sheet rock.
IMPORTANT: All screws must be installed into wood. If there is no wood to screw into, additional wall framing supports may be required.
B
A
C
A. Horizontal line
B. Vertical centerline of range hood
C. 5¹¹⁄₁₆" (14.4 cm)
5.Install the 5 x 45 mm mounting screws. Leave a ¹⁄₄" (6.4 mm) gap between the wall and the back of the screw head to slide range hood into place.
¹⁄₄" ![]() (6.4 mm)
(6.4 mm)
Chimney Support Bracket Installation
1.Place two of the chimney brackets against the wall so that their top edges are ¹⁄₁₆" (2.0 mm) from the ceiling or soffit and level. Mark holes.
C | C | B |
A
A. Vertical centerline
B. ¹⁄₁₆" (1.6 mm)
C. 10⁹⁄₁₆" (26.9 cm)
2.Drill pilot holes.
■ If installing into wood, drill 4 - ³⁄₃₂" (2.4 mm) pilot holes.
3.Attach each bracket to the wall with a 4.2 x 8 mm mounting screw. Tighten screws securely.
Complete Preparation
1.Determine and make all necessary cuts in the wall for the vent system. Install the vent system before installing the range hood. See the “Venting Requirements” section.
7