ProMedia® GMX D-5.1
Welcome to the Klipsch ProMedia® GMX
IMPORTANT NOTE: Before You Begin
Do not plug in the GMX
Unpacking
Carefully remove the system components from the carton:
•1 Subwoofer
•5 Satellite speakers on pedestal bases
•1 Digital preamplifier and control module
•1 Multipin control cable with DC supply cord
•5 Speaker cables with RCA connector on one end
•1 Stereo
•1 AC power cord
Speaker Setup
The subwoofer requires an AC power connection (do not plug it in until setup is completed). All five satellite speakers and the control module connect to the sub- woofer, which provides the power for all channels.
Set up the speakers as follows:
1)Place the satellite speakers around the area where you will be sitting, more or less as illustrated in Fig. 1. The center speaker should be directly above or below your TV or monitor (the satellites are magnetically shielded to prevent picture interference). Place the left and right front speakers to either side and equidistant from the screen. Place the surround (rear) speakers to the left and right and slightly behind the seating area and facing in toward it. If possible, all five satellites should be about the same distance from the seating area.
2)The subwoofer can go virtually anywhere that is convenient, but we recommend placing it in the front soundstage of your system and, if possible, against a wall or in a corner.
3)Using the five supplied speaker cables, connect the outputs on the back of the subwoofer to the matching satellites, as shown in Fig. 2. The striped wire should be connected to the red speaker terminal.
4)Using the supplied multipin DIN cable, connect the DIN output on the back of the system control module to the DIN input on the back of the subwoofer (see Fig. 2).
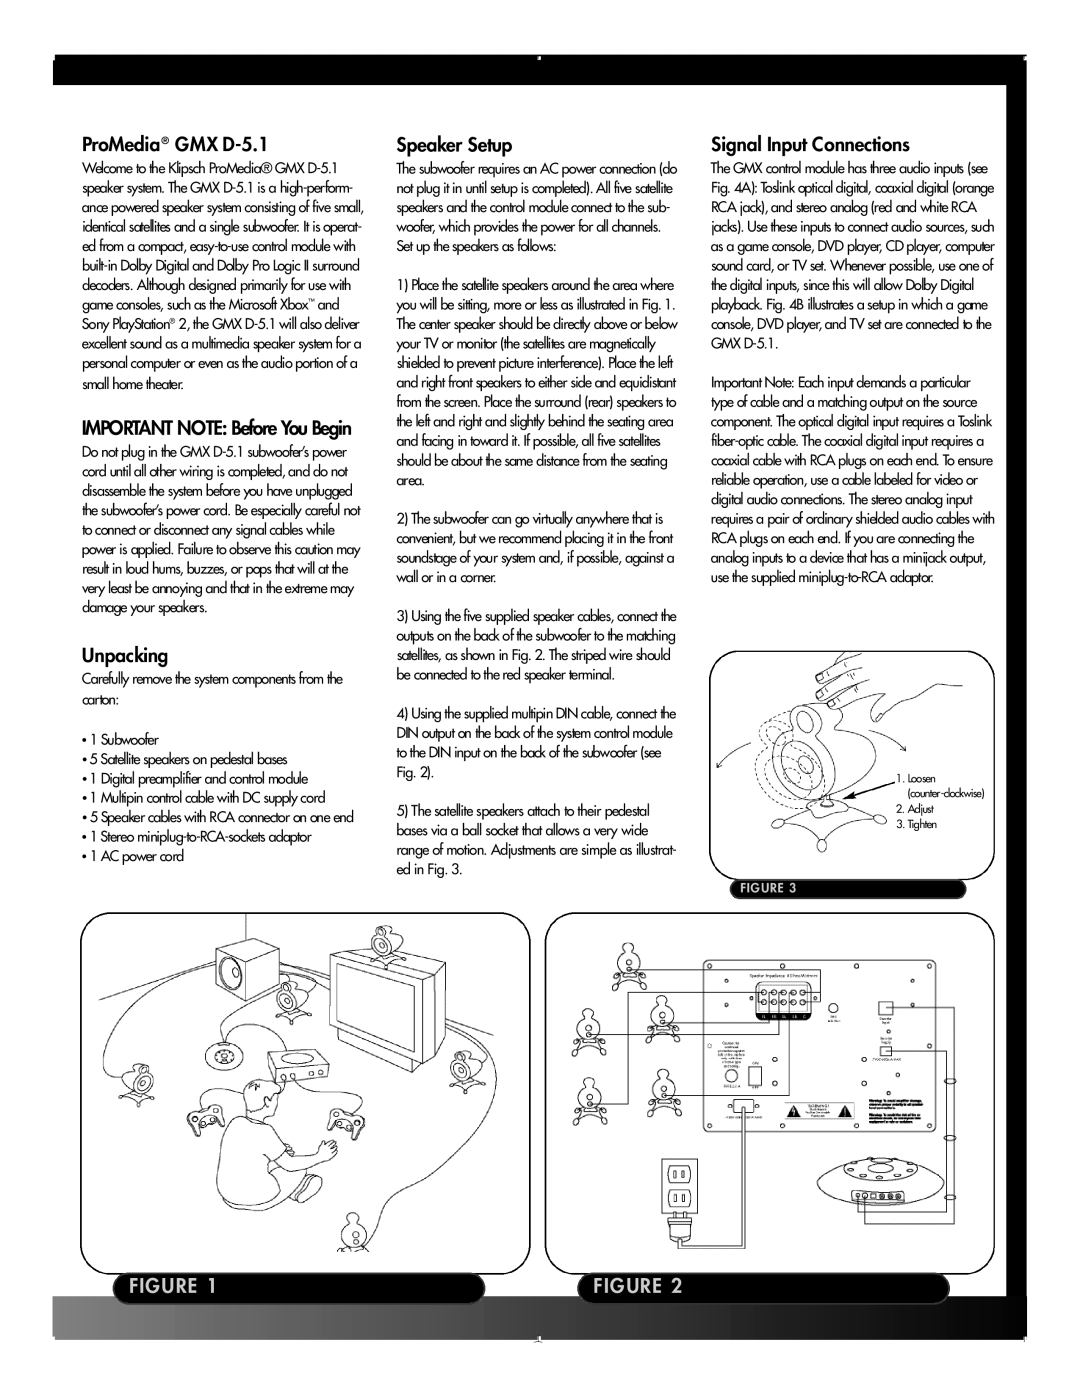
5)The satellite speakers attach to their pedestal bases via a ball socket that allows a very wide range of motion. Adjustments are simple as illustrat- ed in Fig. 3.
Signal Input Connections
The GMX control module has three audio inputs (see Fig. 4A): Toslink optical digital, coaxial digital (orange RCA jack), and stereo analog (red and white RCA jacks). Use these inputs to connect audio sources, such as a game console, DVD player, CD player, computer sound card, or TV set. Whenever possible, use one of the digital inputs, since this will allow Dolby Digital playback. Fig. 4B illustrates a setup in which a game console, DVD player, and TV set are connected to the GMX
Important Note: Each input demands a particular type of cable and a matching output on the source component. The optical digital input requires a Toslink
1. Loosen
2. Adjust
3. Tighten
FIGURE 3
FIGURE 1 |
| FIGURE 2 | |
|
|
|
|