SB3 specifications
The Klipsch SB3 is a formidable soundbar that combines innovative technologies with a sleek design to deliver an immersive audio experience. This model is part of Klipsch's renowned product lineup, recognized for its commitment to high-quality sound reproduction and exceptional performance in home theater environments.One of the standout features of the Klipsch SB3 is its powerful audio output. Equipped with dual 3-inch woofers and dual 1-inch horn-loaded tweeters, the soundbar produces clear, dynamic, and well-balanced sound across all frequencies. The horn-loading technology captures the signature Klipsch sound, resulting in a more accurate and detailed audio experience that enhances movie dialogues, music, and sports broadcasts.
The design of the SB3 is both stylish and functional. Its low-profile form factor allows it to fit seamlessly under most televisions, while the black finish and premium materials give it an elegant touch that complements any home décor. The soundbar can also be wall-mounted, providing versatility for those seeking to optimize their room's layout.
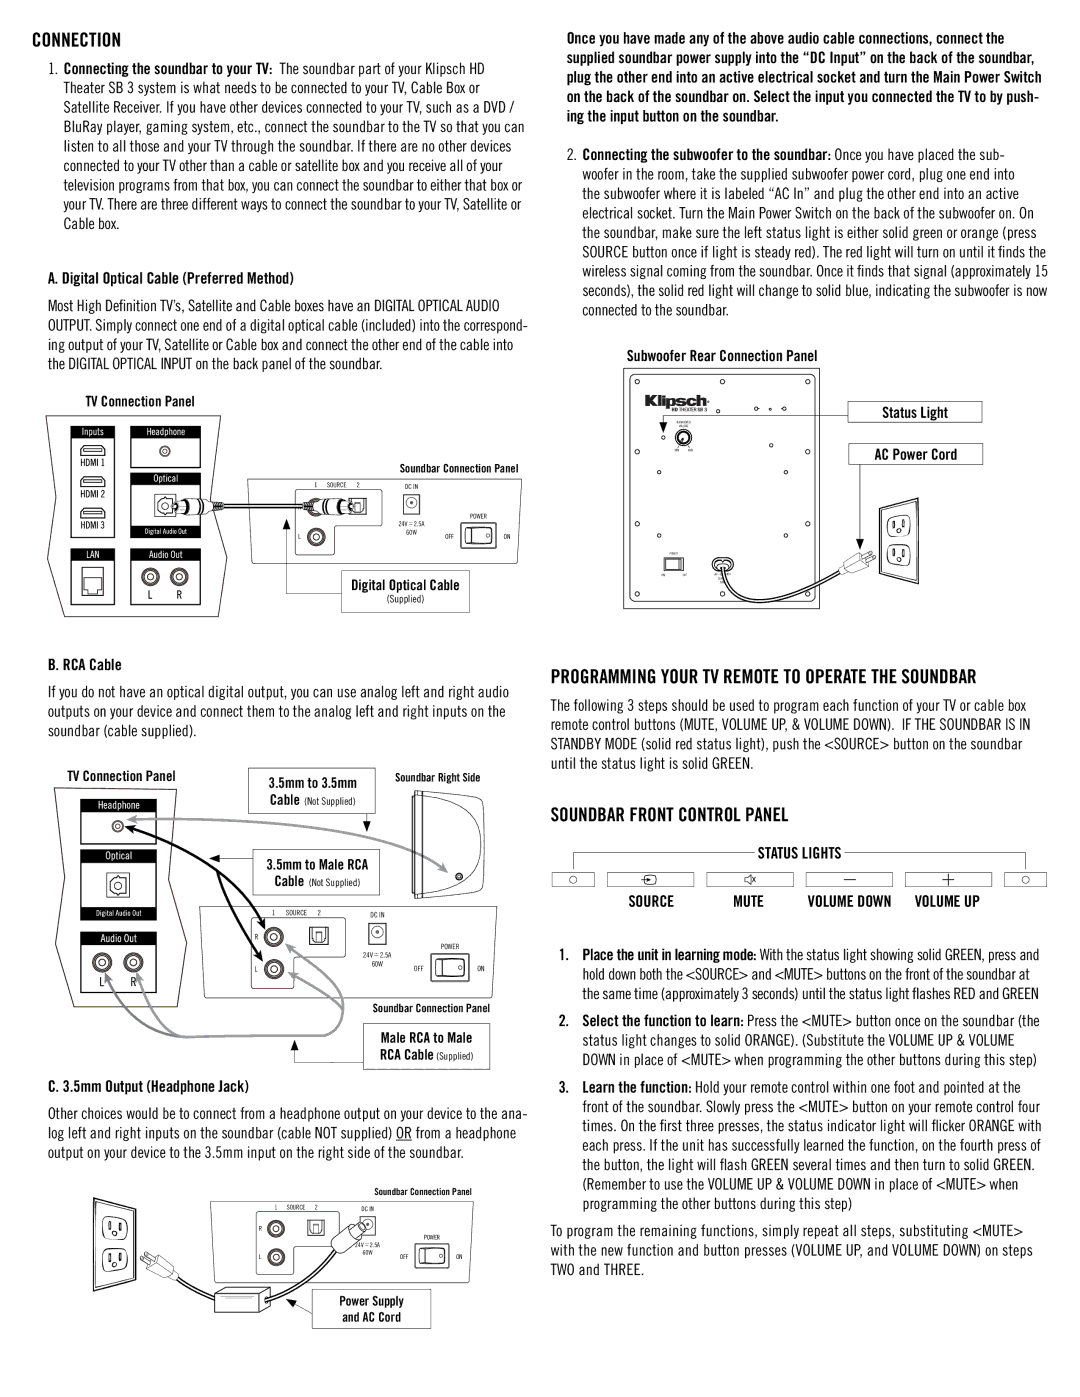
Connectivity is another strong suit of the Klipsch SB3. It features multiple input options, including HDMI ARC, optical, and AUX, allowing users to easily connect various devices such as TVs, Blu-ray players, and gaming consoles. Moreover, Bluetooth capabilities enable wireless streaming of music from smartphones and tablets, providing convenience for users who prefer to listen to their favorite tracks without the clutter of cables.
In terms of audio enhancement technologies, the SB3 includes advanced DSP (Digital Signal Processing) for tailored sound profiles, ensuring that the audio is optimized for different media types. The soundbar also features a built-in subwoofer, eliminating the need for a separate unit, which reduces hassle while still delivering deep bass for an enriching cinematic experience.
The Klipsch SB3 is not only designed for performance but also for simplicity. It comes with a user-friendly remote control, allowing easy navigation of settings, inputs, and volume levels. Additionally, the soundbar is compatible with voice control features through various smart home systems, making it a modern choice for today's tech-savvy consumers.
In summary, the Klipsch SB3 soundbar stands out in the crowded market of audio equipment due to its powerful sound output, elegant design, versatile connectivity options, and advanced audio technologies. Whether used for movies, music, or gaming, it promises to elevate the listening experience to new heights.